Upgrading the Blizzard 1240 to Blizzard 1260
In my Series of upgrading to 060 cpu. It is time for the Blizzard 1240.
I got this to have in my “Demo-party” Amiga.
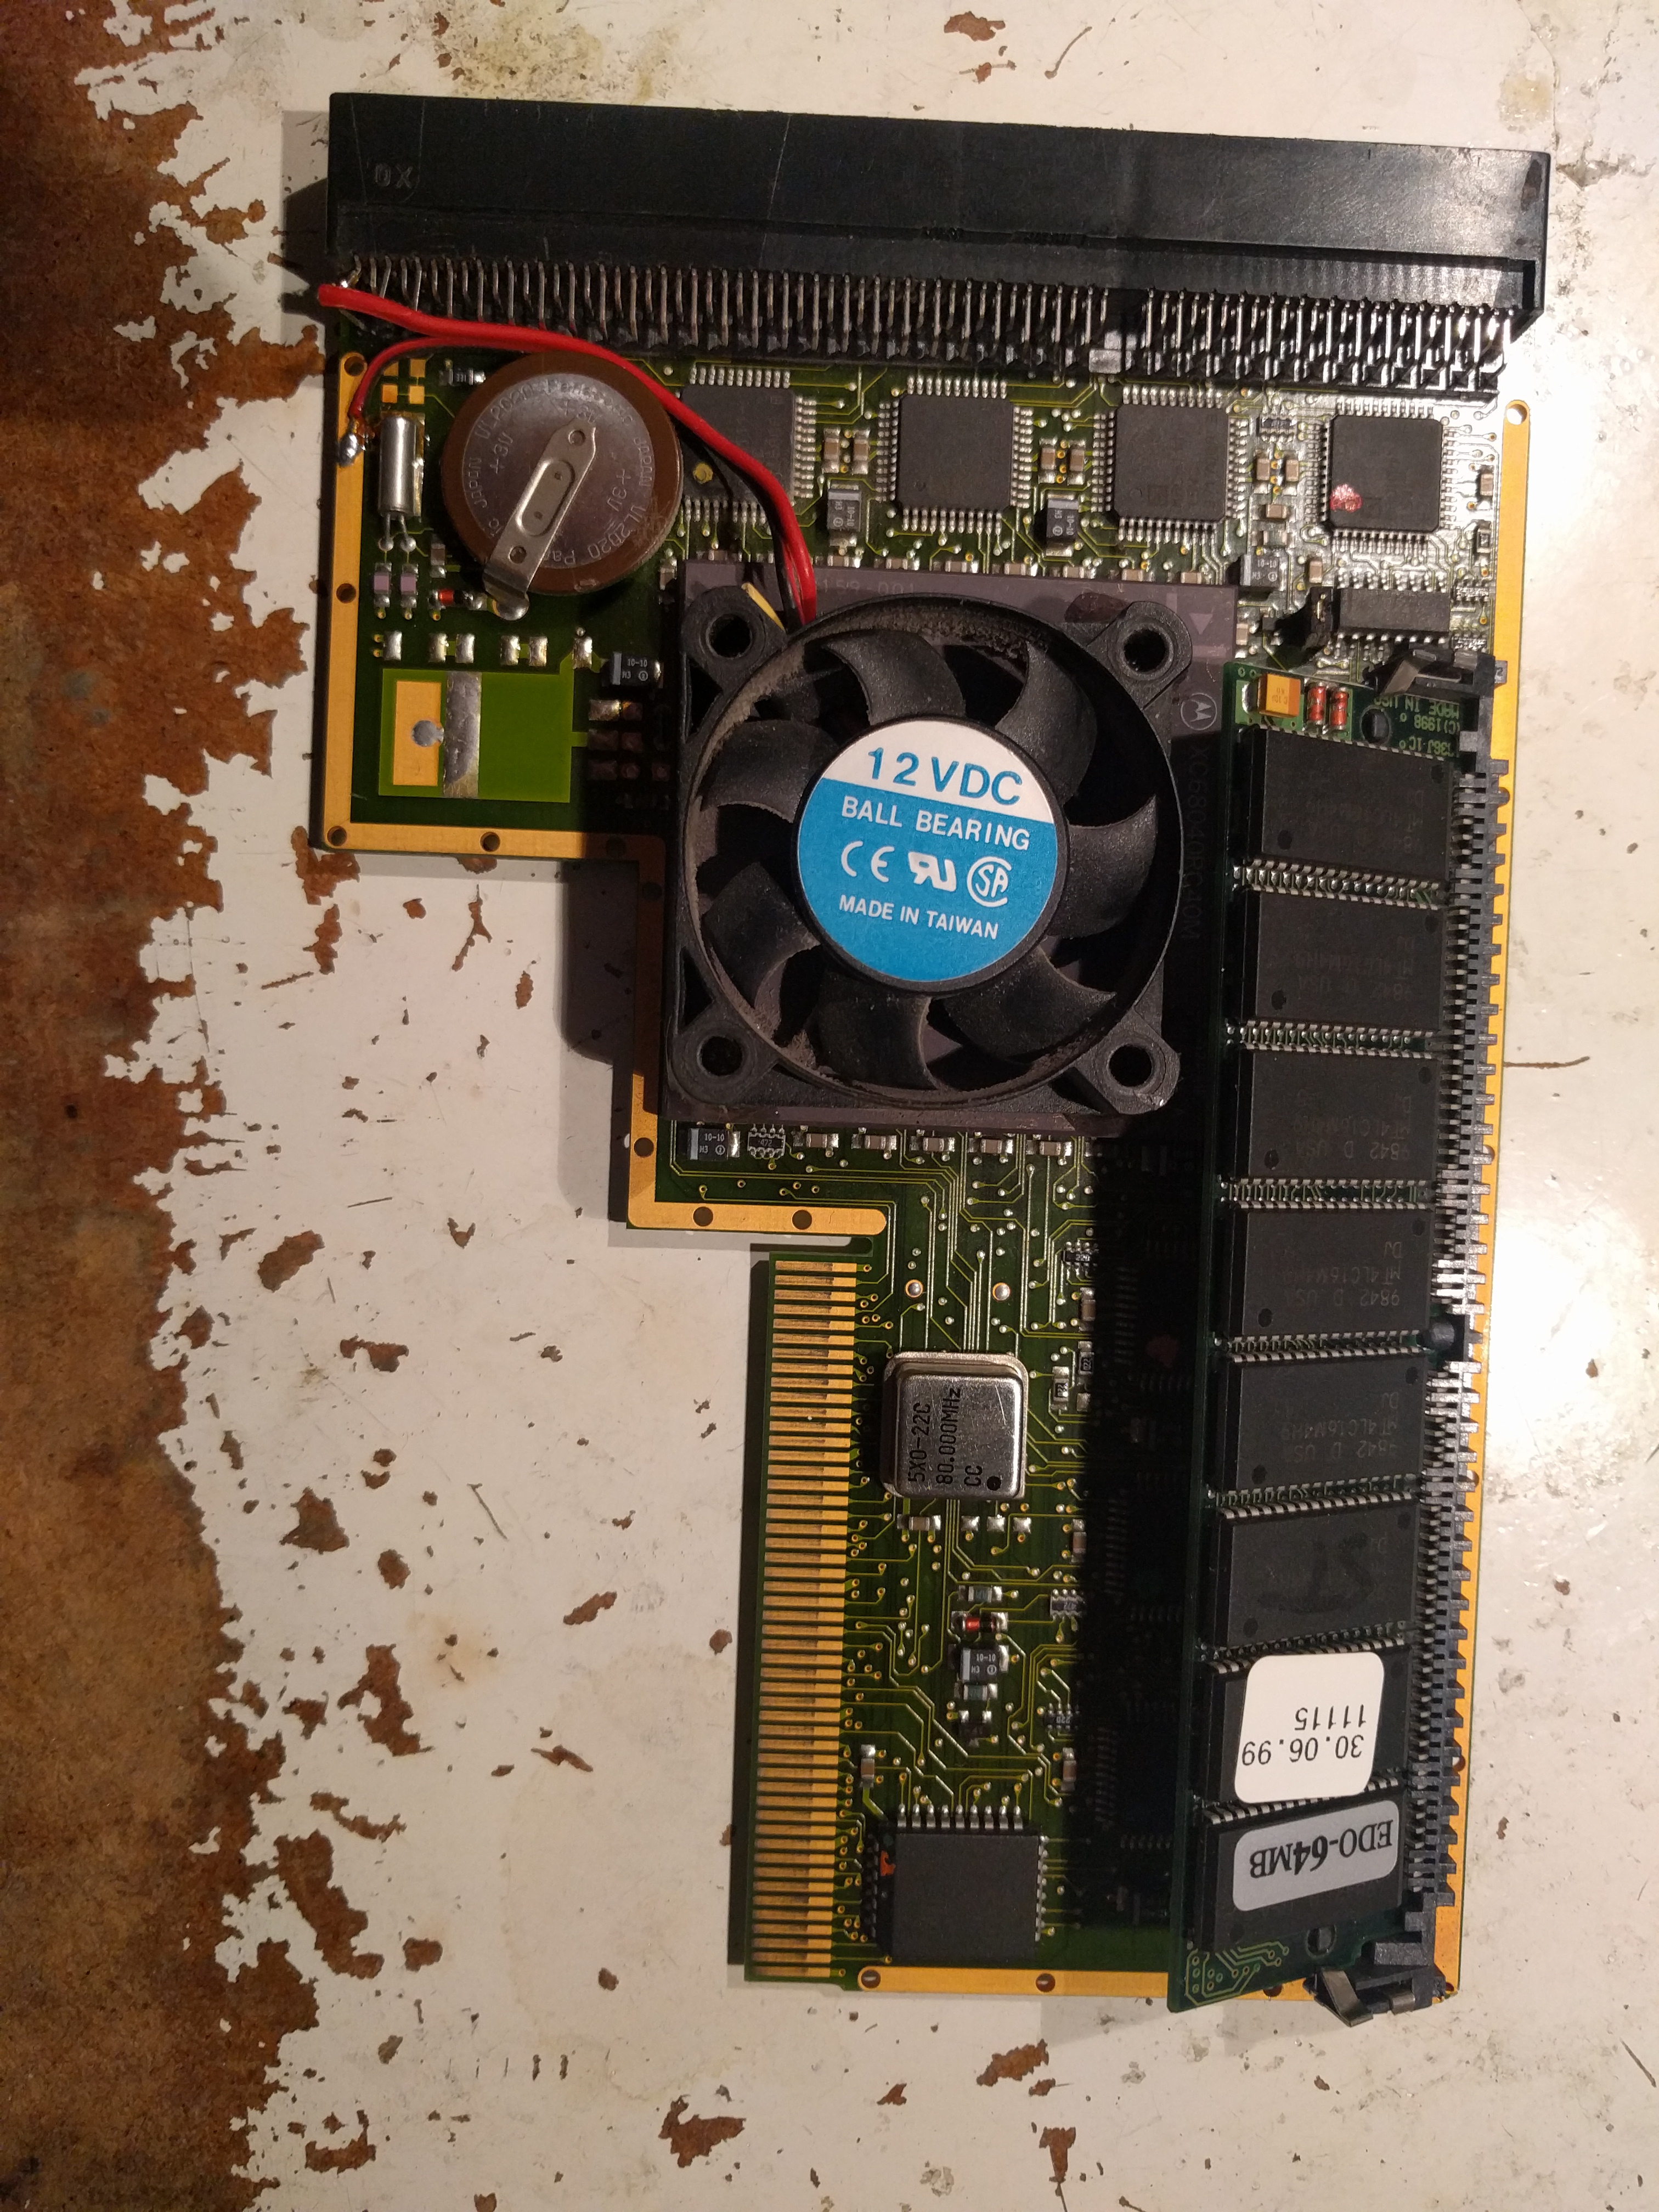
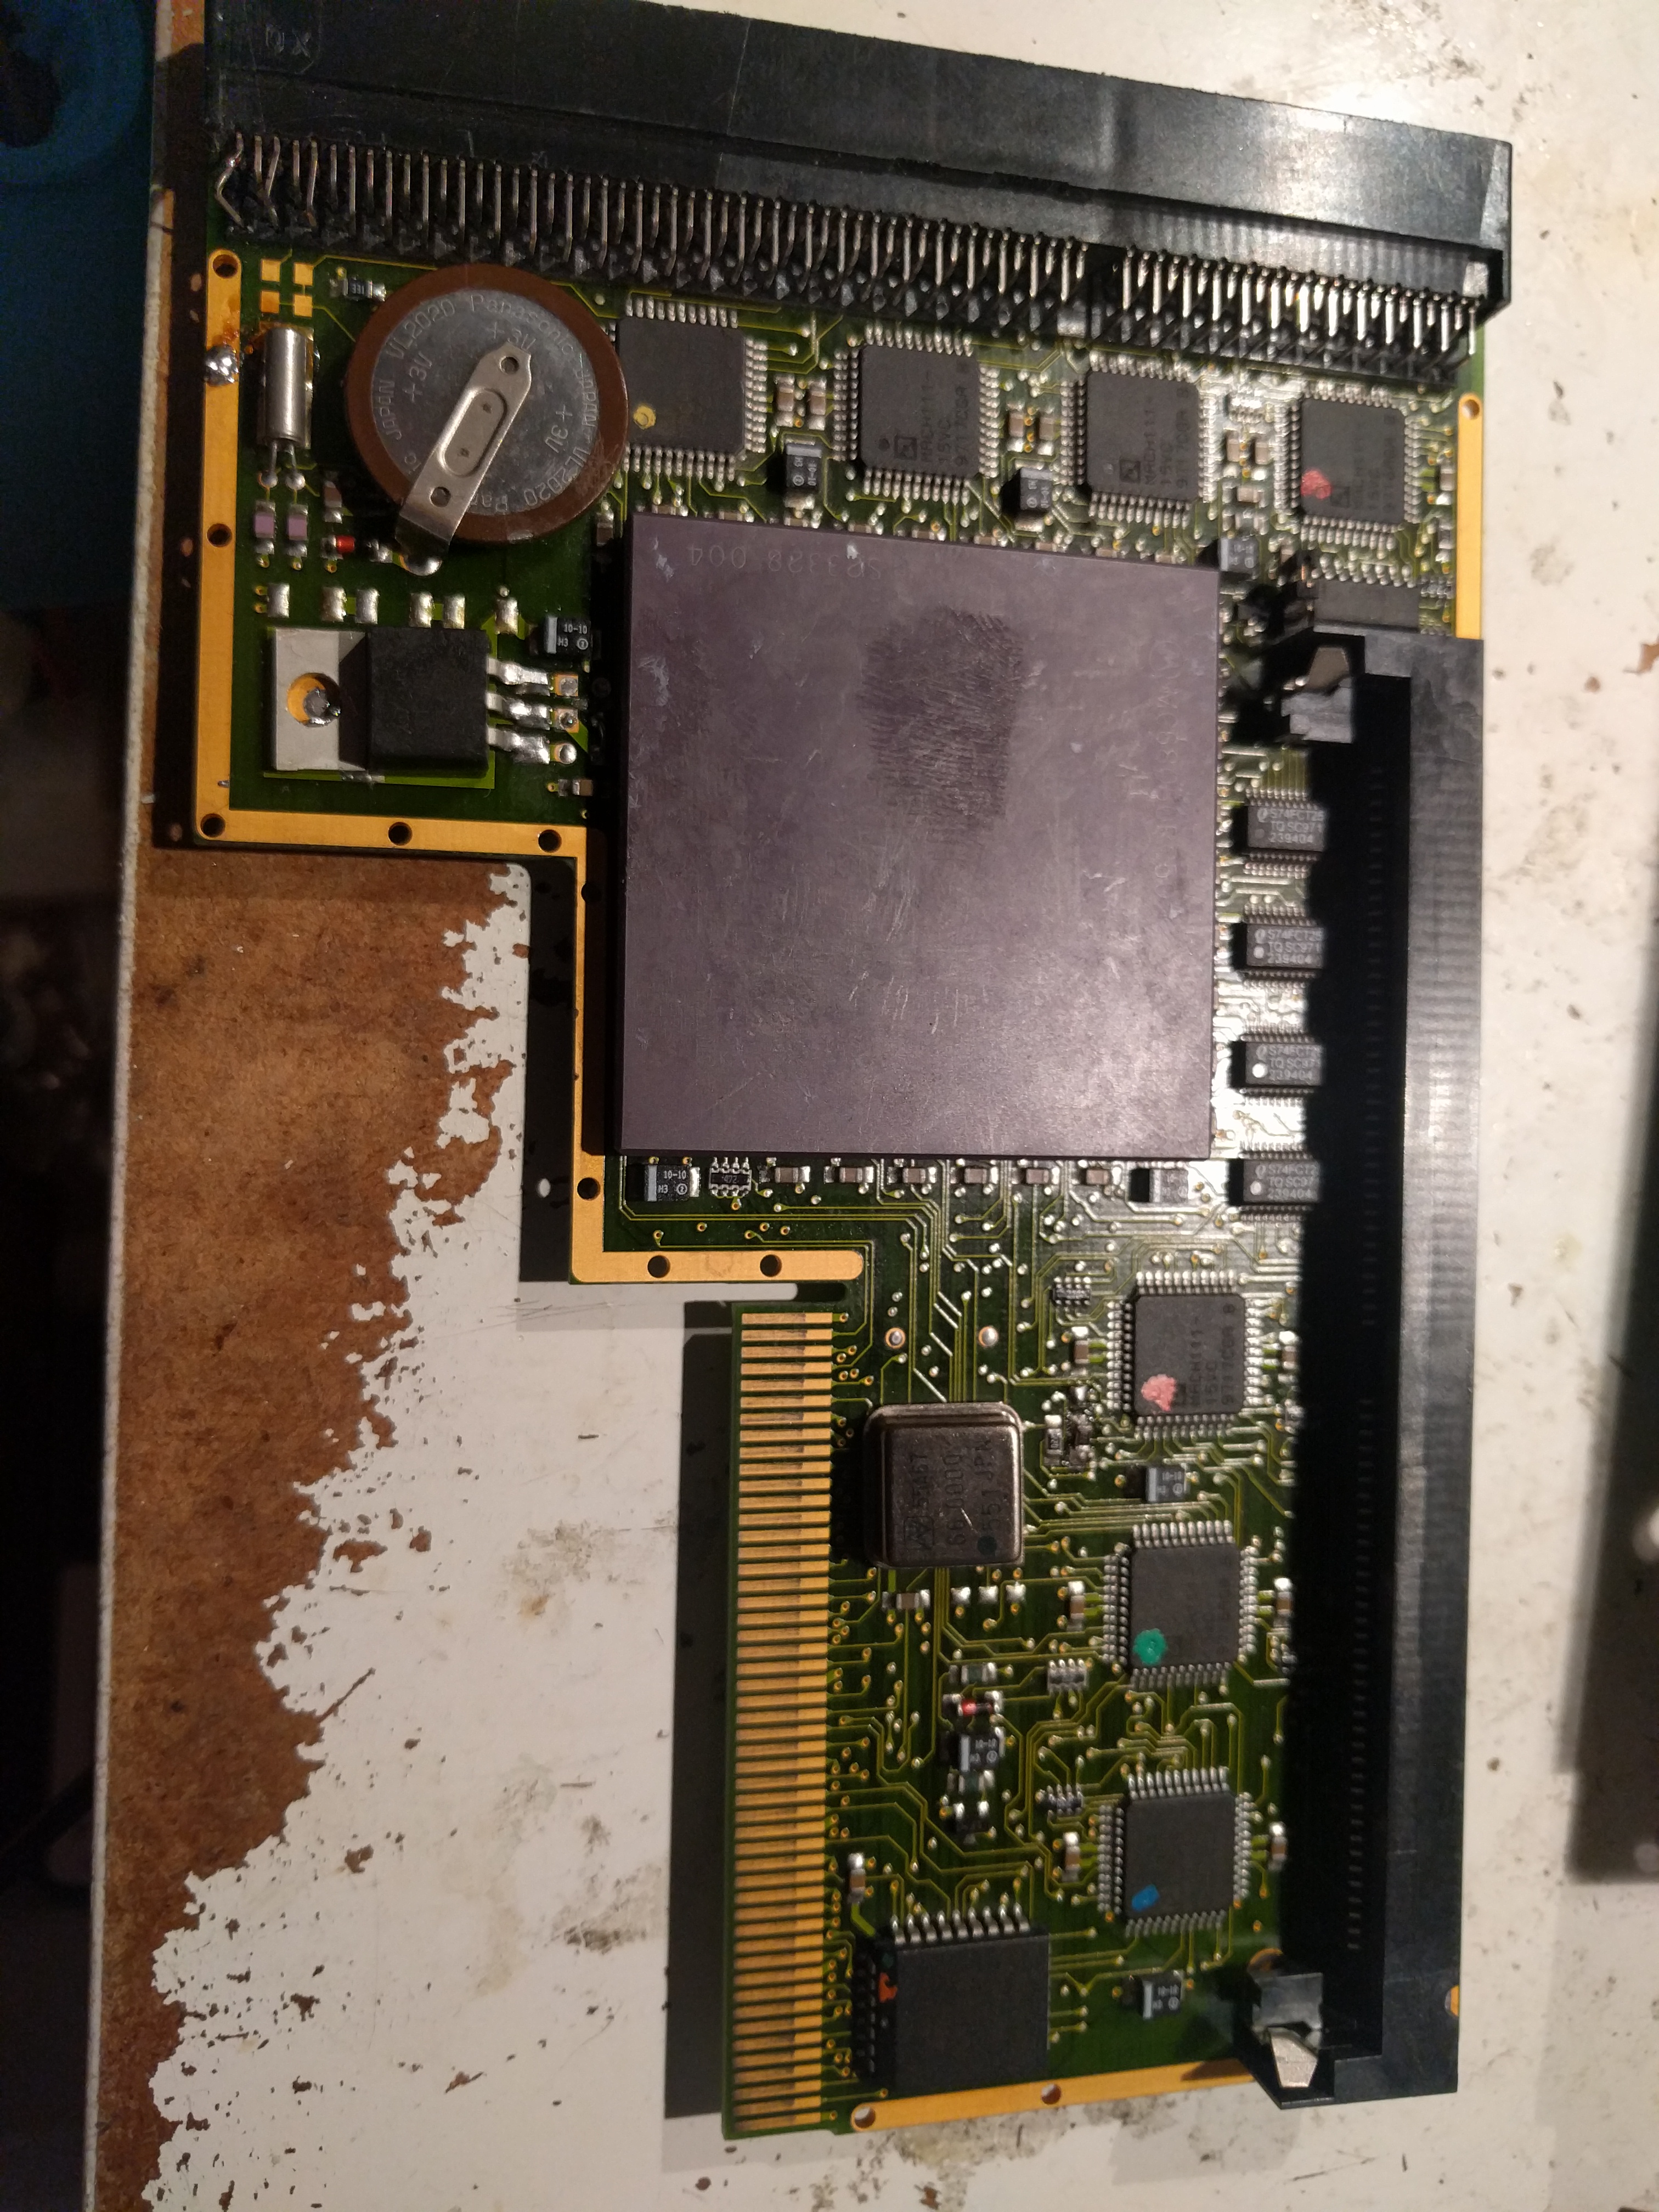
One Blizzard 1240. .(YES it has the 1260 print on the back. all 040 have that)
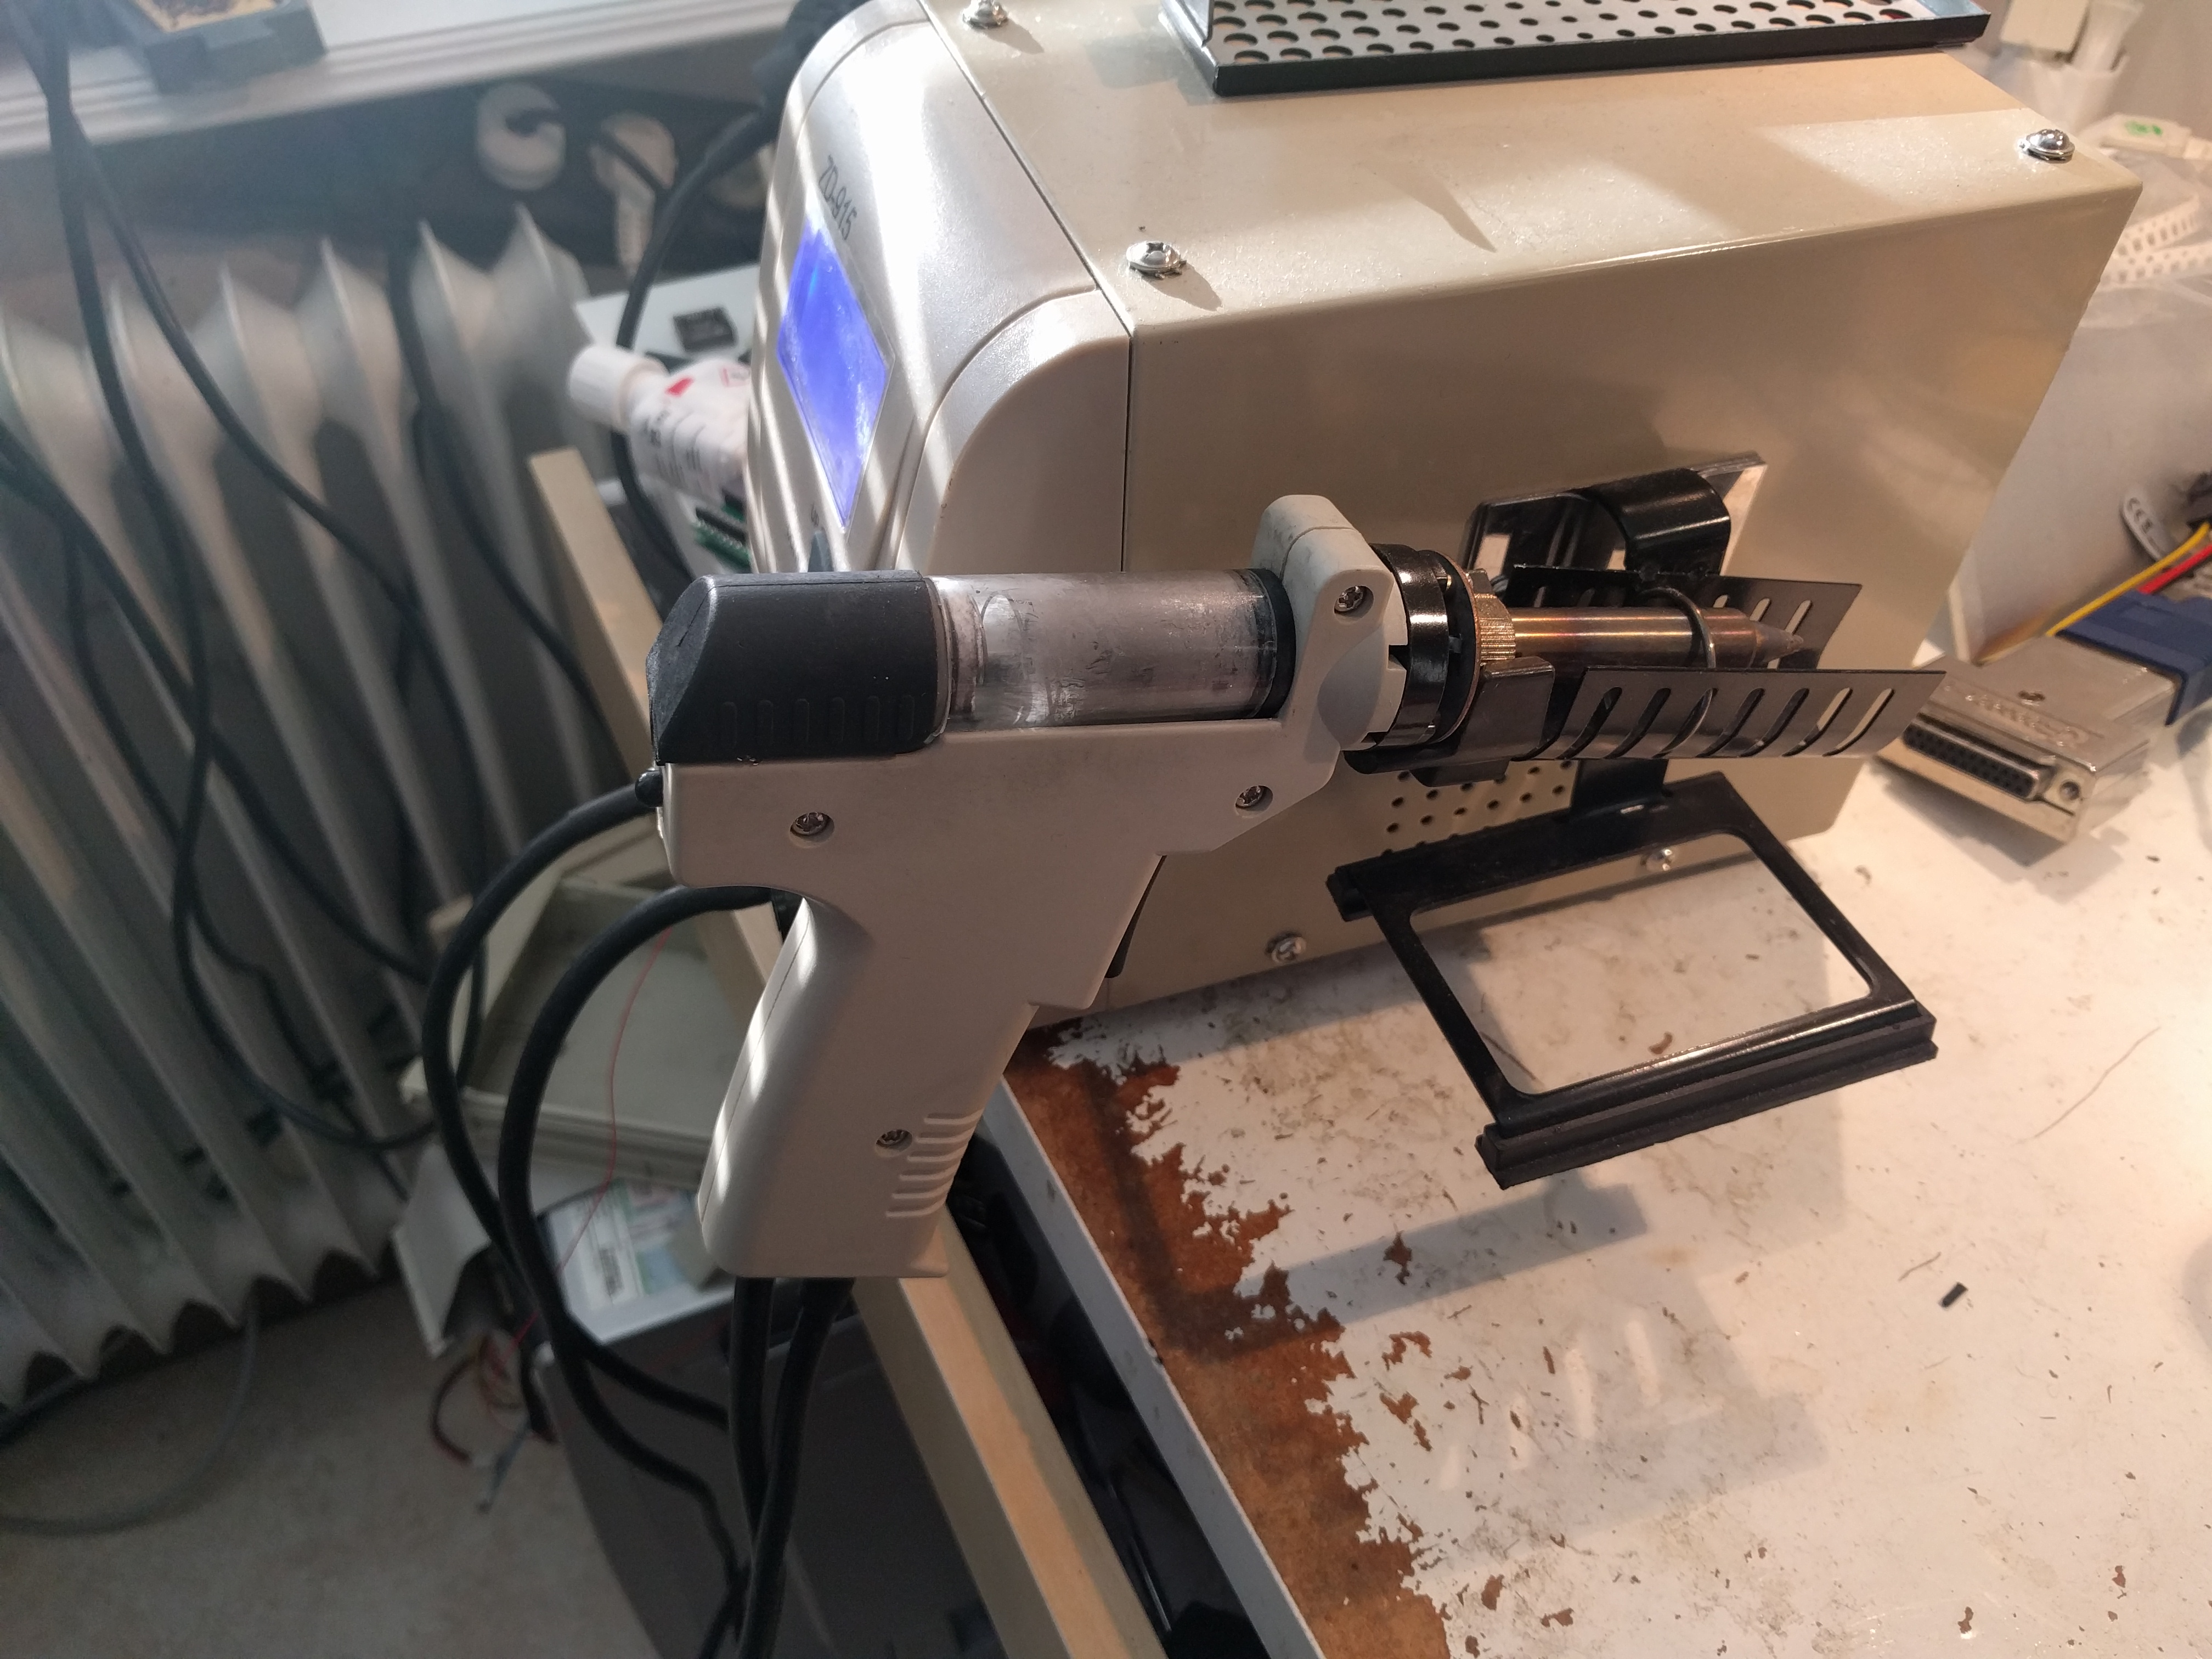
So first, we need to remove the CPU. and this is the hard part. you need to have a Desolderingstation, like my ZD-915
So remove the CPU gently.


ALL pins needs to be open, the 040 uses less pins then the 060.
Now solder in the 060. there was 4 small distances on the 040. I move them to the 060 aswell so we have the same spacing between board and cpu. I would recomend you to try to get hold of a Rev6 060 (marked 71E41J) and no LC or EC model, try to use the RC one with full FPU etc. (don’t know if EC or LC even work on the Blizzard)
Now with the 060 in place, we must change voltage to the cpu. as the 040 uses 5V and the 060 uses 3.3V.
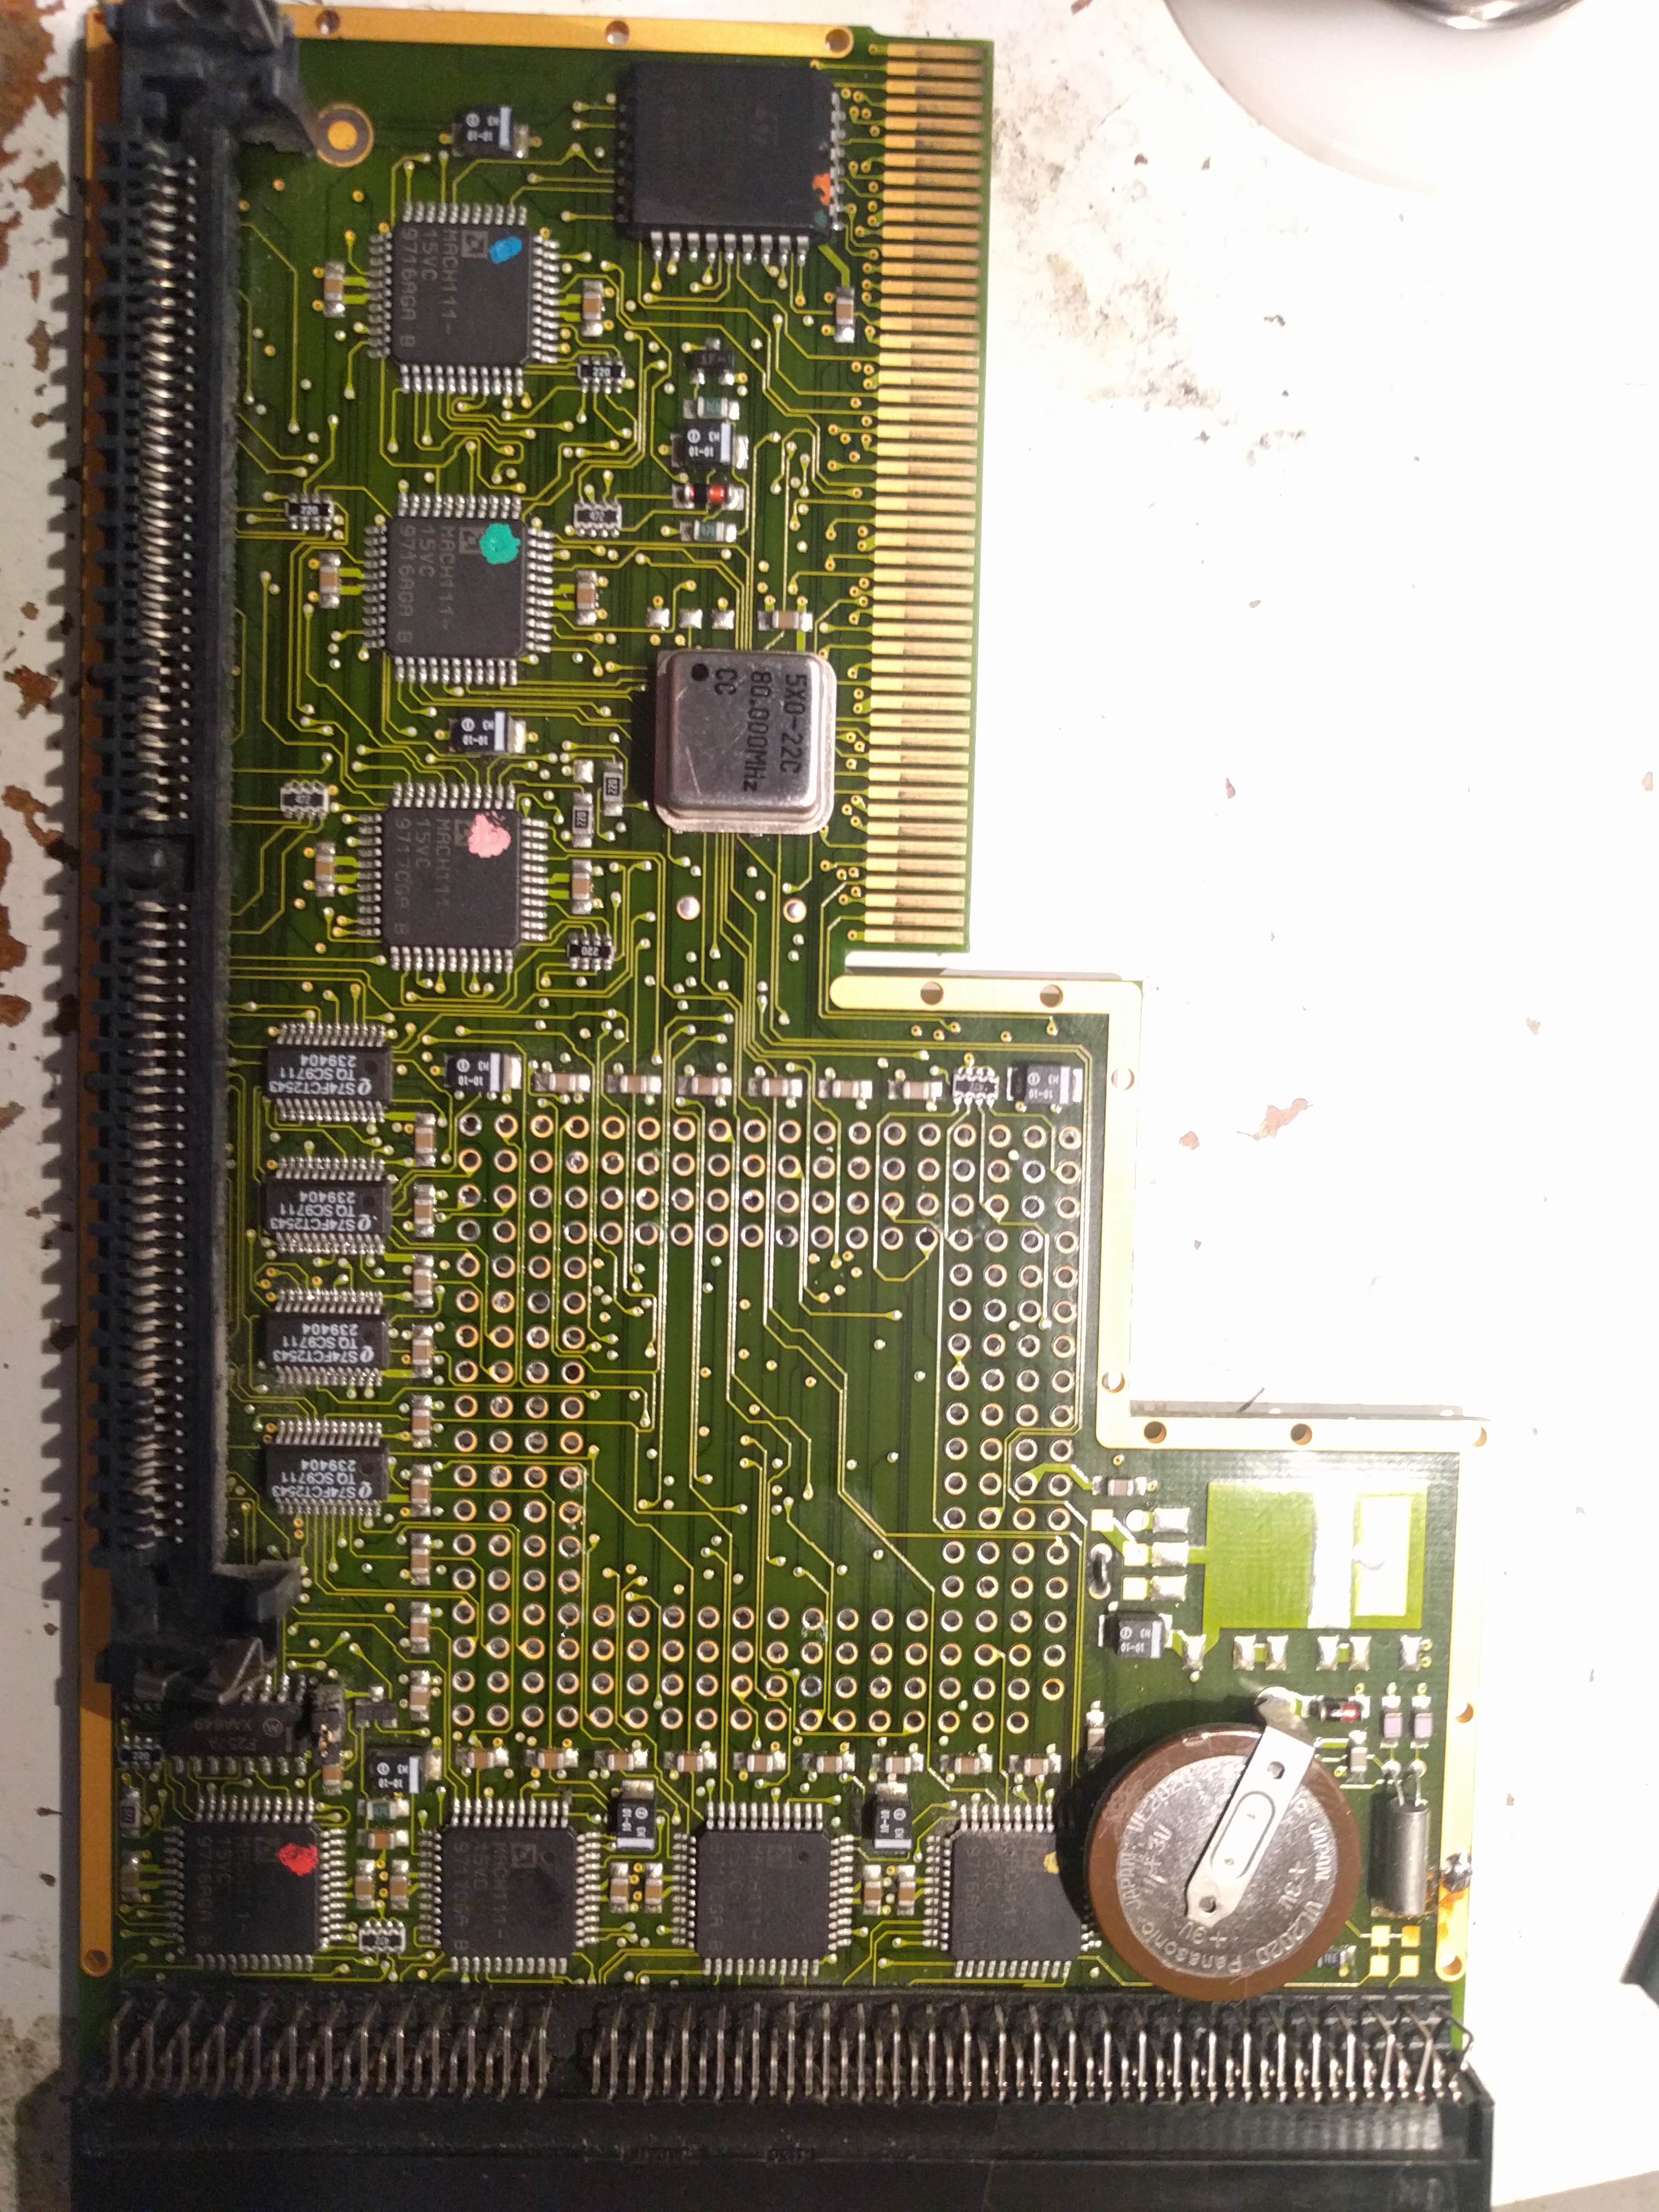
Look at the part close to the battery:

(bad picture.. my phone as bad at closeups)
At the small circle you see a small wire soldered between pin 1 and 2. This must be moved to 2-3 instead:
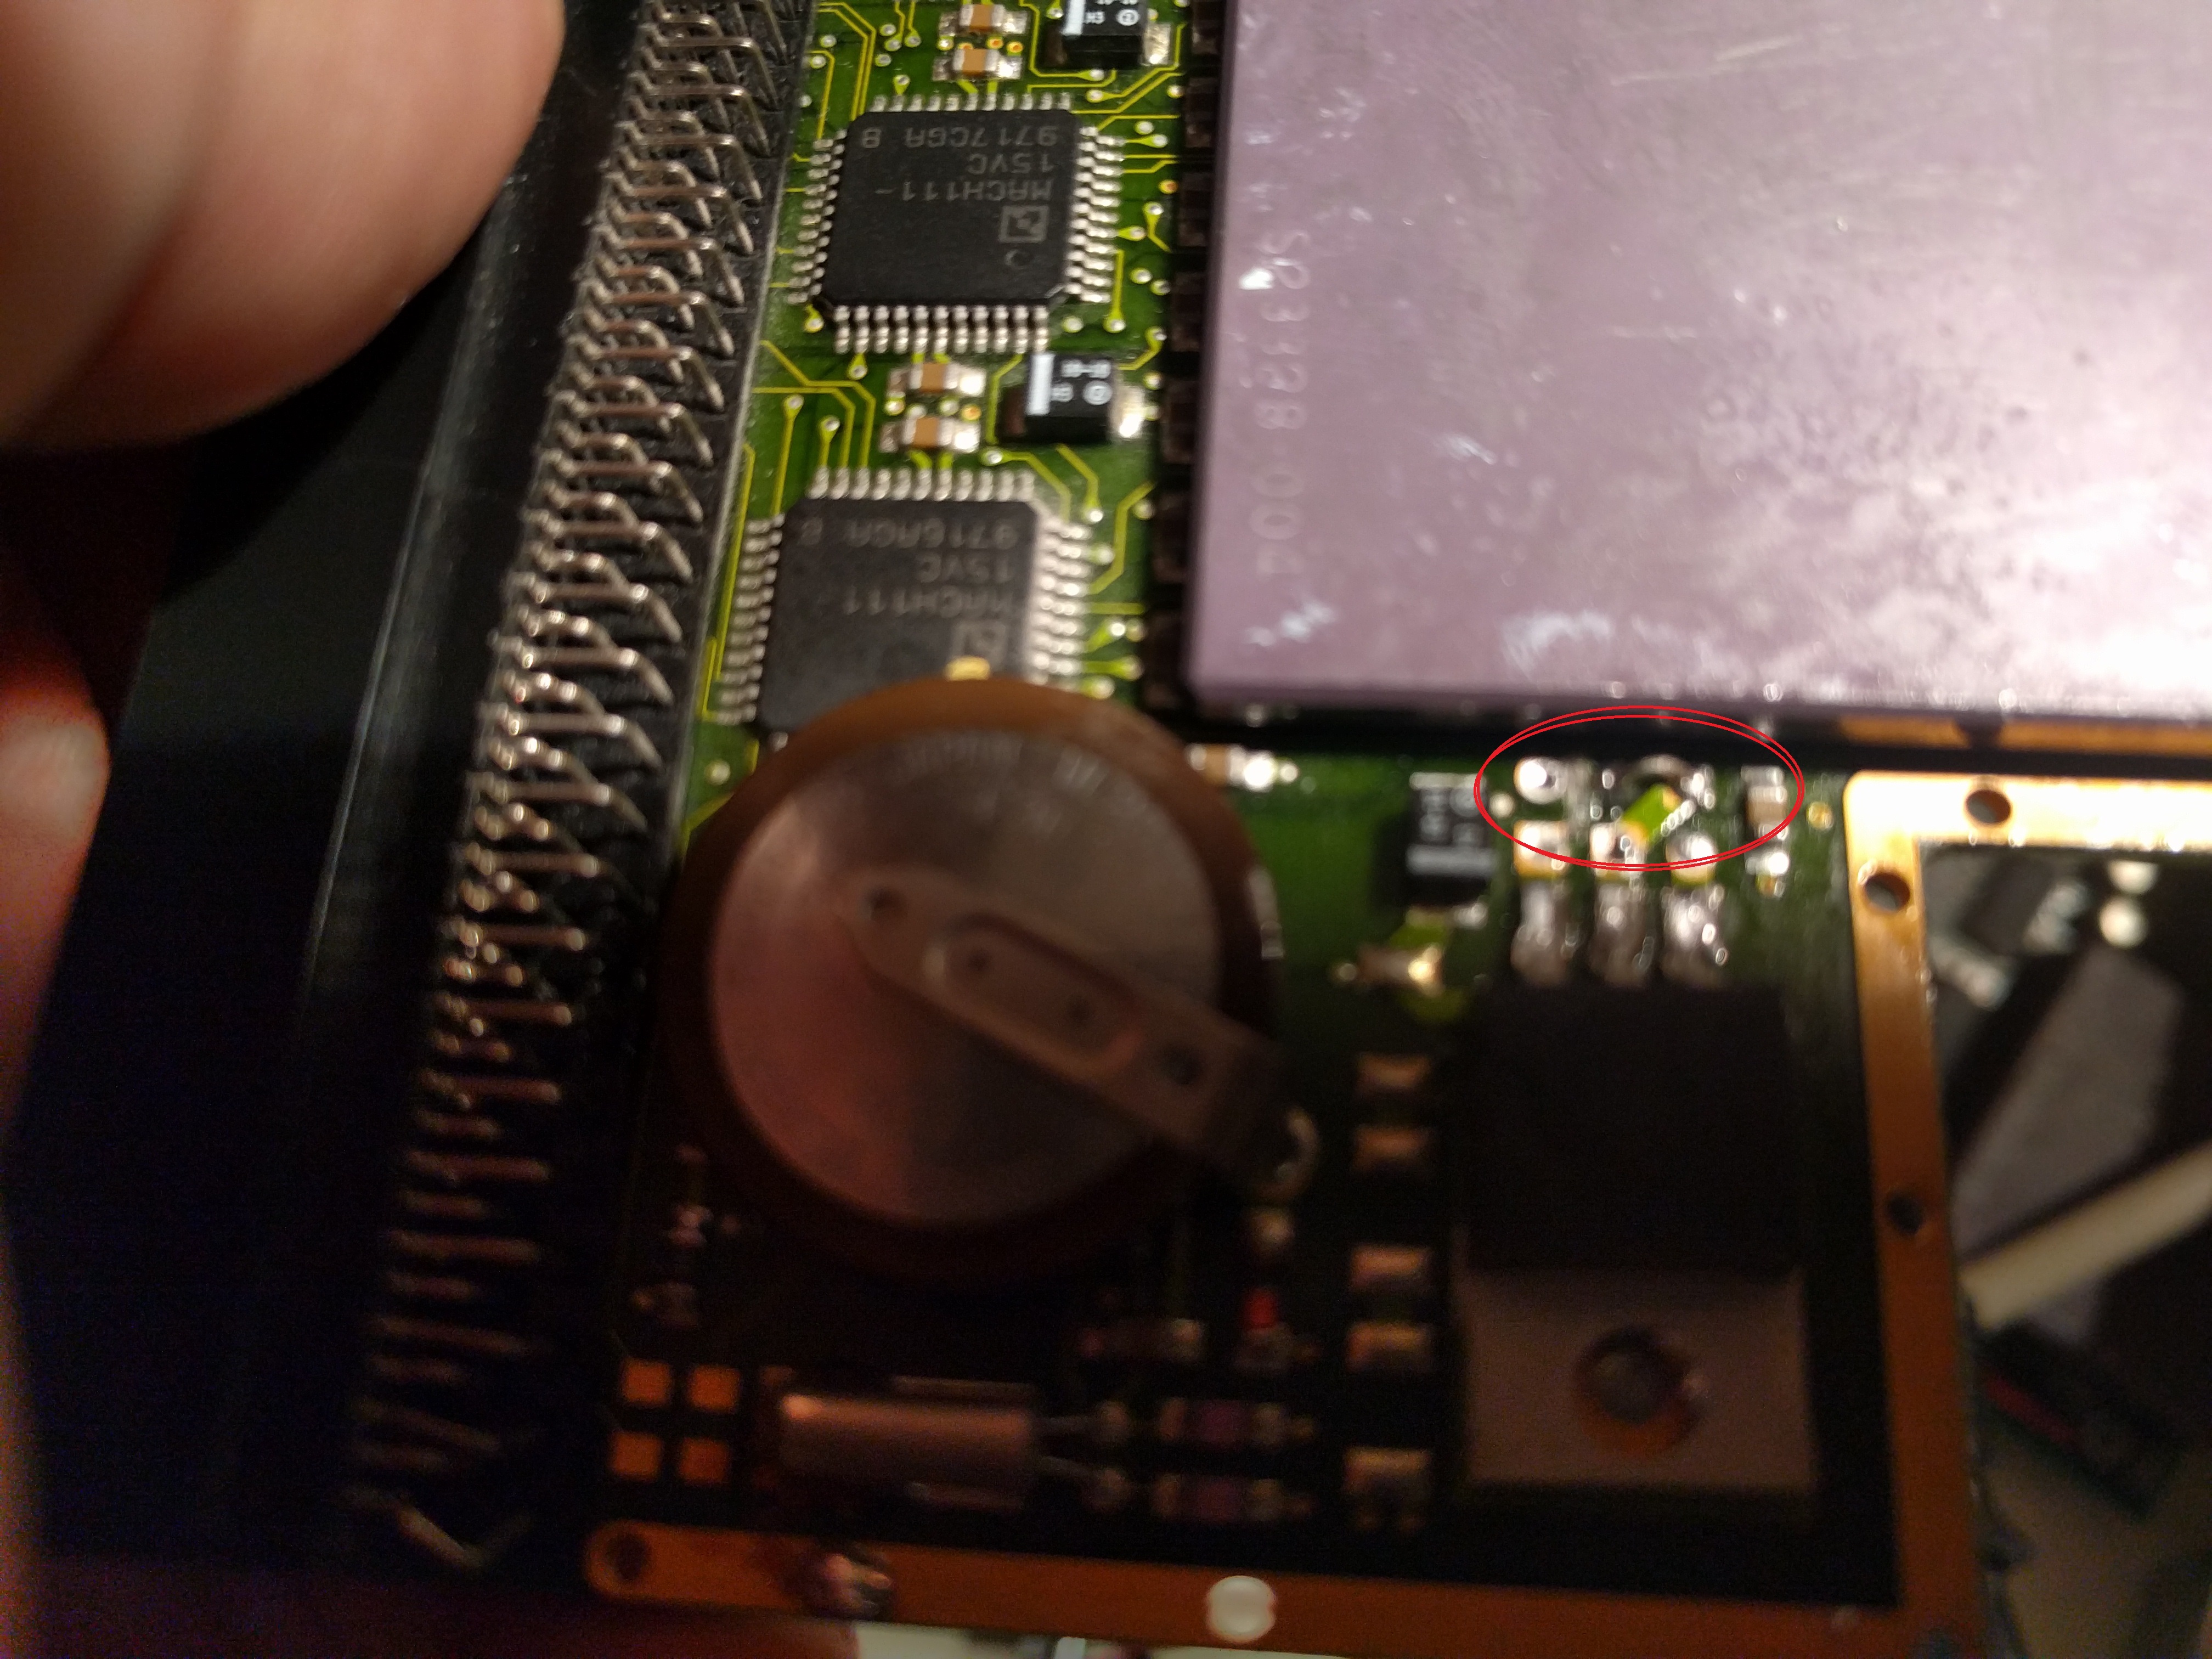
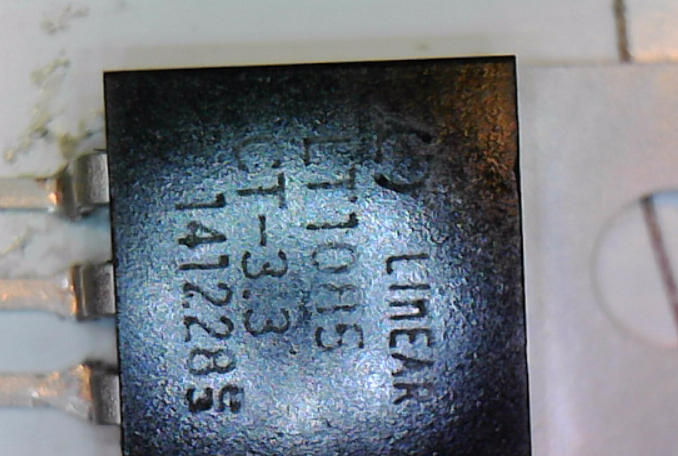
And you also need to solder in a Voltageregulator (LT1085CM-3.3 voltage regulator 3.3Volts)
and solder it to the 3 pads close the the wire-jumper. You also need to change the oscillator to one that fits your needs, above 60MHz and you might have issues with SCSI-Addon. 72-75 is kind of maximum, I put in a 66MHz one.
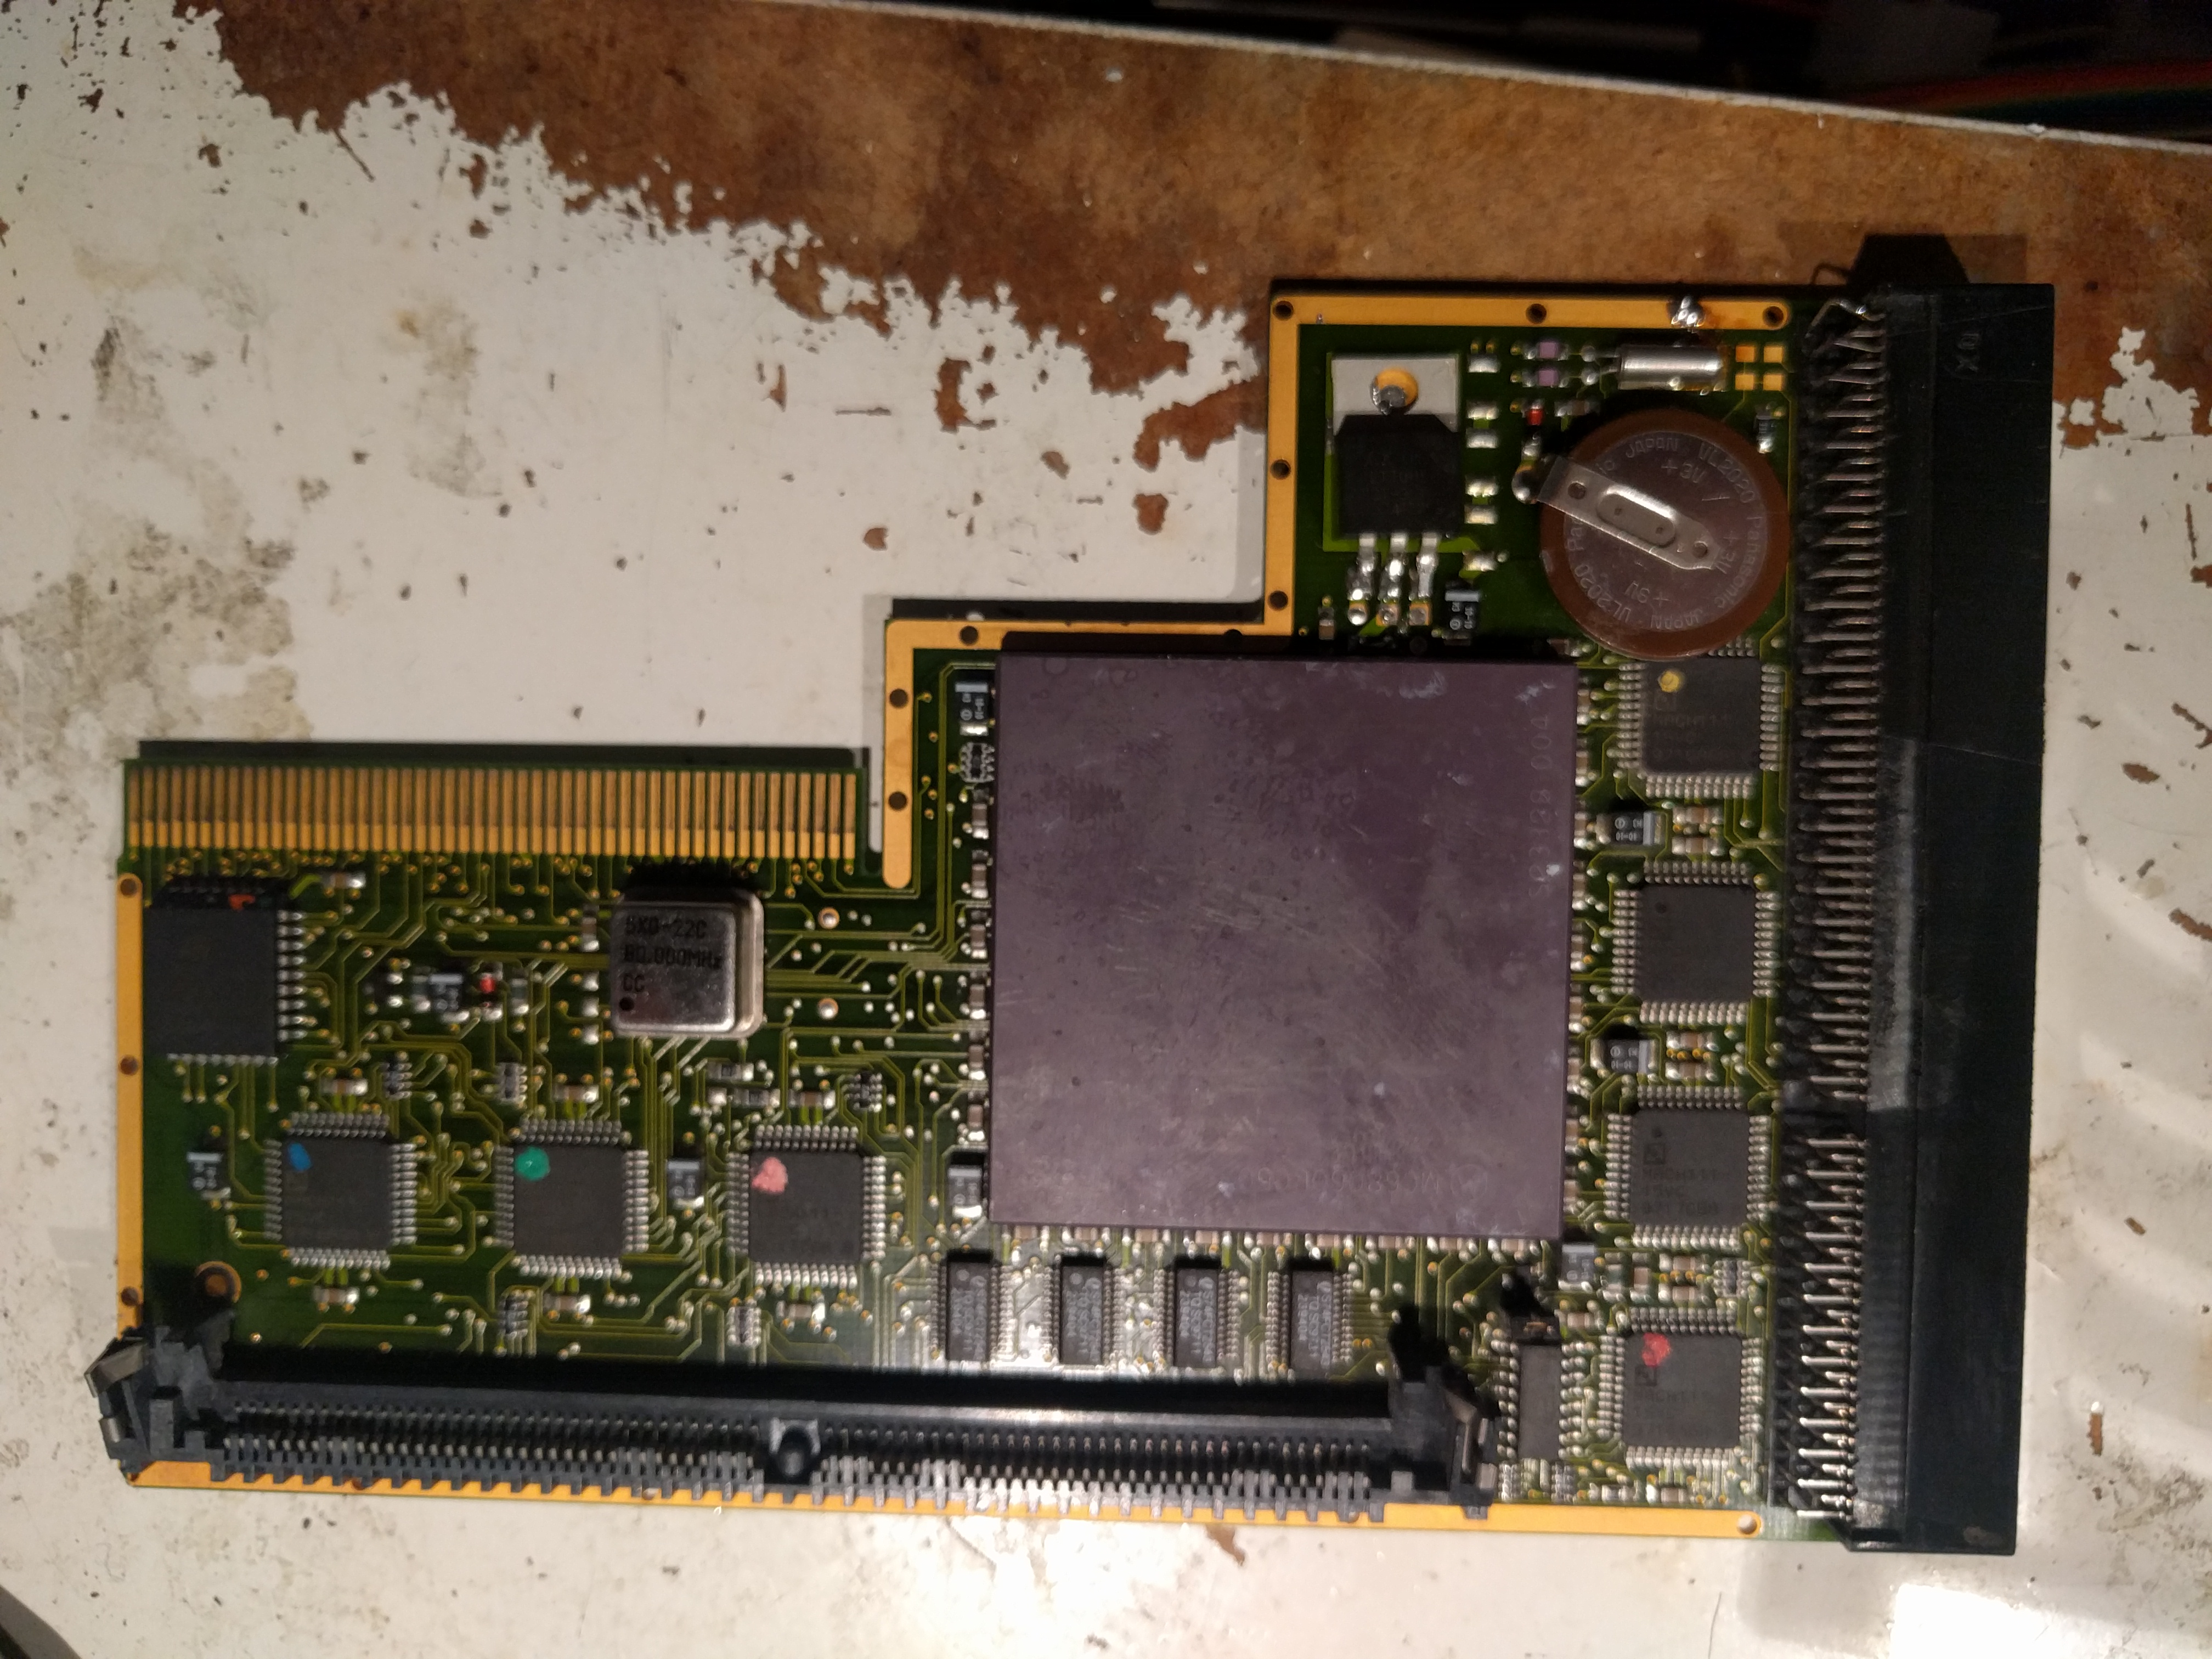
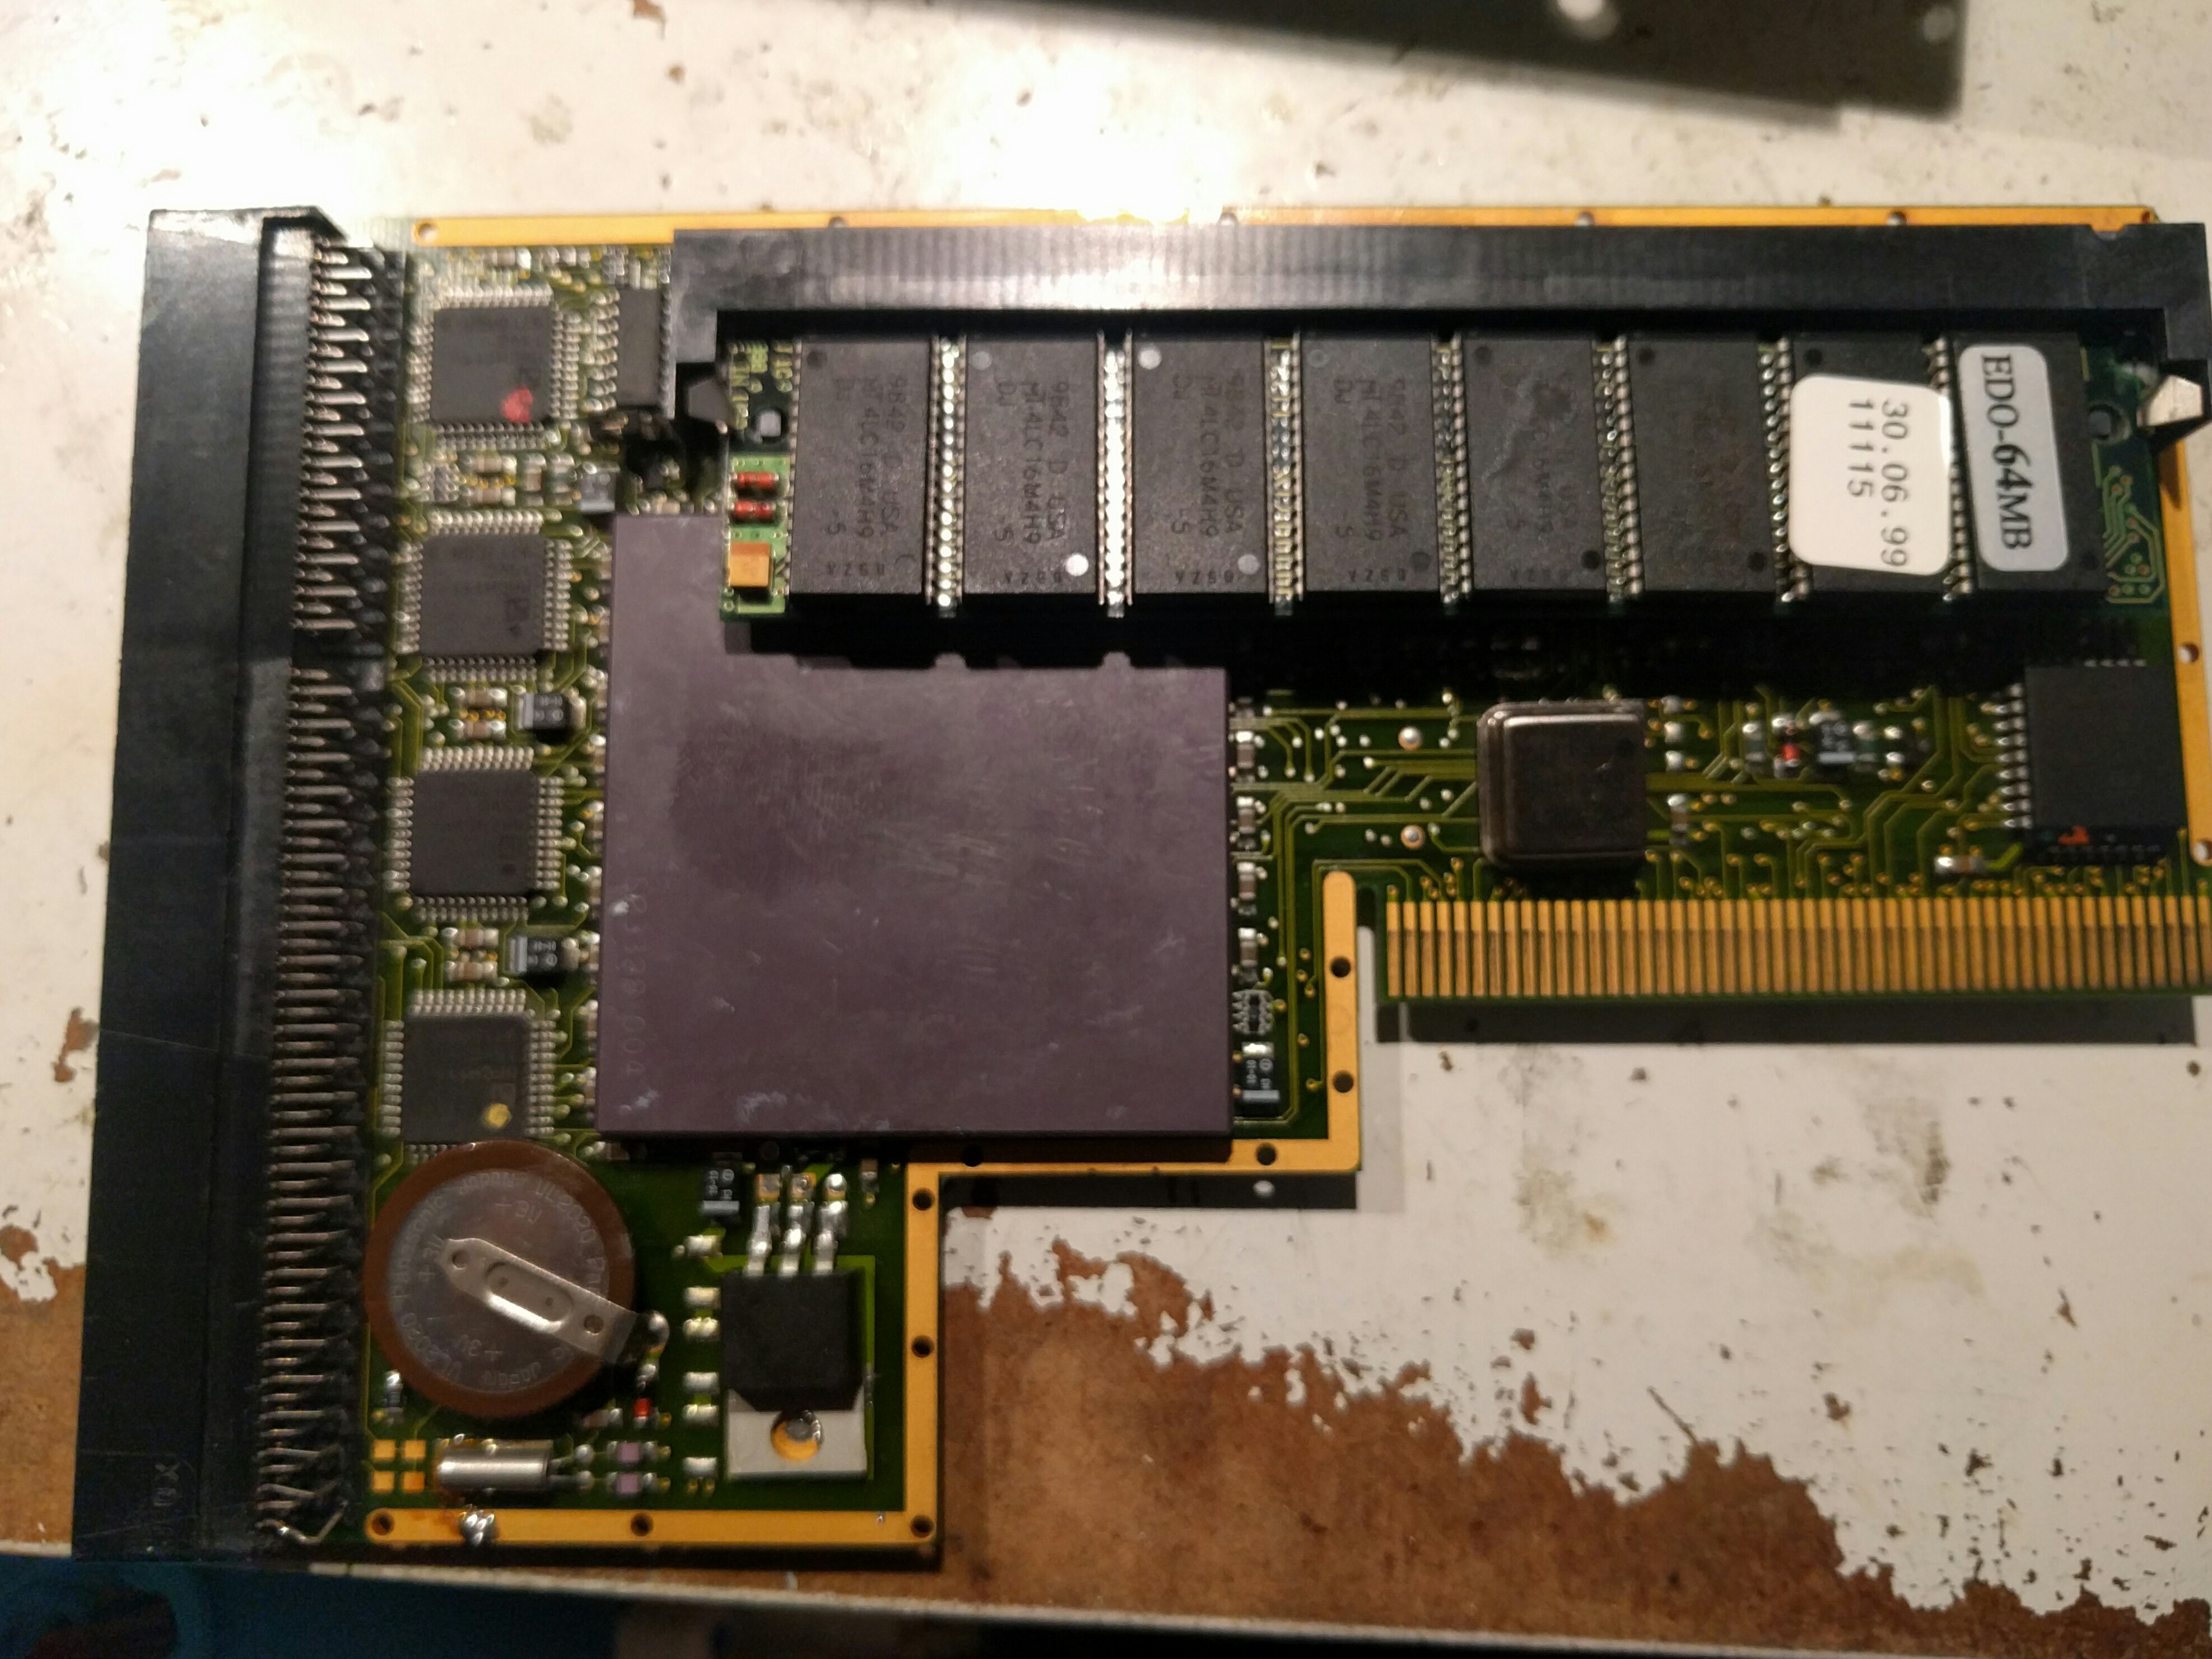
Now you have an Blizzard A1260:
But that SIMM socket is annoying as you cannot close the trapdoor.
So we remove it:
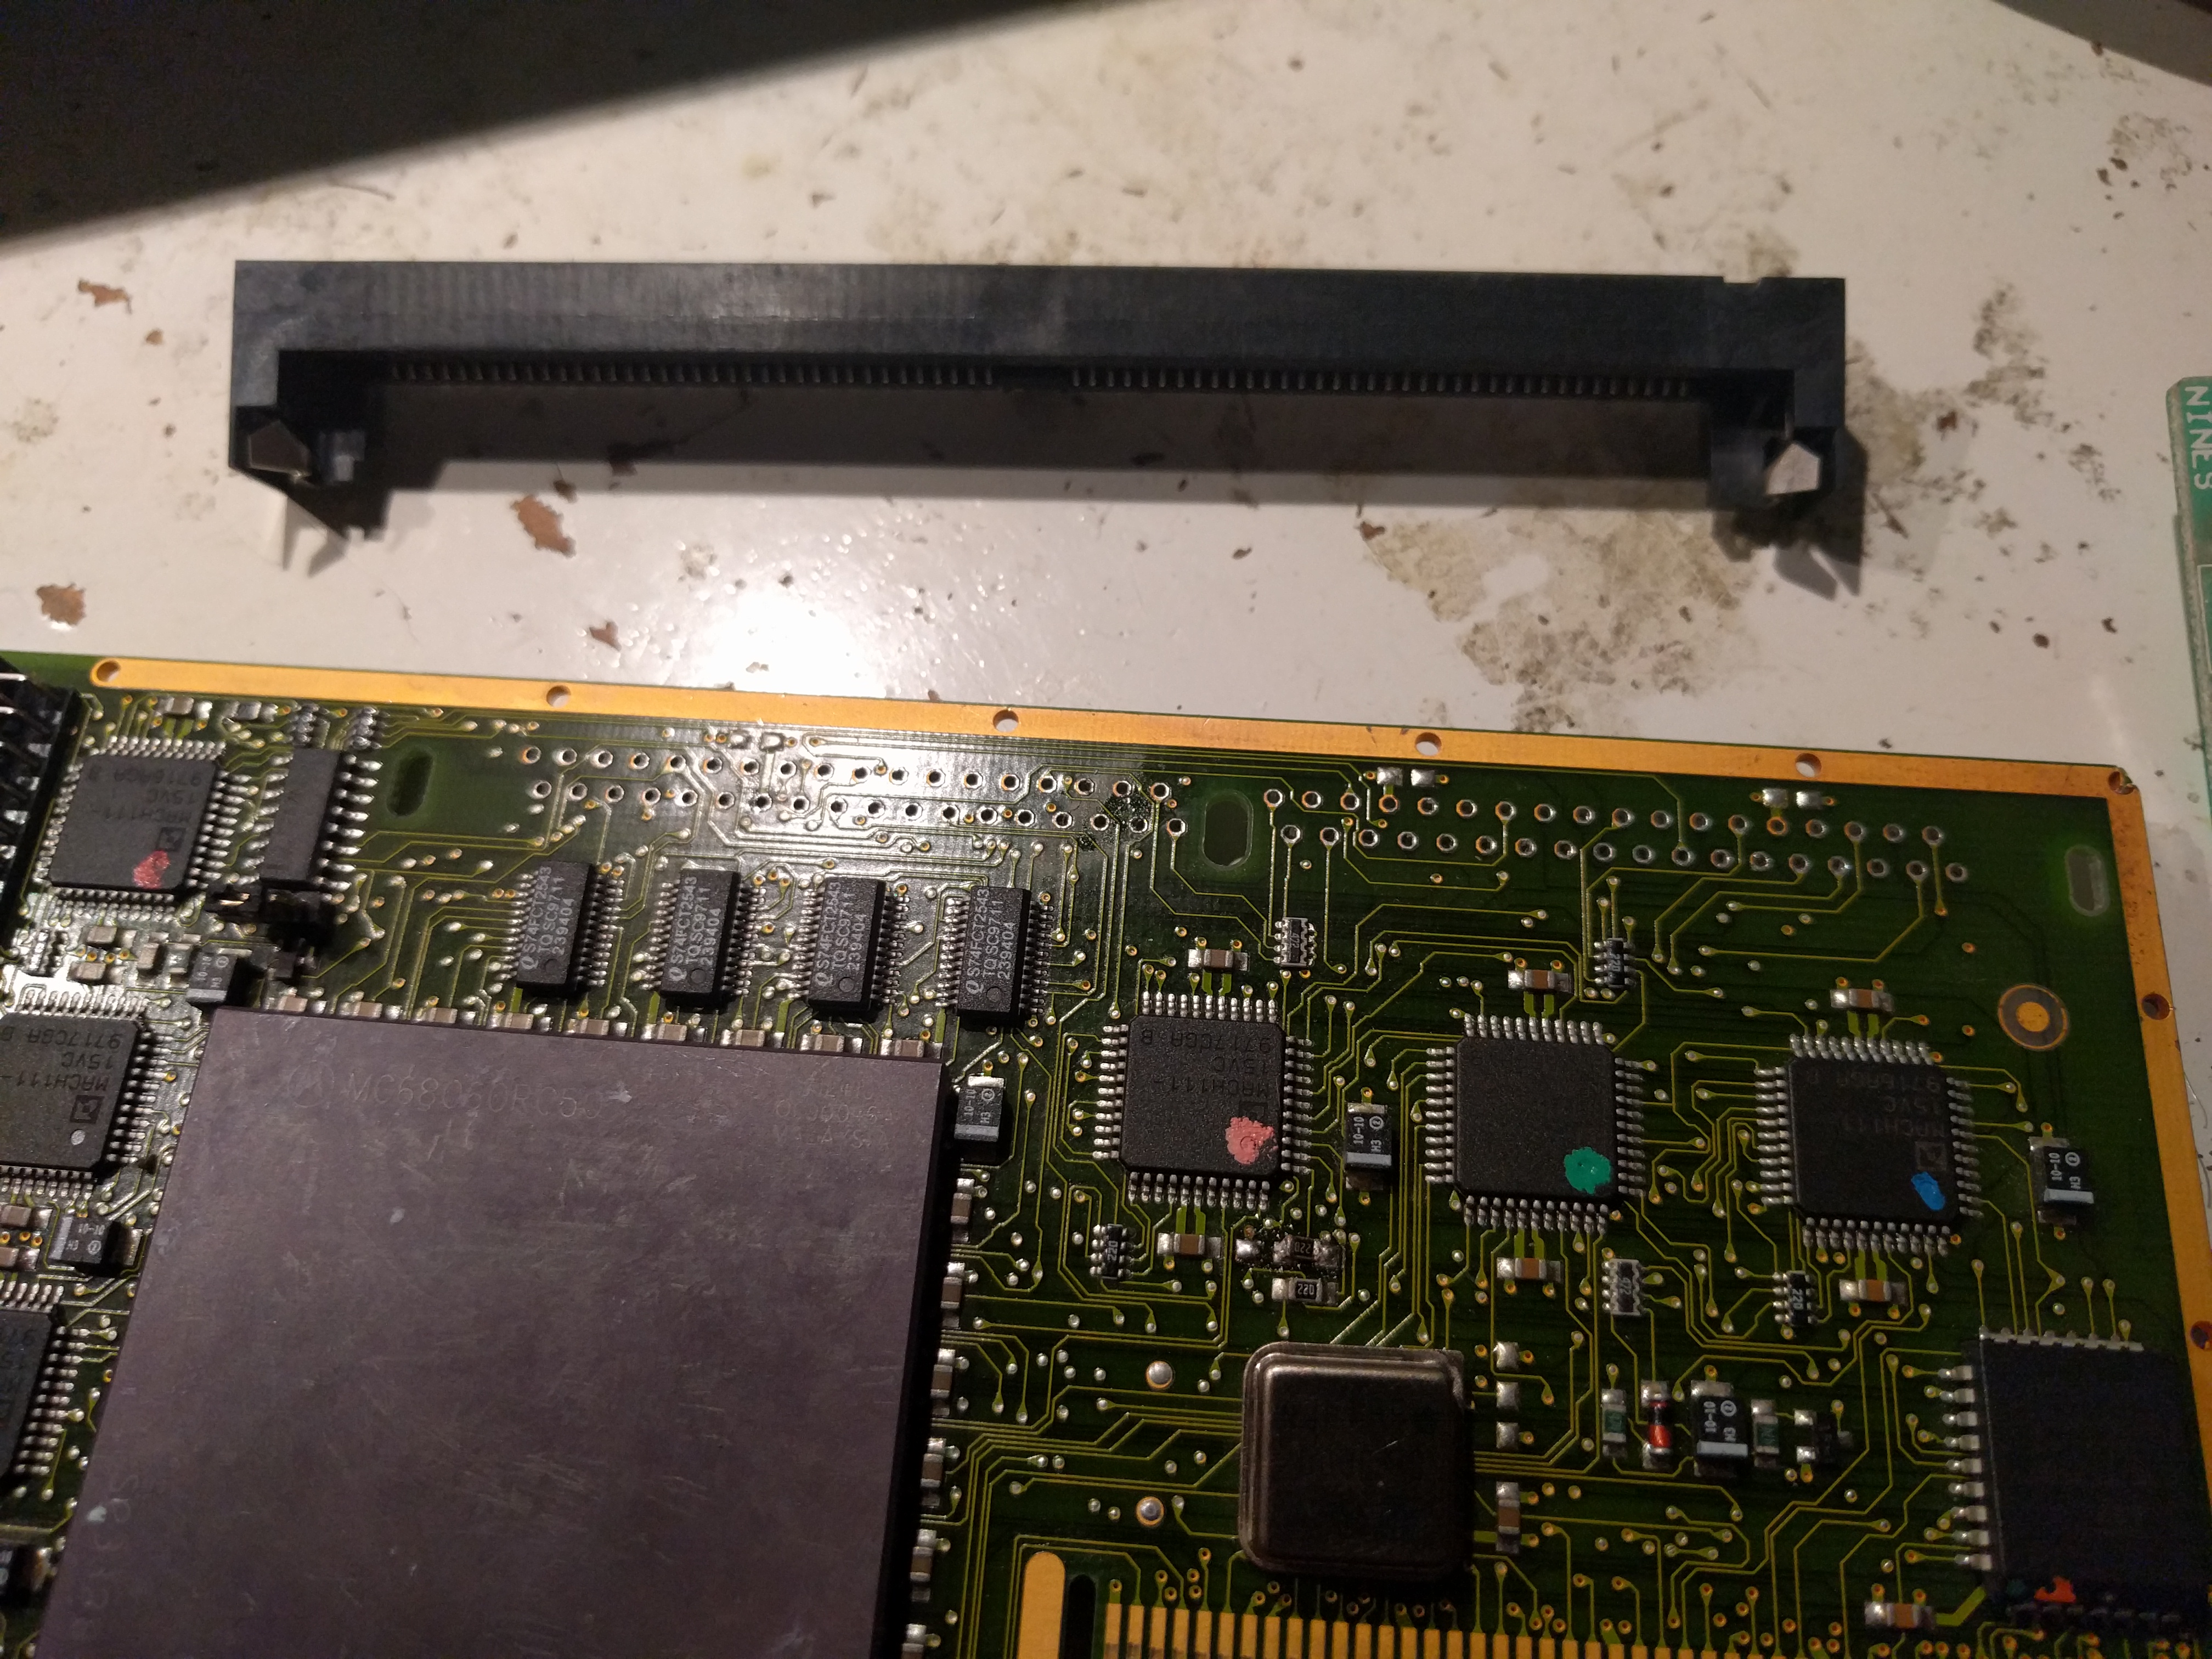
And solder in a socket like the 1260 instead. I actually let the SIMM be in the socket while doing it, knowing it will fit.
So just stick in the SIMM and we are ready to go:
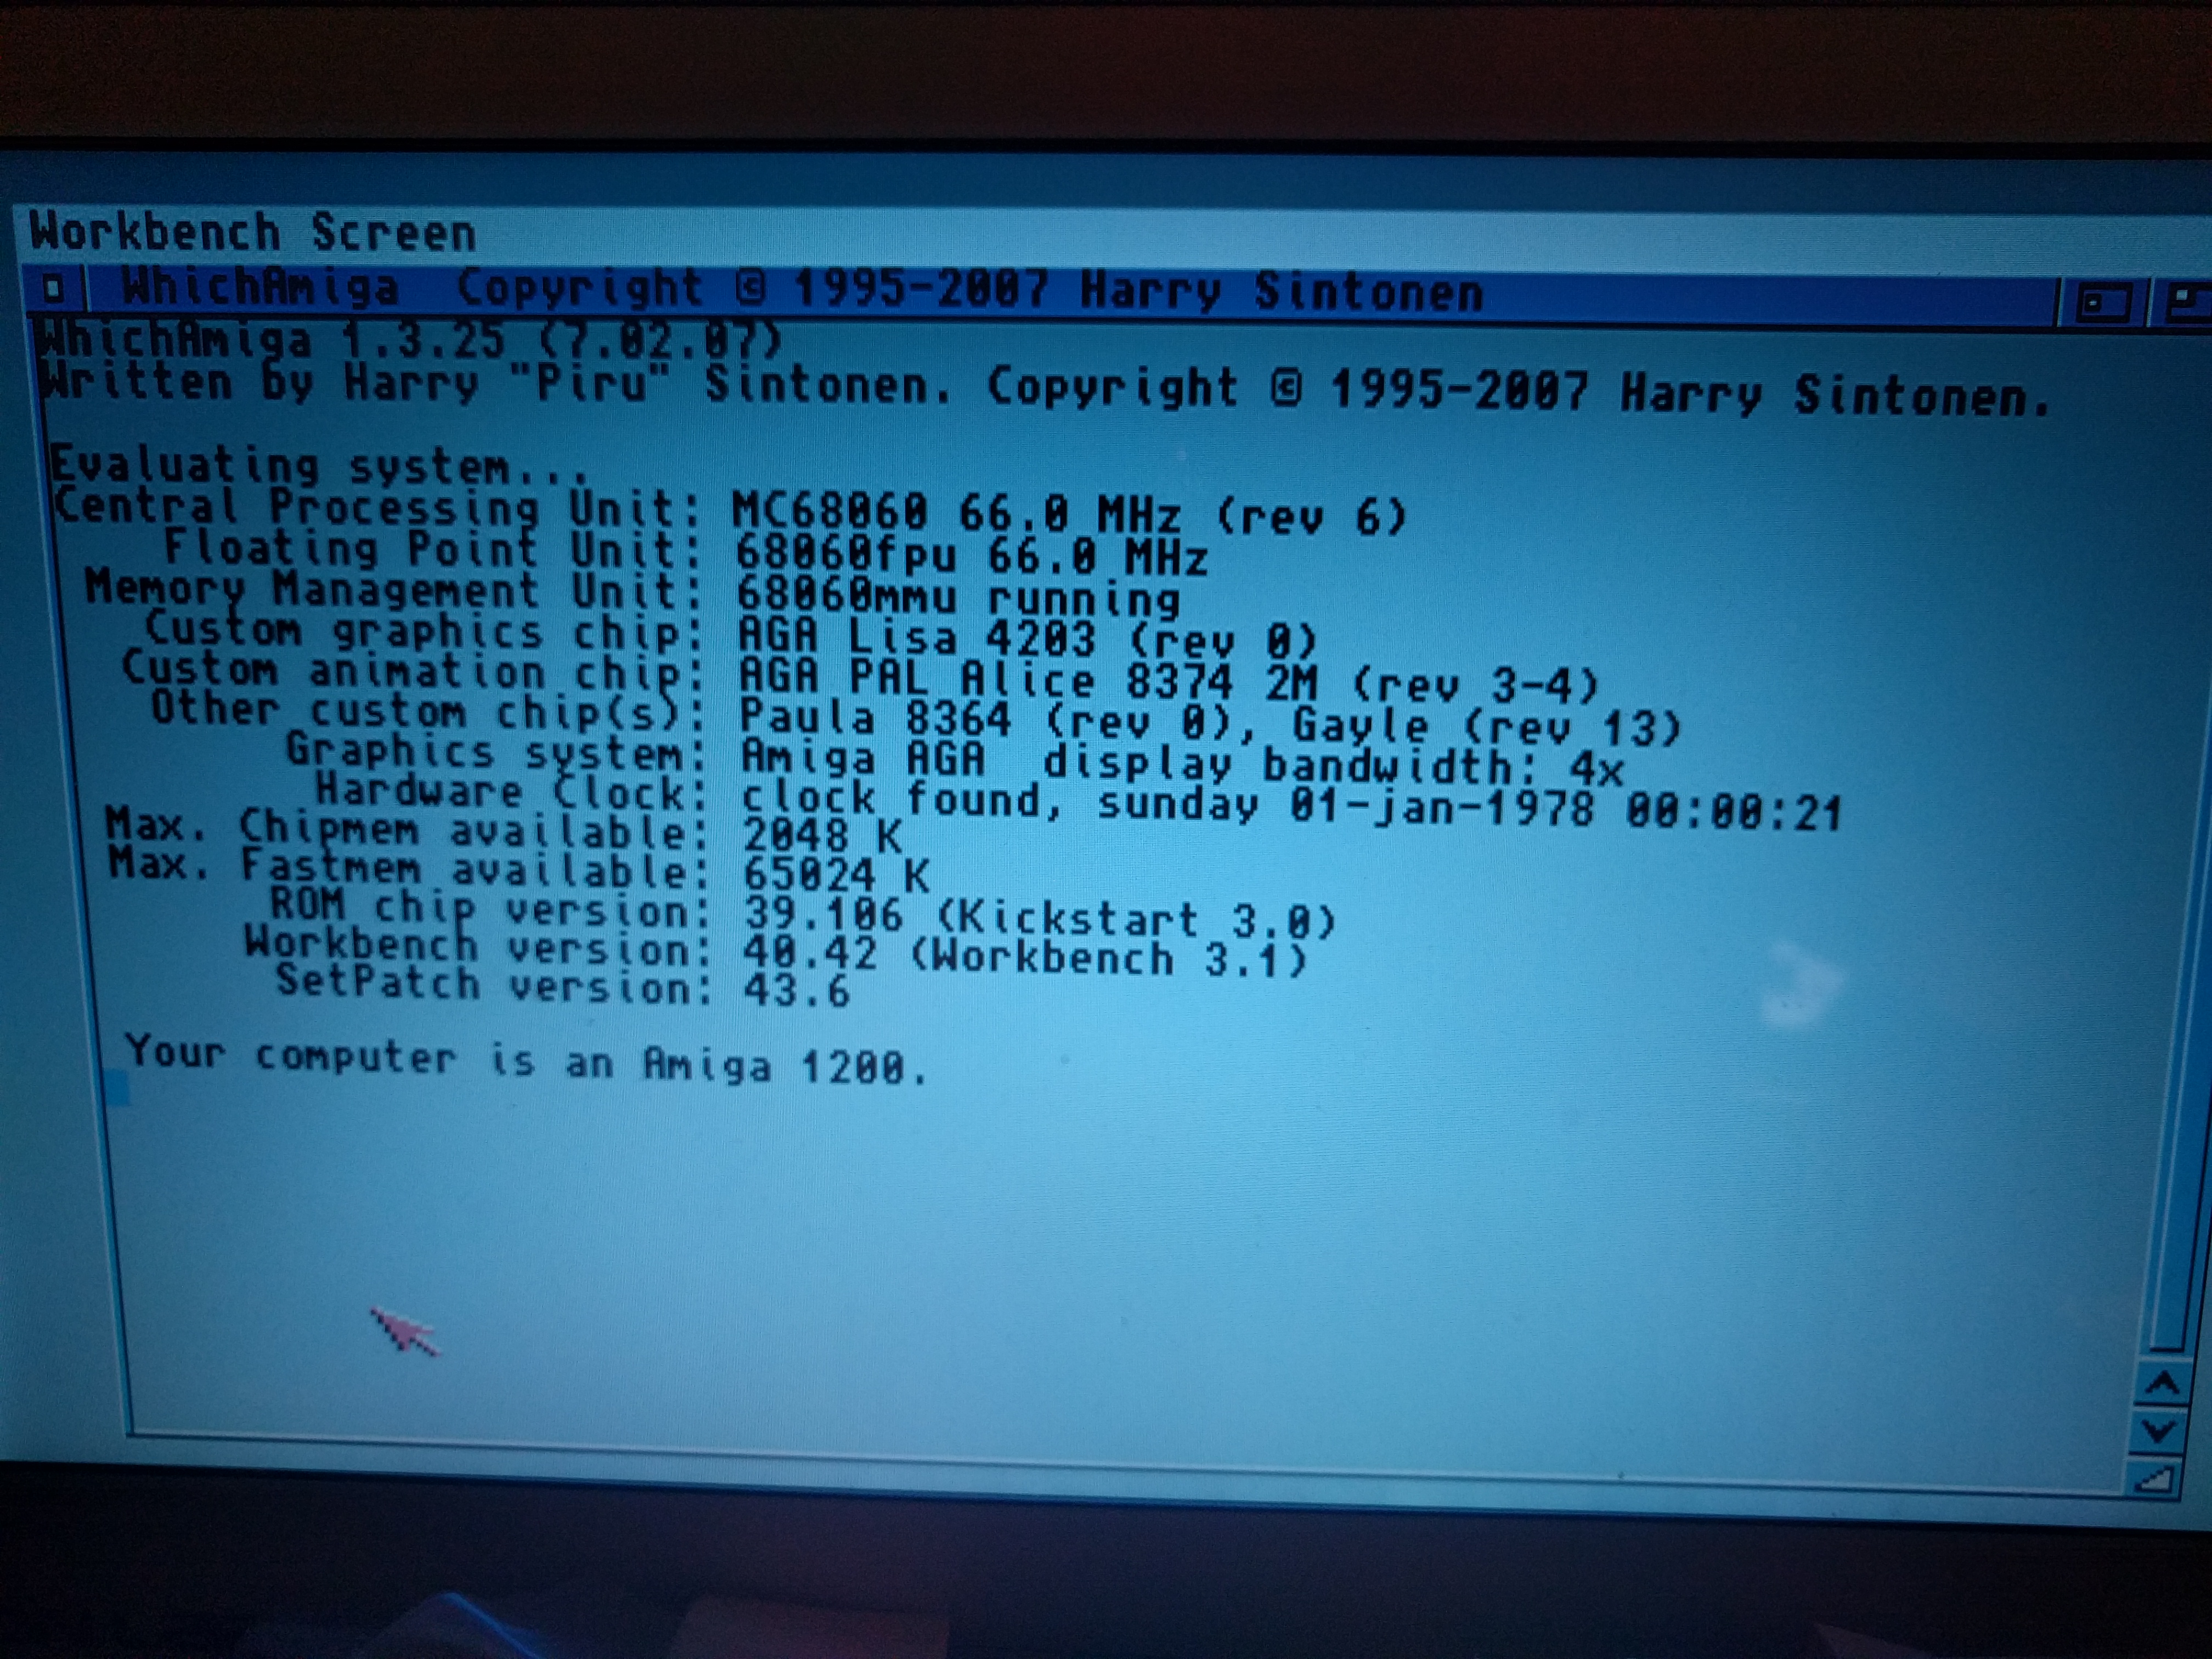
And well. it also boots: