X500 Evo, Stuffing da beast (Part 1)
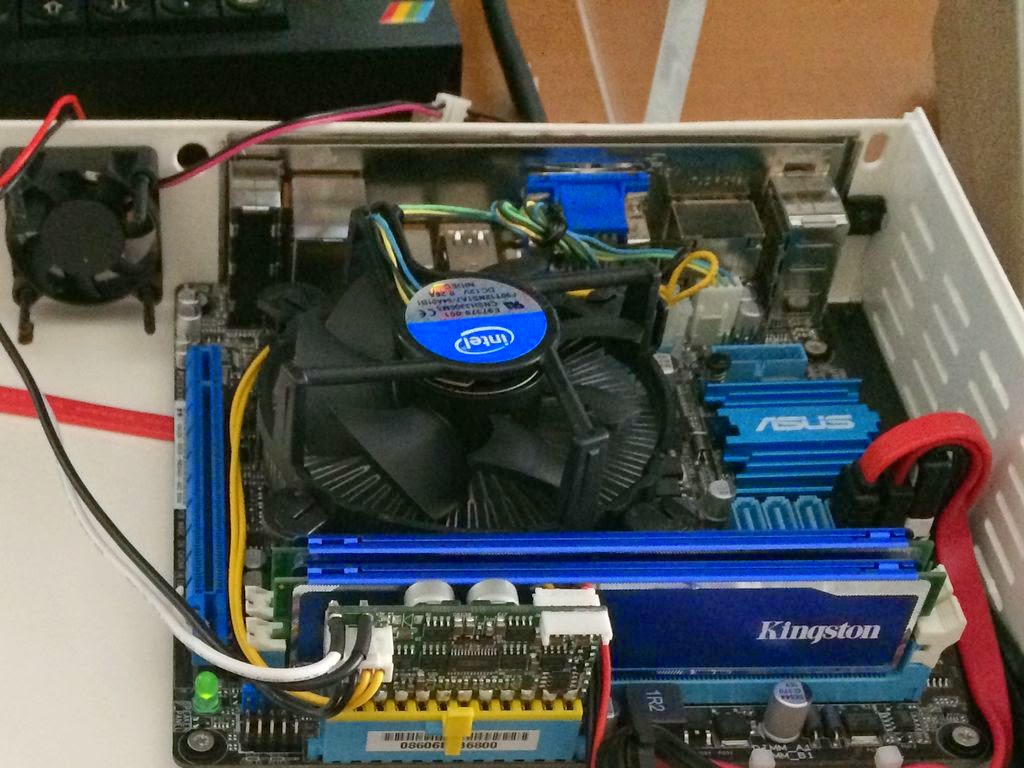
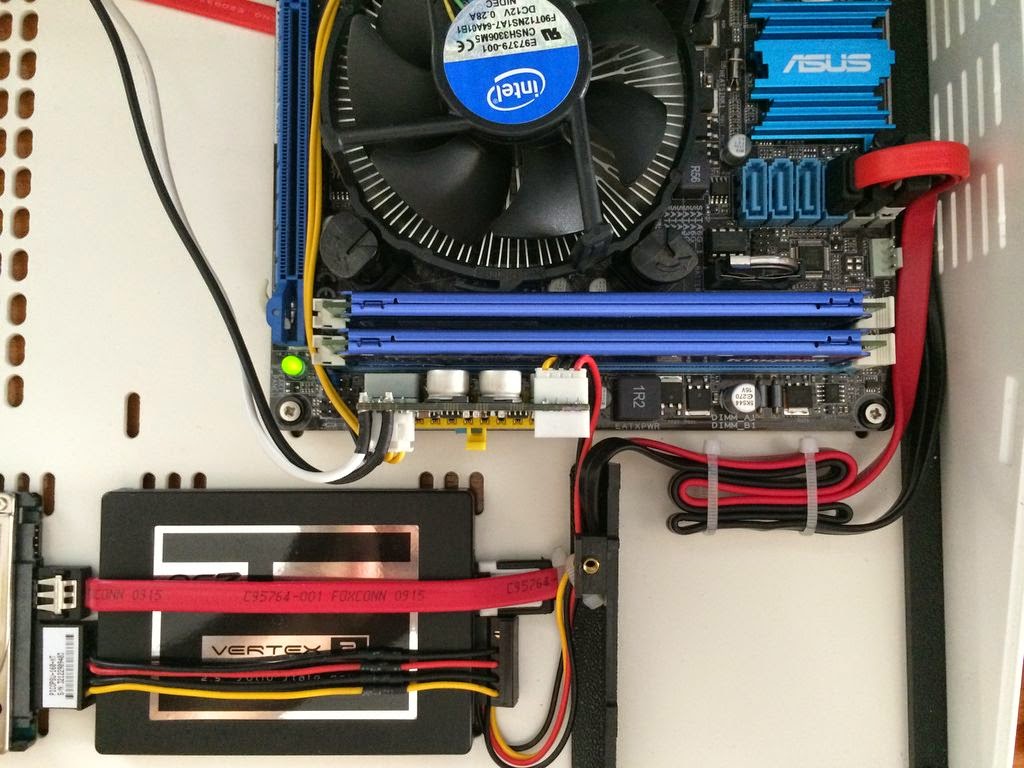
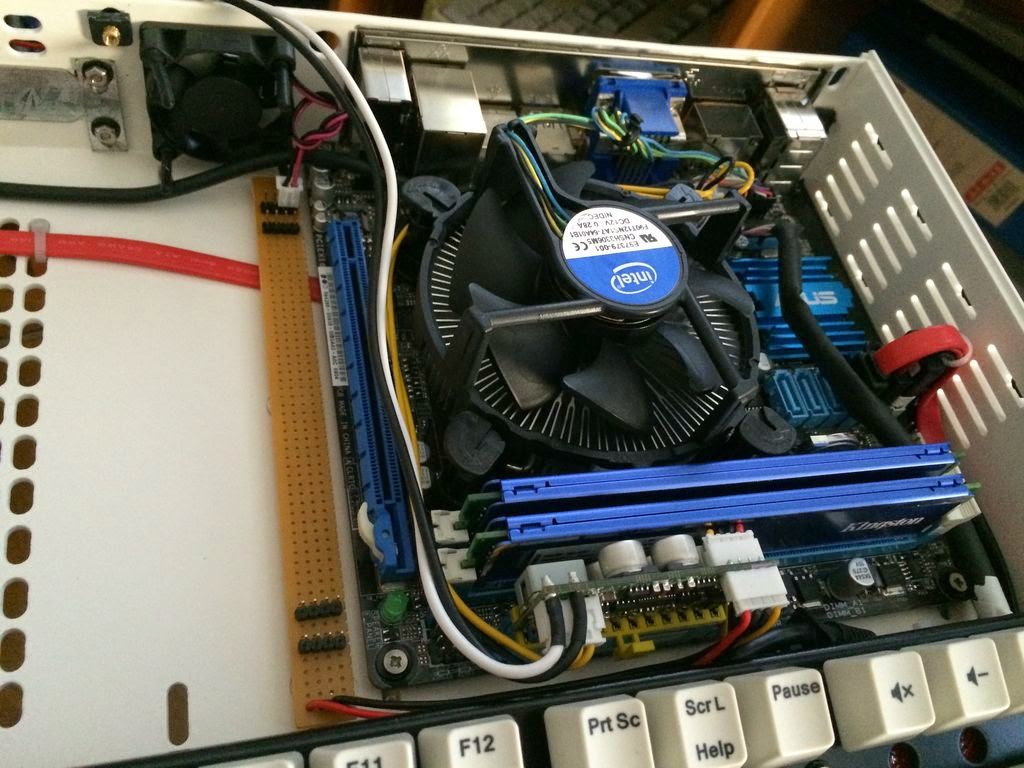
- Motherboard: Asus P8H77-I
- CPU: Intel i3 3240 (3.4GHz @ 55W TDP)
- RAM: Kingston 2x 4GB (1600MHz)
- SSD: OCZ Vertex 3 120GB
- HDD: Seagate 500GB 5400rpm
- PSU: PicoPSU 160W (powered by an beefy 192W brick using 4pin adapter
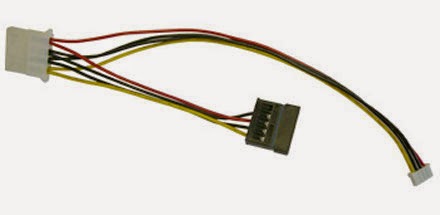
Sadly the PicoPSU power extension cable has only 1x SATA connector and a molex which I didn't want.
No reason to keep it as-is :)
Molex connector was removed, and an extra SATA connector was attached to the wire. Ofc shrinking tubing was used to insulate the cables. After that both drives were mounted in place to check them out!
Awesome tight fit :)
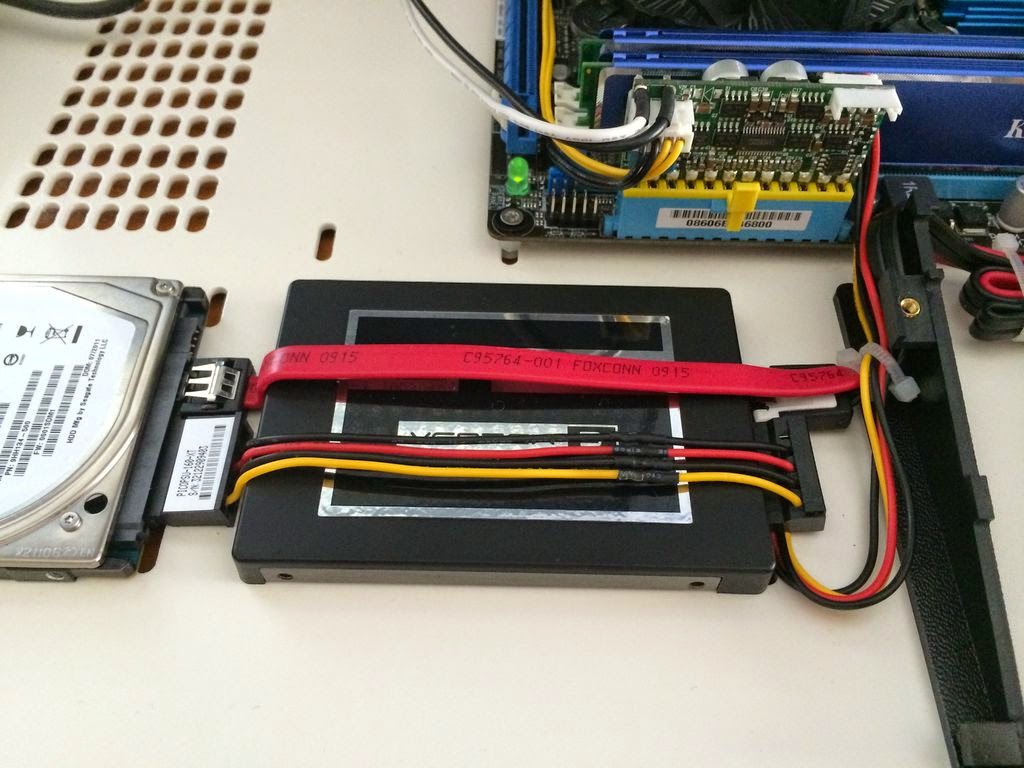
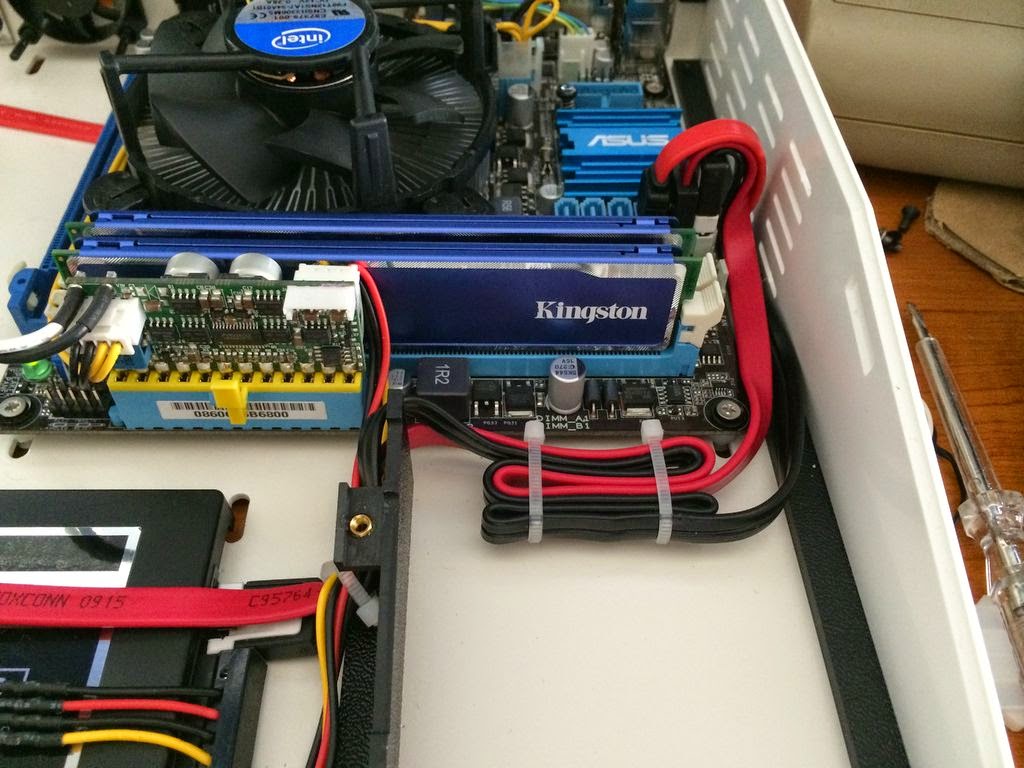
As some might know I'm a bit OCD with the cabling so I used some straps to hold the SATA cables in place not to have a mess which I dislike.
OK. Data cables were ready. What about powering the extra bits of the case? Those parts are:
- DVD/RW's Molex connector (5V)
- 1x back side's 40mm fan (12V)
- 2x upper shell's 50mm fans (12V)
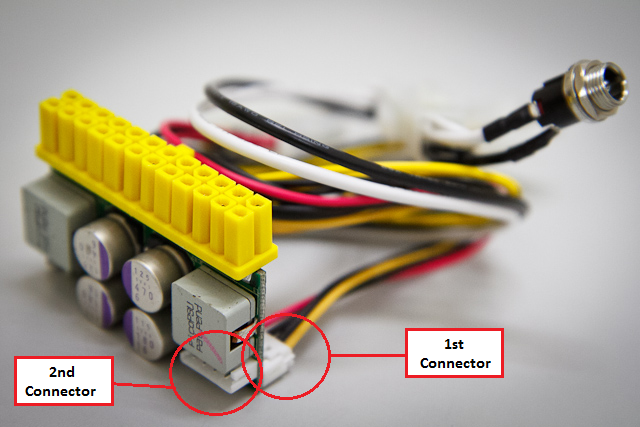
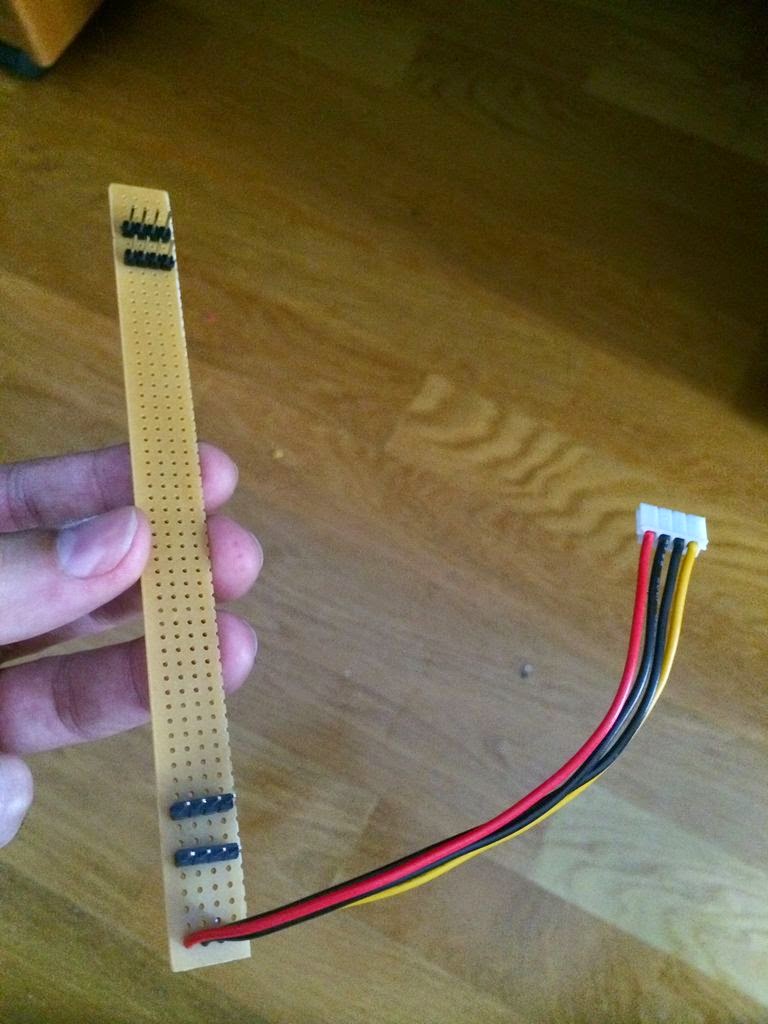
As you can see from the lower part of the veroboard, it's really hand having each line shorted, giving me the ability to add as many headers I want in the future (not that it will be needed from what I can tell). I also putted some silicon base in 3 parts in order to be able to mount it properly :)

And here it is mounted and taking power from PicoPSU.
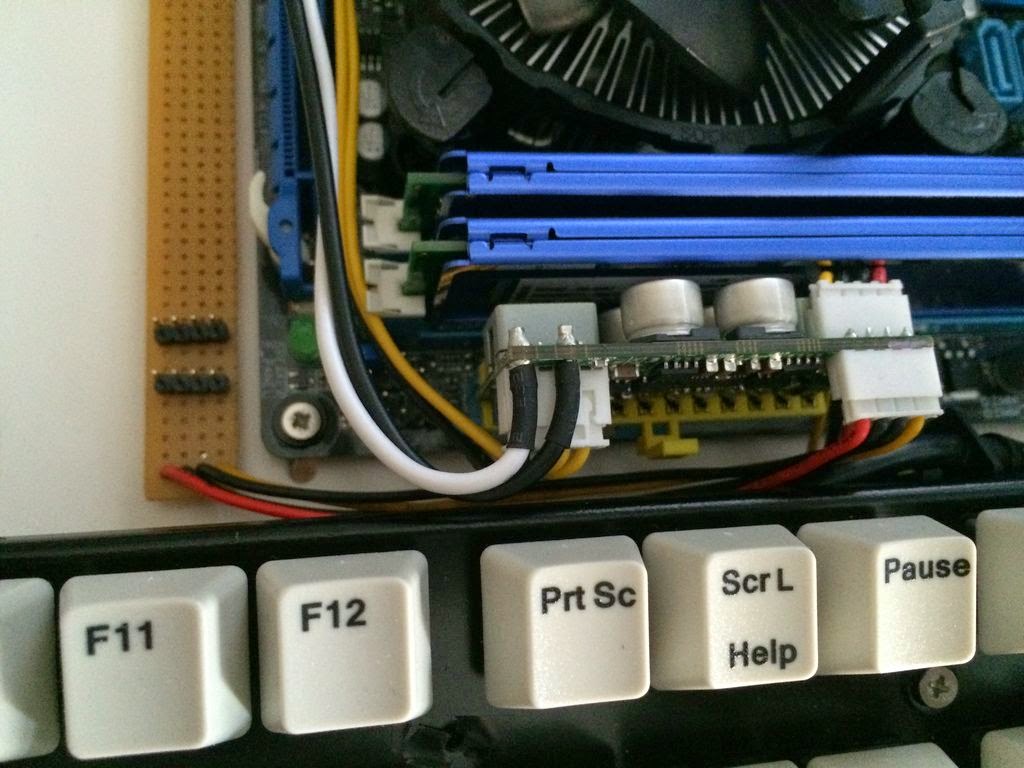
Here you can see it placed next to the motherboard and giving juice to the backside 40mm fan.
And here it's giving juice to the pin header of the DVD/RW (after I tossed the big and ugly Molex connector).

It's getting rather nice imho isn't it?
What I observed so far are the following:
- My i3's stock cooler has more height than the case can take, alas the upper shell doesn't close. The only valid coolers for that setup after searching a lot on Google were 2.
- Either the stock cooler of the lower consumption i3 3220T

- Or the awesome "Noctua NH-L9i" ultra low profile 37mm combo

- As you can imagine... I ordered the Noctua without a hesitation after contacting Loriano to get measuring of the innards of the case and the stock 3220T cooler height.
- All fans are mounted using silicon rubber mounts for better noise cancelation and ease of fitting. As these mounts are black, they don't look so nice with the rest of the white case. In order to make it look even better, I ordered a set of white silicone mounts to give them a spin.
So that's it for now...
More articles will come in the following days as I'm waiting some things to arrive :)
Stay tuned.