10-Watt Audio System Inside My A1222 Plus
Last entry I covered audio players on the A1222 Plus, so it only seems fitting that I make a quick detour back to the hardware side to cover how I outfitted my A1222 Plus with an internal 10-Watt amplifier and speakers.
Keeping in mind my goal of creating a truly portable system, I had to find a way to fit and power an amplifier, with decent sounding speakers, all inside the small case. It took a bit of research with trial and error to find the right components, but in the end, I'm happy with the sound quality and packaging. This blog describes how I was able to accomplish this task
Keeping in mind my goal of creating a truly portable system, I had to find a way to fit and power an amplifier, with decent sounding speakers, all inside the small case. It took a bit of research with trial and error to find the right components, but in the end, I'm happy with the sound quality and packaging. This blog describes how I was able to accomplish this task
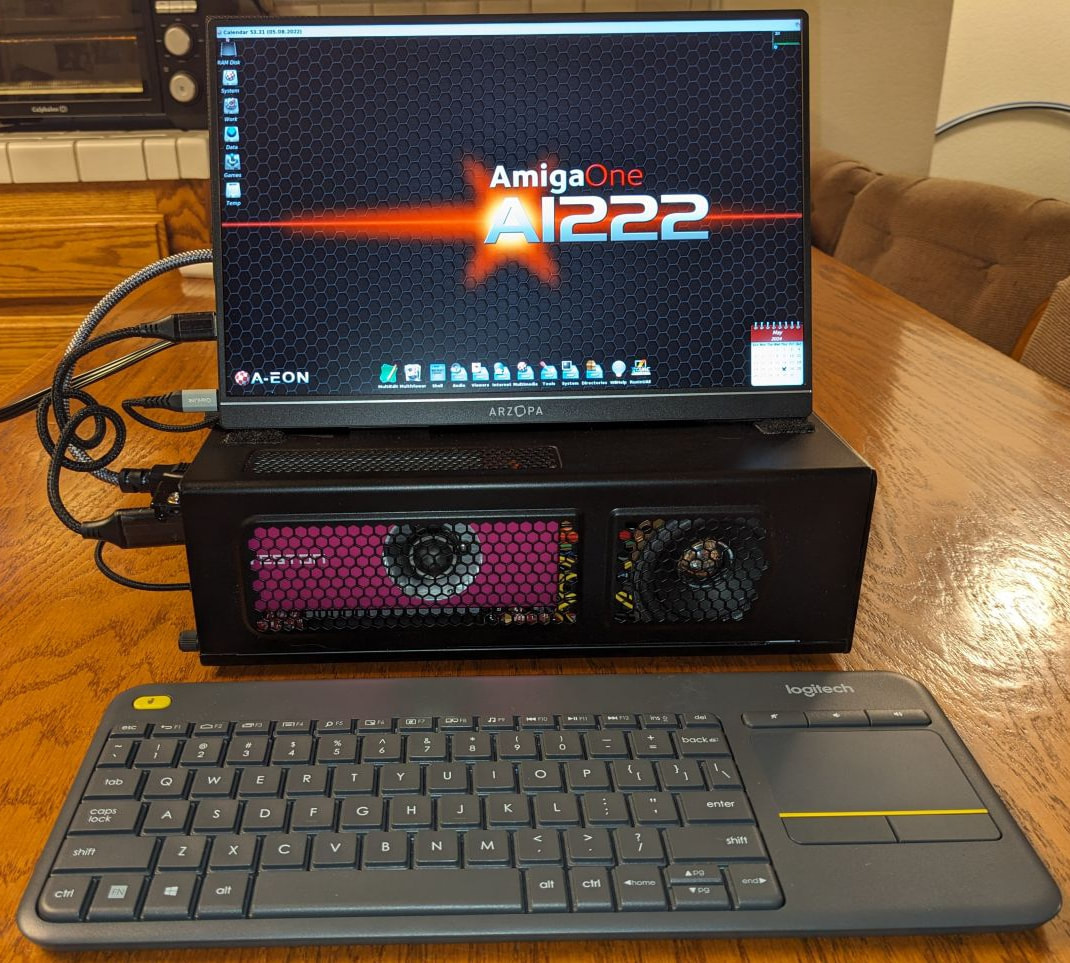 A1222 Plus with 10-Watt Amplifier and speakers inside.
(Open pictures in new page for larger view)
Where to Start
The first thing to do was to find out what amplifiers are available. So, off to Google and Amazon to do some research. I needed to find something small enough to fit inside the case, run off the internal power supply, and have enough wattage to produce decent sound. I'm not talking high fidelity but something that I could listen to without cringing. To my surprise, I found a whole host of mini amplifier boards with various voltage requirements and various wattages. After reading multiple reviews and specification sheets of various amplifier chips, I settled on the HiLetGo PAM8610 Mini Stereo Amplifier. It was small enough to fit perfectly in my case, where I needed to put it. It produces 10-watts using a 12V supply and had a volume control that fit perfectly though an existing hole in the back of my case. The hole was there to allow use of an external power supply as an option. More information on the amplifier can be found here.
www.amazon.com/HiLetgo-PAM8610-Amplify-Portable-Amplifier/dp/B01DK29KYG
www.amazon.com/HiLetgo-PAM8610-Amplify-Portable-Amplifier/dp/B01DK29KYG
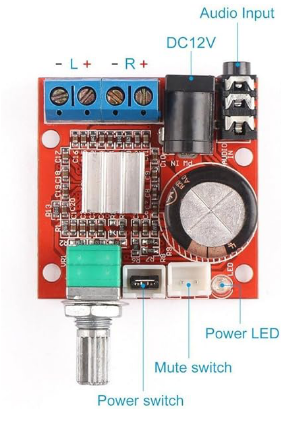 Amplifier Information.
|
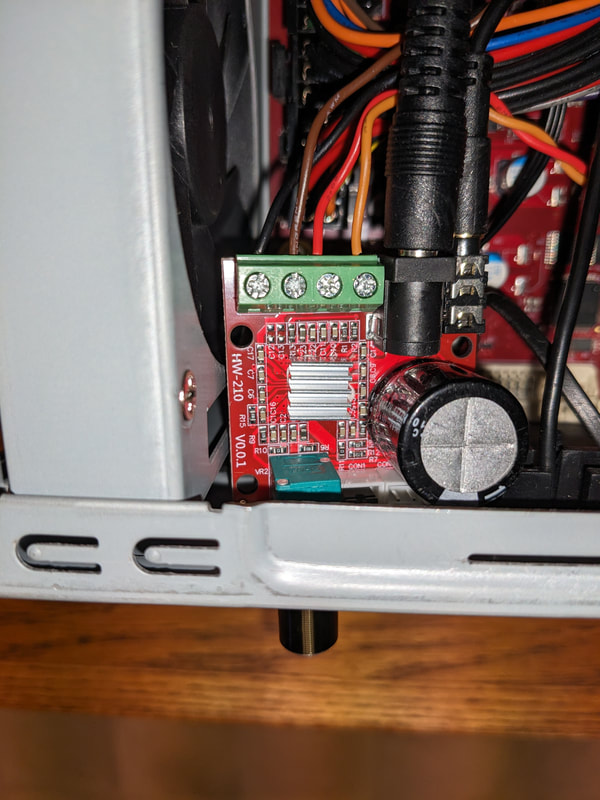 Amplifier Installed.
|
As the name implies, it's based on the PAM8610 DC Class D amplifier chip. This is an older chip but there seem to be a lot of mini amp boards built around it. Best of all it only cost $7.50 US . Specifications for the chip are as follows:
Class D stereo amplifier
Power Output: 10W per channel into 8ohms
Frequency Response: 20Hz to 50KHz
Recommended power supply voltage: 12V
PCB board size: (40 * 40) mm
Power Interface: 5.5mm socket
Audio Interface: 3.5mm
1% THD at 5 Watts, Max 10% THD at 10 Watts
Class D stereo amplifier
Power Output: 10W per channel into 8ohms
Frequency Response: 20Hz to 50KHz
Recommended power supply voltage: 12V
PCB board size: (40 * 40) mm
Power Interface: 5.5mm socket
Audio Interface: 3.5mm
1% THD at 5 Watts, Max 10% THD at 10 Watts
Connecting it all up
Ok, so I've settled on an amplifier, now how am I going to connect it all up? Well, the power supply has a 12V line available and the audio output from the A1222 Plus motherboard is a 3.5mm connector. I also needed wire to connect the speakers. More about speakers later. So…back to Amazon to do some searching.
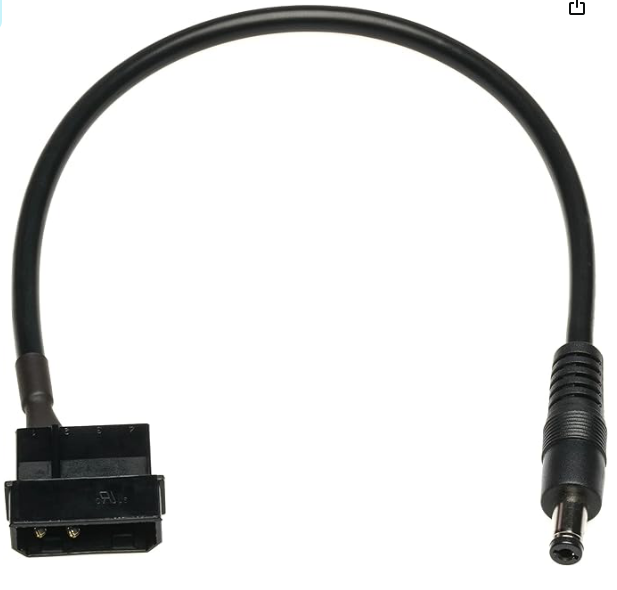 CRJ 4-Pin Male Molex to 12V DC 5.5mm adapter cable
|
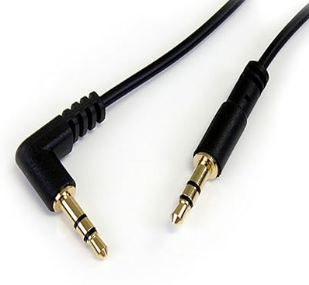 3.5mm to 3.5mm right angle stereo audio cable
|
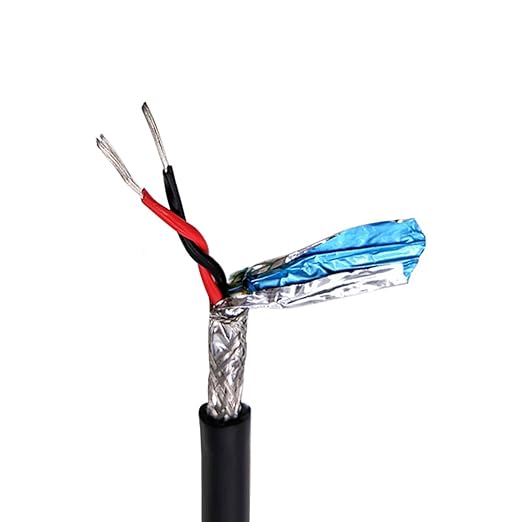 Two conductor, twisted pair, shielded wire
|
To my surprise, I found a CRJ 4-Pin Male Molex to 12V DC 5.5mm, 1mm long adapter cable which worked perfectly to make a very clean connection.
www.amazon.com/dp/B01F5KL9T0?psc=1&ref=ppx_yo2ov_dt_b_product_details
www.amazon.com/dp/B004G7U40Y?psc=1&ref=ppx_yo2ov_dt_b_product_details
www.amazon.com/dp/B01F5KL9T0?psc=1&ref=ppx_yo2ov_dt_b_product_details
Of course, 3.5mm audio cables are easily found, so I used this 1 foot one with a right-angle connector on one end. I was able to run this cable from the outside of the case to the inside through a hole that was intended for a second speed switch for a second fan that the case supports. www.amazon.com/dp/B004G7U40Y?psc=1&ref=ppx_yo2ov_dt_b_product_details
Two conductor, twisted pair, shielded wire, in small quantities, for connecting the speakers, was much harder to find. With persistence I managed to find the following wire, which works well and keeps out extraneous noise generated from the motherboard.
www.amazon.com/dp/B0CJTWLQV4?psc=1&ref=ppx_yo2ov_dt_b_product_details
Speakers - The Final Challange
Now that I have the amplifier, cables and wires, the one last component I needed was speakers. Speakers play a major role in the sound quality, and it was quite a challenge to find speakers that would fit inside the case and still sound reasonably good. After getting the amplifier mounted and all wired, I tried the system out with some old 3" car stereo speakers I had out in the garage. After hooking them up, I fired up the audio program, SongPlayer (see previous blog entry), and tweaked the treble and bass controls. To my surprise, it sounded good. There is room on one side of the case where a second fan could be installed and a little room on the other side of the case next to the power supply where I could mount speakers. Unfortunately, these speakers wouldn't fit in the case. What to do?
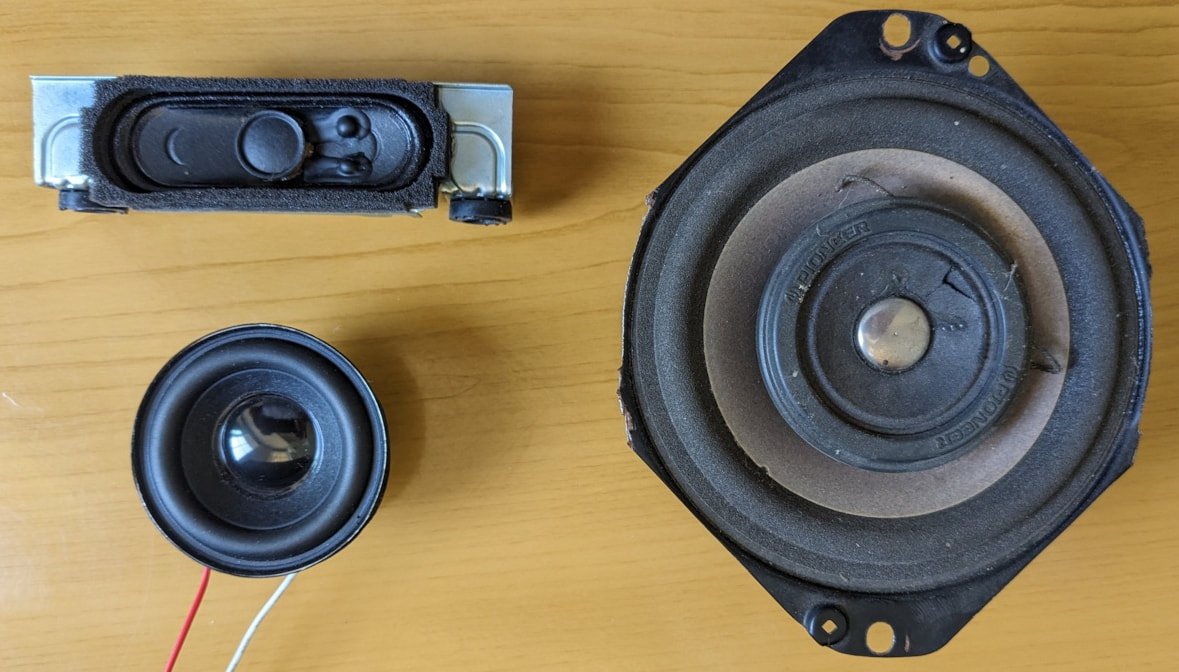
Top left, Vizio 24" TV speaker. Below, small project speaker. Right, 3" car stereo speaker.
It was at this moment that I remembered I had an old broken flat screen TV in my garage, so I broke it open and ripped the speakers out of it. They were long and skinny and fit in the case quite nicely. They were only 3-watt speakers which sounded about as good as you would expect from a flat screen TV (not great). They didn't produce much bass and, as expected, distorted if I cranked the volume to high. So, I buttoned things back up and began a new search on Amazon for speakers. I found some project speakers, that could handle 10 Watts, but they didn't provide any more bass than the TV speakers, so the search continued until…..
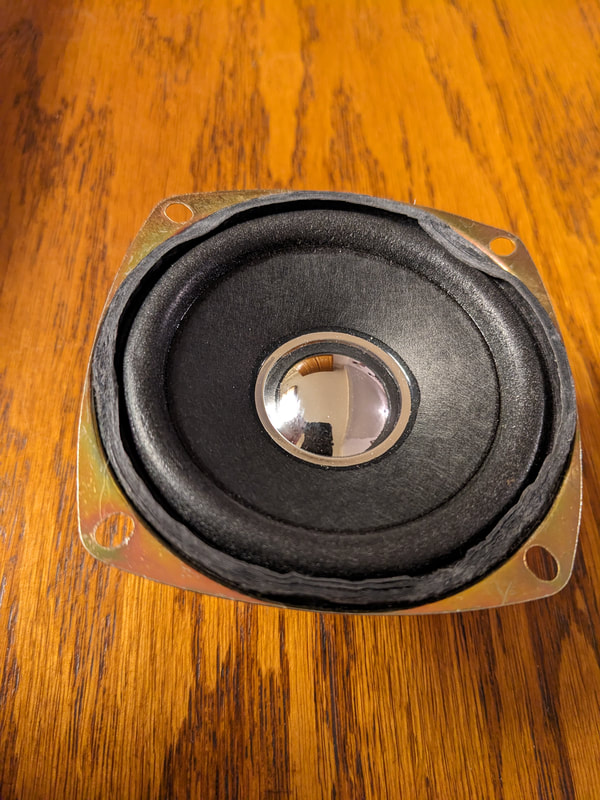 10-watt, 8 ohm speaker front
|
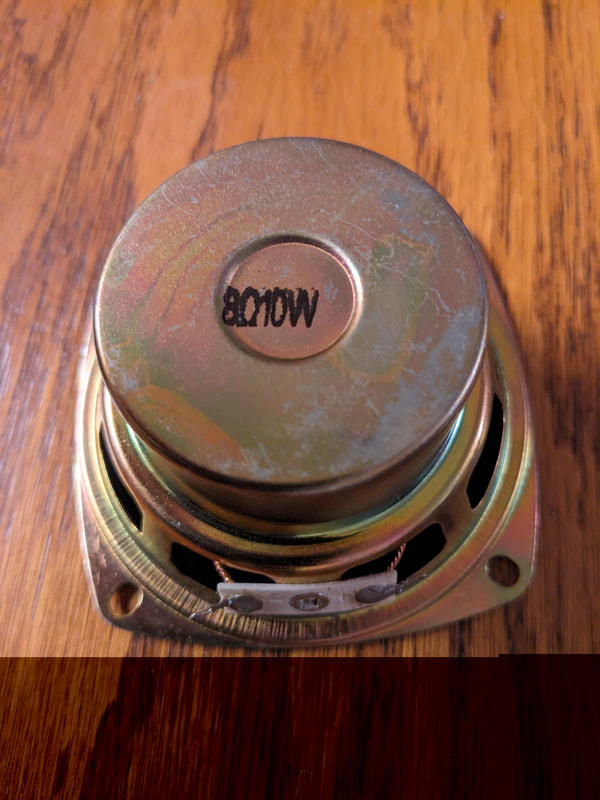 10-watt, 8 ohm speaker rear
|
Eventually, I was able to find these 3-inch, 10-Watt speakers that were no more than 1.77 inches deep. The speakers are rated at 90dB sensitivity with a frequency range of 108Hz to 20kHz. I thought I could squeeze these in, so I ordered them.
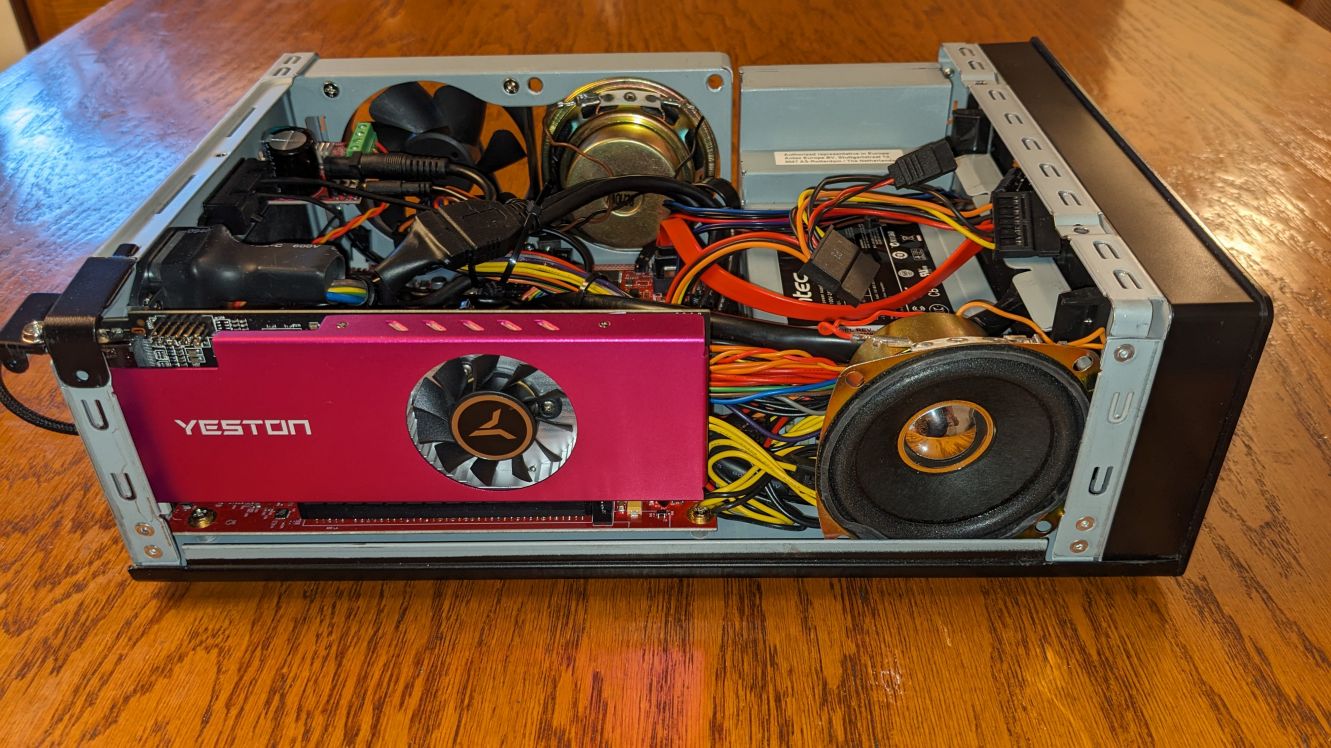
Far side speaker in second fan slot. Near side speaker in space next to power supply.
Once received, I managed to get them mounted and wired in. They fit and actually sound pretty good with a decent amount of bass, especially when I increase the bass setting with SongPlayer. Not booming but there and balanced with the mid-range and highs. I was finally happy with the results. One last finishing touch was to find a knob for the volume control. After a bit of effort, I am very satisfied with the results and am happy with the sound. It's not high fidelity but as good as a decent pair of smaller external speakers. I was able to accomplish my goal of having a fully functional system, in a portable size case, that only requires me to plug in one power cord to operate. Below are some pictures of the final product.

Final build. Top View.
 Right side speaker.
|
 Left side speaker.
|

Rear view showing volume knob in upper left and 3.5mm cable going from sound output jack to inside the case. Also shown is the IOGear AR LAN to WiFi adapter to allow true portability.
What's Next
So, now that I have some nice built-in sound for my A1222 Plus, it's time to put it to some expanded use. Next blog I'll take a detailed look at "MediaVault". A streaming player by Georgios Sokianos. I'll review using it with a script I wrote to expand its functionality and take a look at how well, or not, it works with the A1222 Plus.
As always, your comments are welcome.
As always, your comments are welcome.