My Checkmate Displays have arrived - Part 1
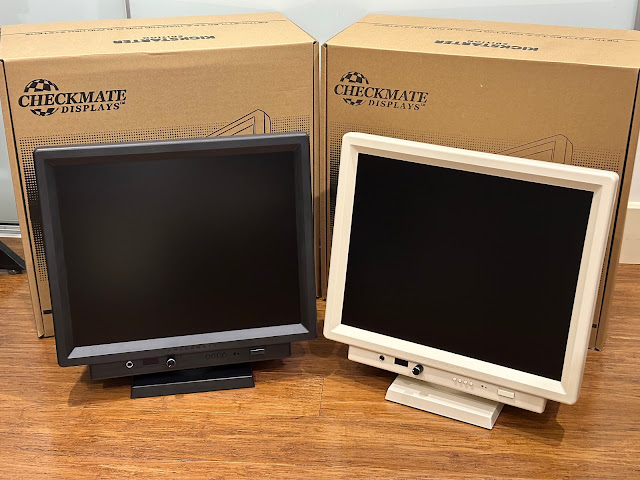
I am pleased to say I received my two Checkmate displays this week from the UK, one black and one cream coloured. Let's take a closer look!
This will be part one of a two part blog series as there is a lot to look at and a lot of systems to try them out on!


This is current compatibility for devices connected to Appy's retro scaler optional add-on:


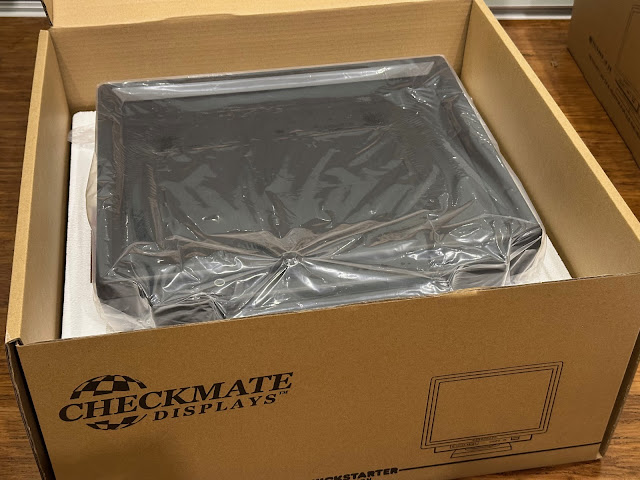
Removing the cream Checkmate display from it's box reveals a very nice looking monitor.

It sits on a swivel stand (which was an achieved stretch goal in the kickstarter), which allows the screen to fully twist around (not just 90 degrees left and right) for easy front access to the slots and ports in the back. It also allows limited up and down movement, which is surprisingly useful.

Turning the monitor to the side reveals one of two speakers built into the monitor, similar to the 1084S which I believe it is modelled on. This means you don't need external speakers, although you shouldn't expect amazing audio and bass feedback with such small speakers - the sound is fine though.


Turning the monitor around on its swivel base reveals the star of the show, the multiple slots. There is also a built in handle to make lifting and moving the monitor around easy.

Let's take a closer look at the slots - there are three in total, and for my monitors, two of the slots are populated. Some backers chose to have the MISTER or Raspberry Pi options mounted into the third slot, creating an all in one computer!

There is ports galore here. Even a RGBi connector for connecting C128 output for CP/M mode. Nice.


The monitor is intended to be operated with the remote - there are buttons on the display itself for more common features, but generally speaking, the remote is what you will be using.

As I was one of the kickstarter backers who did a bank transfer via wise.com, Steve included a full colour ring bound User manual with the monitors as a thank you. For everyone else, they will get a PDF version of the manual (which I also have).

Not sure if there is language localisation of these stickers, or they are only in English. Of course for me, English is fine!

It doesn't matter if you choose black or white. Both look great :-)

Personally I would have painted the checkmate lettering on the front in white on the black monitor, and in black on the white monitor. It is hard to see unless up close.

An interesting observation that is relevant to my setup is that the low profile external floppy drive just fits underneath the monitor, which is great for me. It wouldn't work if it was a Commodore 1010 or 1011 floppy drive though.

Next I found a SCART to RGB port cable to connect from the Amiga 1000 RGB port to the SCART port on the back of the Checkmate display - it also has the RCA audio to capture the audio into the checkmate display to play via it's internal stereo speakers:

Great thing about the swivel stand is I can rotate 180 degrees to access the rear of the monitor. Much easier for connecting the cables.


The User manual explains the ports on the back quite well, and the operation of the remote control:

As mentioned in the manual, there is a second remote control if you ordered the RF in/S-Video in option, but since I didn't do that, I just have the main remote control:

While I had the monitor rotated with the slots facing me, I applied the included port name stickers to the back:

This of course makes everything so much easier to understand what it is!

I turned on the Amiga 1000 also. The Checkmate logo appears and I am then greeted with a RGB message and nothing else. I was expecting the kickstart disk prompt, but nothing.

It turns out the default input is expecting 1280x1024, but in reality the SCART input is being scaled to work at 480/576.

The GBS control module has this small front mounted display and jog dial to adjust common parameters like screen resolution and Presets which are stored in the settings to adjust the display.

I then changed the resolution to 480/576 using the jog dial, and pushing it in to select the option.

The Amiga 1000 display then appears, although the positioning is not ideal.

Referring to the manual, Preset profile #4 is for the Amiga, so I selected that using the GBS control jog dial:

The Amiga 1000 display then appears:


The image was not so sharp though, with some ghosting evident. It is clear I have some more work to do. I booted the workbench disk from floppy and I got some wavy output, with the straight line a bit wavy in some sections:


This is much more noticeable in Workbench than when playing games or demos:


I ran some more recent Amiga demos from floppy disk on the A1000 - it looks good, but with 1280x720 you do get black bars at the top and bottom of the display:

To be fair to it though, the exact same thing happens with a normal TFT screen, as I show below with the Amiga 500 running an Indivision ECS scan doubler connected to a 19" TFT screen, side by side with the Checkmate display on the A1000 - both running the same demo from floppy disk.

Both screens have top and bottom black borders. By sheer luck, the checkmate on its stand means the display output lines up almost exactly! Would love to say I planned that, but it was just luck.

I did notice the brightness on my old 19" TFT is a bit lower than what is set on the Checkmate, as shown above and below - it is not a problem or anything, just a difference in output settings on my old TFT screen:

Next I fired up the Workbench 1.3 floppy disk in both computers to compare the output:

I opened the windows in the same places so it was a fair comparison:

Here is the close up of the Checkmate - the iPhone I used to photograph adds wavy line artifacts to the screen depending on the angle sorry - oh for a decent screen image camera!

Here is the close up of the TFT screen on the Amiga 500 with the same Workbench windows and apps open:

Personally, I can't see much difference, but your mileage may vary!

I did the same test as before, running the same game on the Amiga 500 with Indivision ECS scan doubler output and put them side by side.


And here is the Checkmate output of the same game on the Amiga 1000:

You may wonder why I care so much about comparing these two. I care because in reality, as long as the output of the checkmate was at least as good as the A500 with Indivision ECS output, then I am very happy with the screen, as this is basically the minimum that I expected it to do.

Since the Amiga 1000 I have does not allow any Indivision ECS to be installed in it due to it having the dual layer boards in it, using the checkmate with it's inbuilt GBS control and Appy's Retro scaler was my preferred option.


Demos appear well on the Checkmate display, but at the moment I am only using the display at the standard Amiga screen mode output, not any of the fancier interlace or later modes that came with Workbench 2 and above.

Enjoy a bit of the amazing Batman Rises using the Checkmate display - yes, I think so :-)

If you haven't checked out the many new games for the Amiga in the last year, you really need to catch up - I covered a lot of them in my blog post here if you want to discover more about them.


I then connected the various AV component cables for the CD32, CDTV and HDMI in from the Panasonic DVD player.


I tested with the Amiga CD32 AV out first up:


As usual the iPhone I am using to take pictures doesn't do great justice to the display sharpness, but it does look good in person:

If you haven't got this game yet, Reshoot 3 Proxima is a great shoot em up - easily the best of the series so far:


Last, I tried out the 2024 game release called Cecconoid, which I also have as a CD32 disc release:


Next up, I tested the Panasonic DVD/PVR recorder I have with the Checkmate monitor.


I can of course adjust the output to fill the screen, but of course lose the edges of the left and right to do so - same as for any 4:3 aspect TV of that era:


Inside Commodore feature - sounds good to me:

I wish my desk could have had these systems on it back then!

I tried the Bedroom to Billions - The Amiga Years DVD next, which is native 16:9 so the menu's and video run in letterbox format on 4:3 display:

As we head towards the 40th anniversary of Amiga in 2025, it is appropriate to watch a bit of original Amiga design team member Dave Needle (RIP), talking at the Amiga 30th celebration in 2015.

Next I hooked up the CDTV via AV input on the checkmate display - it looks good despite the iPhone's best efforts to ruin it - as before though it runs at 1280x720 given it is AV input:


Workbench windows appear sharp when using 1280x720 screen resolution - as a reminder the iPhone adds wavy artifacts to the screen image for close up photos, but they are not there in person:

I enjoyed some mod tunes from the CDTV Demo CD, using the internal speakers on the Checkmate display for audio output:


Always enjoy listening to the tunes on this CD, and I occasionally leave it running in the background while doing other things :-)


I also ran the Psygnosis demo CD after that on the CDTV, which looks good also:

The CD player function looks nice on the Checkmate display too:

I decided to switch back to the cream monitor at this point, as I wanted to explore the GBS Control customisation features. I fired up a music disk demo on the Amiga 1000 to use for testing things out - you can see that the screen is not positioned right, and that is because I was playing with it already:

The User manual details that you can connect via WiFi to the GBS control module on the Checkmate monitor using another computer or a iphone/ipad etc.

I connected to the broadcasted SSID on the GBS control module as per the instructions and browsed to the http://gbscontrol to access the GBS setup software:

You can see the checkmate display screen is set to use 1280x960 with GBS control, which explains the previous output not fitting correctly, since the 1280x720 is the required resolution to use at the moment.


Exploring the settings in the GBS control software further, you can adjust a lot of parameters, force low res screen modes to use upscaling, output frame to force PAL 50hz to 60hz, de interlace method and more!

In the System section of the configuration, you can force a restart of GBS control, reset to default settings if you mucked it up and don't want to have to fix it, and to backup and restore configurations.

In the filters section, you can turn on the scan lines (if that is your thing), and other filters are available too:

The picture control section is probably the most important part (as far as I am concerned), as this allows you to adjust the position of the screen image, adjust scaling and borders.

I played around with this to get the best centered picture I could with the demo I was playing on the Amiga 1000 on the Checkmate display at this time:


I should mention that these profiles are not visible or selectable from the front mounted GBS control jog dial. Not sure why that is - something I should check on Discord I suppose!

It was at this point I realised that moving my A1200 to make space for this setup was not going to be as easy as I hoped as the checkmate case was taller than my Display shelf!

So, after some choice grumbles about that, and then removing the shelf and everything on it, I got the setup happening:

AmiKit XE 12 has been updated to use a different linux setup, but this machine has not been updated yet as I haven't had time to redo the SD card image and transfer all my setup across.

I then set the resolution of AmiKit XE 12 to use the native 1280x1024 display of the Checkmate display:


When you run Amiga as emulation, you don't have the issues that native Amigas have with the unusual resolutions. Everything is scaled to fit the 1280x1024 screen.

It just looks great as a result:


It looks great on the display as expected:

I tried Worthy also, another great game for the Amiga:

The game fills the display, and looks glorious:


I will never, ever, stop being amazed how beautiful the art in this game is, even in 2025:

The game is also a lot of fun.

I squeezed in one more game, Pinball Fantasies:


Running AGA demos (like this one called Phase One from capsule in 1998 which uses interlace screen modes) also look great:


I also tested my own old demo group's demo from The Experience called "Terminal", which also looks great - by the way the borders were present on normal CRT monitors too.

Behind the scenes, the raspberry pi runs linux, and you can click Show Pi on the AmiKit XE menu to see it:


From the linux side you can watch full 1080p resolution videos, YouTube, etc, with no constraints.

I switched back to AmiKit XE 12 to to some web browsing to catchup on the latest Amiga releases on Aminet:

Using the Checkmate display with a Raspberry Pi 4 or 5 is a perfect match I think. Having the Pi module so it is an all in one system would be awesome. I imagine the MISTER module would be awesome too.


I connected up the cables. This machine has two video outputs (well, three actually), a HDMI output from the Pistorm for RTG Workbench running the latest AmigaOS 3.2.2, a VGA scan doubled native Amiga output from the Indivision ECS card (installed internally), and of course the native Amiga RGB port output from the Amiga 500 motherboard.

With the Checkmate display, as shown with the Amiga 1000 earlier I can now use the native RGB to SCART output rather than the VGA scan doubled output, but since I only have one RGB to SCART cable at the moment, I will use the VGA output for the Amiga native output for now.

The checkmate black monitor looks great with the Checkmate 1500 plus case. Makes sense since they were made by the same company. :-)

As mentioned this Pistorm's MicroSD card is loaded with the Pistorm firmware and AmiKit XE 12.5, and I have an active subscription to get the latest versions of AmiKit XE as they are released.

In this shot above you can see the Emu68 firmware boot screen as it powers on, displayed on the HDMI output, which is automatically switched to on the CheckMate Display.

To be honest I was surprised this RTG output worked - I had the output setup when connected to a 16:9 1080p TFT monitor to 1080p, and the Checkmate screen's native panel resolution is 1280x1024....

In the screen mode settings I tested 1280x1024 RTG mode:

It surprised me how squished 1280x1024 RTG test mode display was. Hang on, I thought this was 1280x1024 screen display?

Remembering that I had the screen set earlier to use 1280x720 for Amiga CD32/CDTV AV input, I changed the Workbench RTG screen mode to 1280x720.

I then rebooted, but the RTG workbench fonts and icons still appears to be squished as it was before.

Not sure what is going on?...Time to listen to some mods while I think it over.

Actually, I decided to test the Checkmate display on some other systems since I didn't really know how to proceed to solve this one!

Booting into MS-DOS with the Checkmate display connected, I note that the screen display is offset to the left - a common issue with MS-DOS machines, even back in the CRT display days.

I hit the menu button on the remote and used the autosize function to fix it - all good now:

First up I ran some text mode based programs like MPX (Mp3 player for dos), and Impulse Tracker, a mod tracker for DOS.


Output is crisp and fills the screen nicely (except the usual top and bottom black borders without further adjustments. With the music group New Order coming to Australia next week (sadly skipping Adelaide), seems appropriate to listen to some of their music today.

Interesting is the screen mode it uses to display the program, 720x400@70hz:

It was at this point I decided to go to the user manual and read a bit more. And it was at this moment I had the Eureka! moment to solve the border issue.

Seriously, read the manual. I could have saved myself a bunch of time troubleshooting this problem of the borders if I just read the manual first.

You can also adjust the internal sound output settings:

You can even set a clock time if you so desire!

You can also change the language of the menu and display text in the monitor - but I left it as English!

Initially, I tried using VGA setup menu under Picture settings, since this allows changing horizontal and vertical position of the display, and other options too:

The Auto adjust helps to an extent, but the borders top and bottom remain.

So I then read this nugget of information in the manual - the line that say "4:3 mode has thin black bars above and below the display":

In the Picture settings menu, there is an option that says Aspect Ratio, which is set to 4:3 by default. If I select that option, I can change it to 5:4

Voila! Problem solved - display now fills the screen completely! Yay! RTFM, seriously!

I feel like a real goose that I didn't realise this earlier. I expect this will also fix the borders I had on the Amiga display output as well.


Robotic by Rage in 1997 - a classic demo:


This next effect always amazed me when I first saw it back in 1998, and is still impressive today:


I also played with Command Keen Goodbye Galaxy, a platform game we sadly never saw on the Amiga, still to this day. We have Amiga ports of Descent, Wolfenstein 3D, Doom, Dark Forces, and so many other games from this era - maybe one day?

The bottom of the game was cut off a bit - the auto adjust setting didn't fix it.

Next I tried Hi-Octane, a bullfrog game for DOS. I need to adjust the position a bit on the Checkmate display as auto adjust didn't align it right, but again, this is quite common in DOS games and demos. The picture is often off centre and needs adjusting.

I chose this game, as it supports VESA 2.0 640x480 screen modes - the default is 320x200 when first run, and I can change it in the in-game menu:

That looks sooo much better now in 640x480:

The game looks great on the Checkmate Display:


I then moved on to check how OS/2 Warp 4 displays on the Checkmate and I have to say it looks great, but I am confused by the resolution the panel is using:


The screen information on the Checkmate shows 1280x768@75hz, but the OS/2 Warp OS itself is actually set to 1024x768@75hz. Strange as the text appears fine and not squished - not sure what is happening there!

But it works and displays fine, and I guess that is the only important thing.

It detected the monitor as a plug and play monitor and proceeded to install the default drivers in Windows 98 for it. Didn't need any special ones. I apologise again for the grainy iPhone photos.


The display looks great, using the full 1280x1024 native resolution in Windows 98, which outputs wonderfully in VGA to the Checkmate Display.

I ran some 3DFX demos to test the display and as expected, looked fantastic:


I also tried out Quake 1 GL using the glide drivers:

It looks great on the Checkmate display also:

A short message to Steve at iMica - my Octane is waiting for your upcoming hardware add-on to support Silicon Graphics machines! I tried it out today with the Checkmate display (using the VGA converter I use with the monitor below which works fine), but as expected it didn't output anything - yet.

I know this is a long post, but I wanted to try out the Checkmate display on a number of different systems, since I am lucky enough to have them and wanted to see it's compatibility, and also to give you a taste of how it looks and works with various systems if you are looking to buy one.