A600: Mounting NMI and USB connector
I forgotten that I had to put the NMI reset button since I've included the HRTmon module inside the custom ROM that I'm kicking via ACATune utility.
That was one of the easiest mods since it just requires just a push switch wired to a female header.

Since I'm not going to press this button frequently and since I don't want it to be visible I thought of putting it close to my Kickstart 1.3/3.1 switch. So a hole has been drilled...

...and here it is mounted and connected to the NMI header of ACA630.

You can see how it looks underneath below.

So this was the easy part...
The hard part that was twisting my mind was WHERE the heck I was going to mount the USB connector?
Every time that I was trying to think about that, I ended up telling myself that I'm gonna think about it another time.
You see... I don't want to make an ugly mod nor mount it in the top part of the case.
Ok after examining the case carefully I FOUND IT!
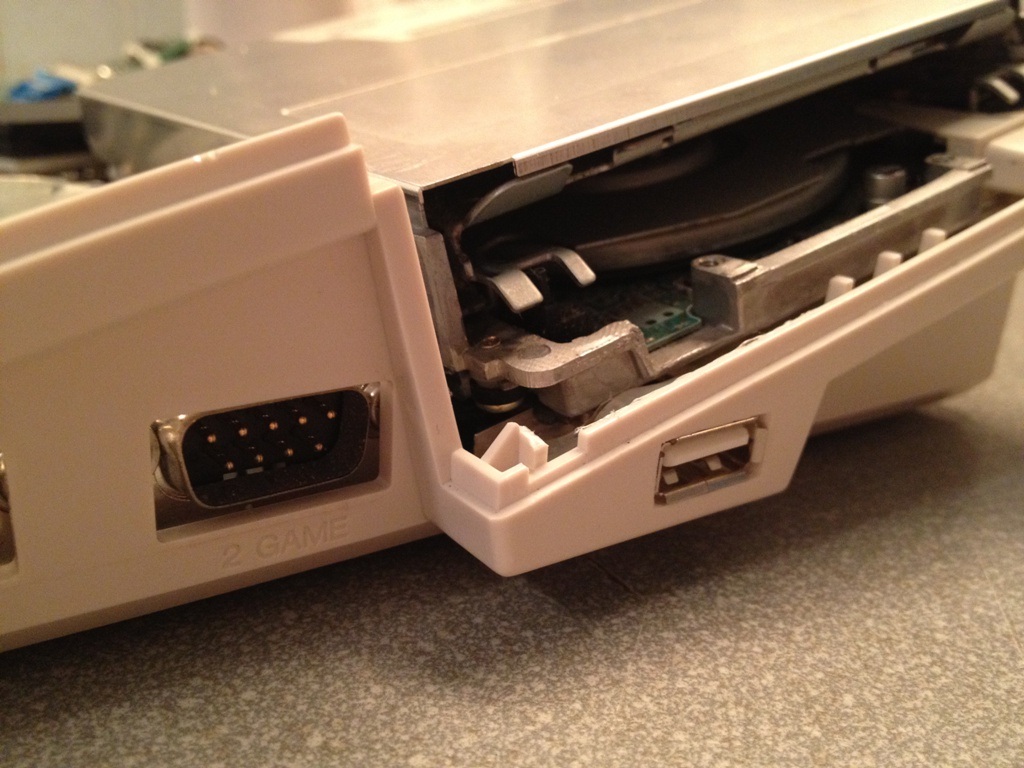
There is a small empty space under the Floppy Drive that you can see in the following pic.

Well... cutting the case for just a single USB (due to it's size) was one of the most annoying and boring things I have done for my A600. In the end, it became rather pretty :)

Next part was to create the custom USB connector and the female header that was going to be connected to the Subway.

And presto! USB connector mounted and hotglued in place :) It does look good and it doesn't even get in the way in kipper2k's PSX/PS2 adapter.

Here you can see how the USB cable was mounted to Subway. 3 more headers are left for future usage.

