AmigaOS4.1 Classic on WinUAE Part 1
By far the exciting news of this week (in my opinion) has been the PPC support implemented in BETA form on the WinUAE Classic Amiga emulation. This enables AmigaOS4.1 Classic to be used under WinUAE on a Windows PC! I had to try this out!
My computer setup is a Core i7 3.20Ghz PC running Windows 7 Pro 64bit, with 16GB RAM, plenty of HD space, Geforce 690, DVD drive and Amiga Forever 2013 installed.
I then updated WinUAE to the latest public 2.8.1 version available from http://www.winuae.net/
Next download the Beta12 file from here: http://www.winuae.net/files/b/winuae_2900b12.zip
Backup your old winuae.exe and replace with this beta 12 version.
Next, download the Picasso IV rom file from here: http://www.sophisticated-development.de/software//P-IV/PIV_FlashImage74.zip
Rename the extracted rom file from the zip to Picasso_iv_flash.rom and place into Rom folder in WinUAE folder.
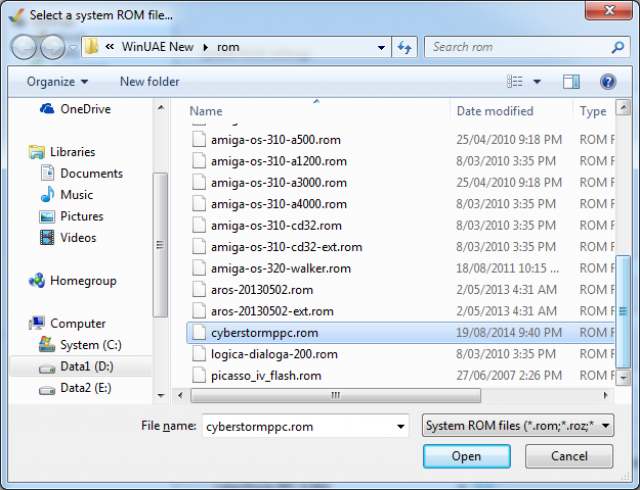
Next, download the cyberstormppc.rom - I was given it (I own a real cyberstorm PPC on my A4000D), so I think you will need to Google this one sorry! When you find it, put this file into the Rom folder as well.
Convert your AmigaOS4.1 Classic CD to an backup ISO to mount into the emulation (I believe you can use the original CD too but I didn't test this). I use ImgBurn for this.
Copy the boot_floppy.adf from the cd - it is located inside the boot_floppy.adf.lha archive in the BootFloppy folder. Copy to your WinUAE adf folder or wherever you put adf files.
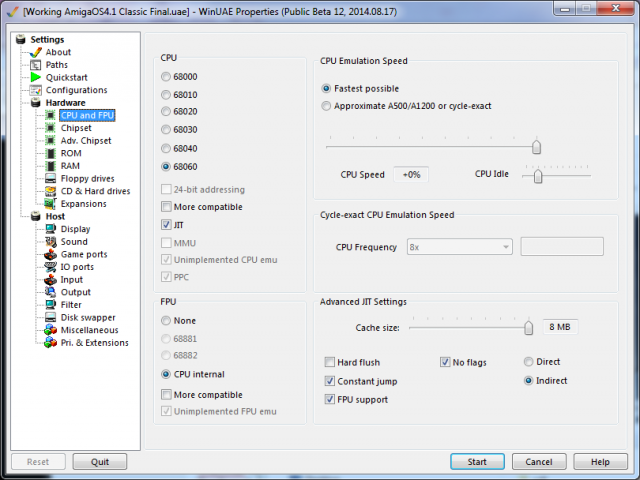
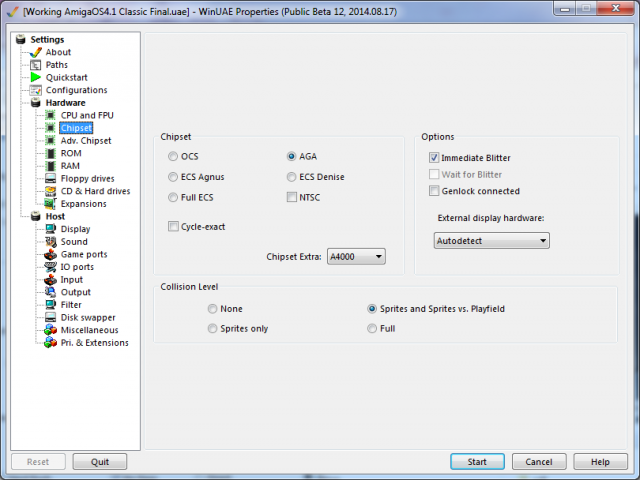
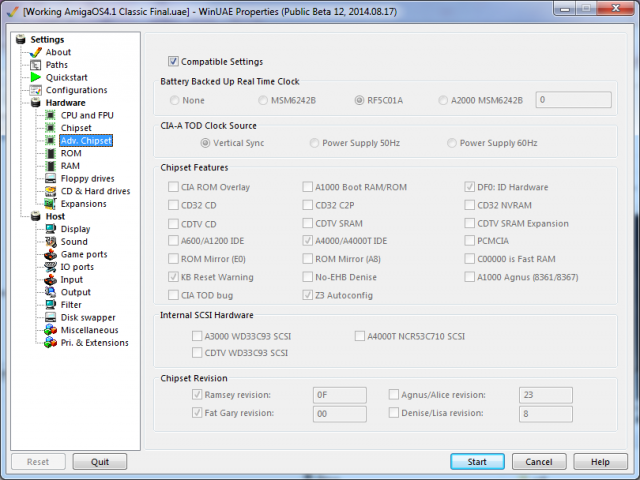
Fire up WinUAE and here are my working settings for your reference. Thanks HammerD for the help with this.
CPU and FPU Section:
Chipset Section:
Adv. Chipset section:
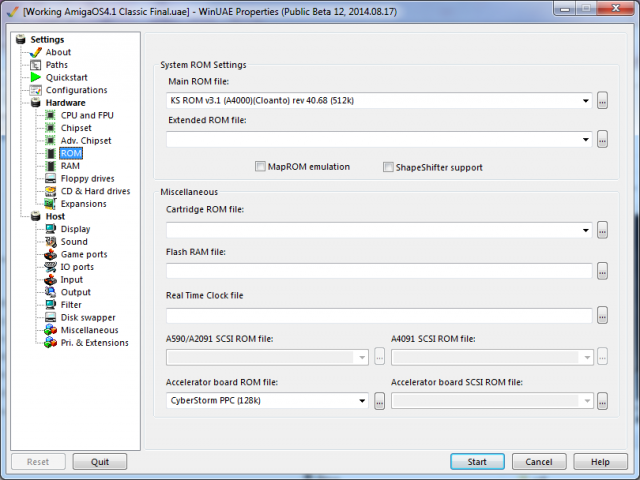
ROM section:
Note: Make sure you choose the 3.1 ROM for A4000 (Cloanto) as the System rom (you will have this if you purchased Amiga Forever - I guess other 3.1 roms might work but not tested:
Under the Accelerator Board Rom file, browse for the ROM file and select the cyberstormppc.rom file you put into the rom folder earlier:
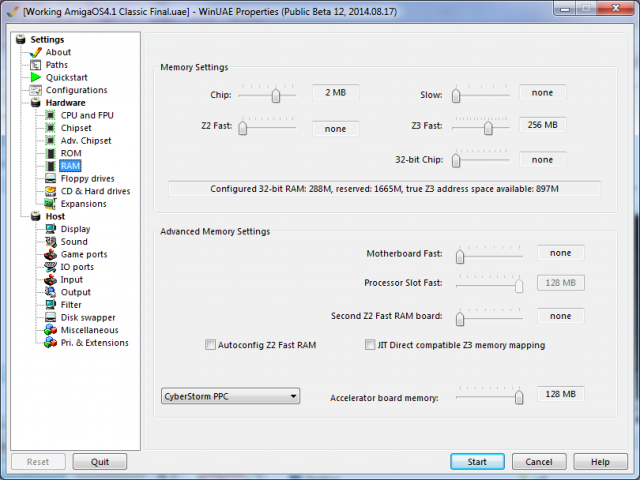
RAM Section:
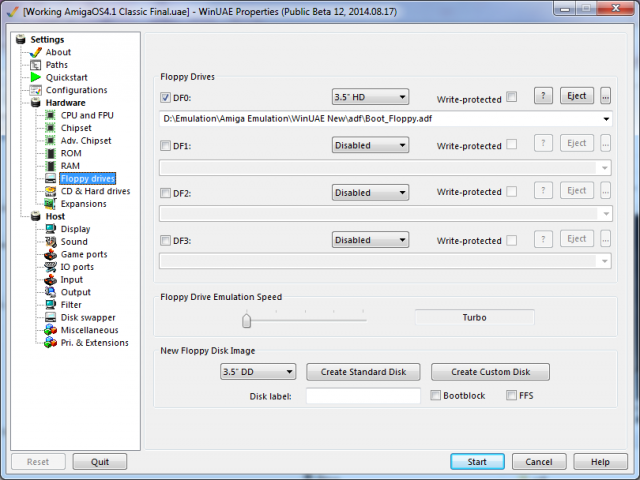
Floppy drives section:
Make sure you choose the boot_floppy.adf you copied from the AmigaOS4.1 Classic CDROM for DF0:
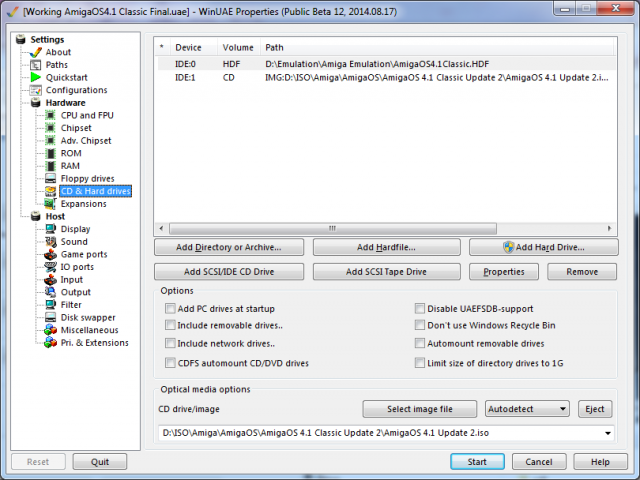
CD & Hard Drives Section:
Make sure the Devices are set as IDE:0 (HDF) and IDE:1 (CD ISO). If you don't have a hard file, select Add Hard file, shown below this screenshot. To add the CD ISO use the Select image file option under Optical Media Options and select the AmigaOS4.1 Classic iso you created earlier:
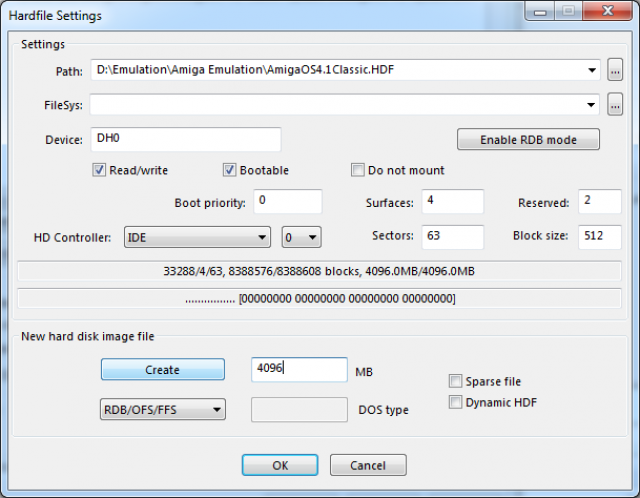
Add Hard file setting screen:
- Go to the New hard disc image file section, put in 4096MB, select FFS as the DOS Type and click on Create, then name the HDF file, then edit it's properties to match what you see above. Make sure you select Enable RDB Mode.
Expansions Section:
Here we specify the Picasso IV video card to get the higher colour screenmodes. To use this, we need to have the Picasso_iv_flash.rom present in the rom folder as covered earlier. Otherwise you will get an error when launching the emulation:
Other sections are more personal taste, but I include them for completenesss:
Having powered on the WinUAE session using the setup above, I then get the Pink boot screen - excellent:
This is then followed by the AmigaOS4.1 Classic logo as the Install CD boots up:
It is certainly not fast, but eventually after around 5 minutes you get to the Installation CD initial setup below:
For now I just want to confirm it works, so I choose to boot into AmigaOS4.1 from the CD. Here it is once booted up:
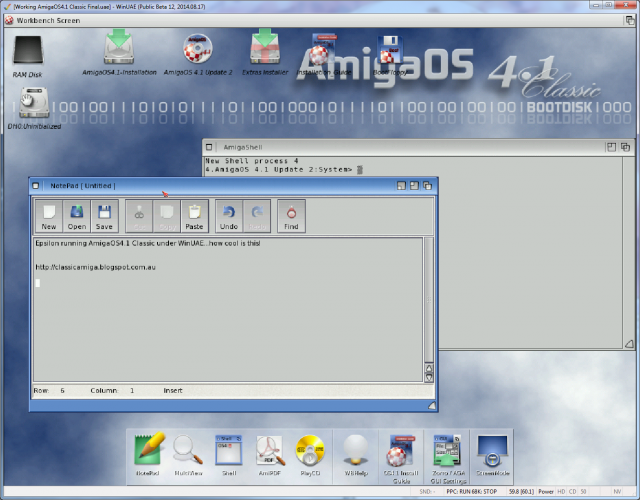
It works! I brought up a notepad session and Shell session and seems to run pretty well:
A little poke around at the Prefs section from the LiveCD:
I will do more on this another day (hard disk install, trying programs out, etc) but it is almost midnight here and I wanted to share on my blog how to get it working for those who may be interested in trying it out!
