Using a Logitech K400 Plus Keyboard with the A1222 Plus
Why the Logitech K400 Plus Keyboard?
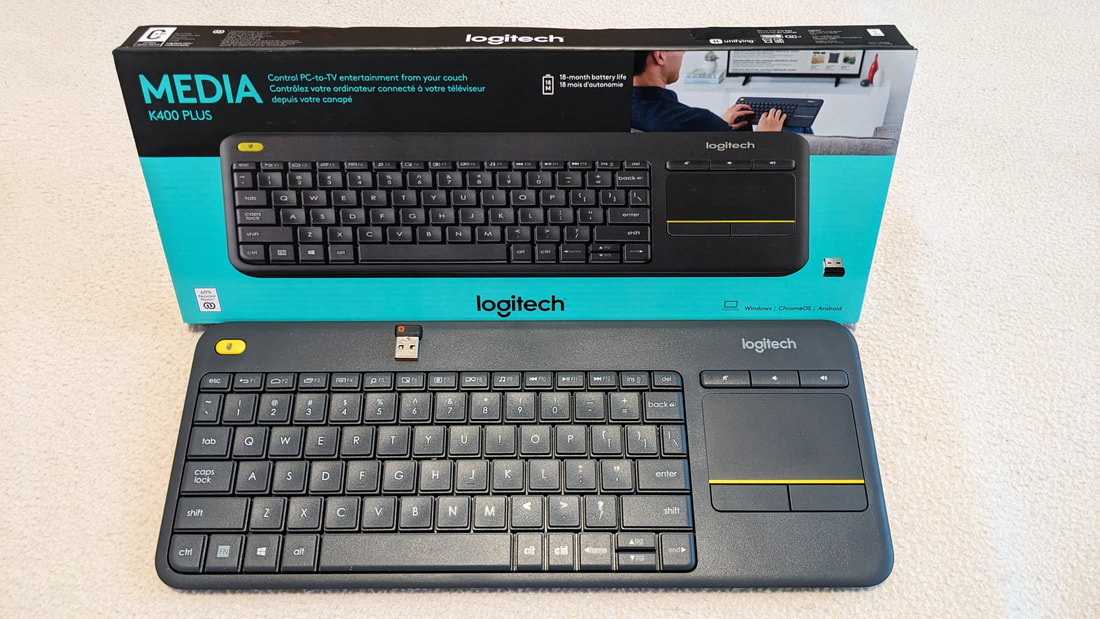
After looking at reviews for multiple keyboards which fit this criterion, I settled on the Logitech K400 Plus keyboard. Note that this is the "Plus" keyboard. It has the multimedia keys, where the non "Plus" keyboard does not.
Challenges using a touchpad with AmigaOS4
Touchpad Workarounds

Keyboard Workaround:
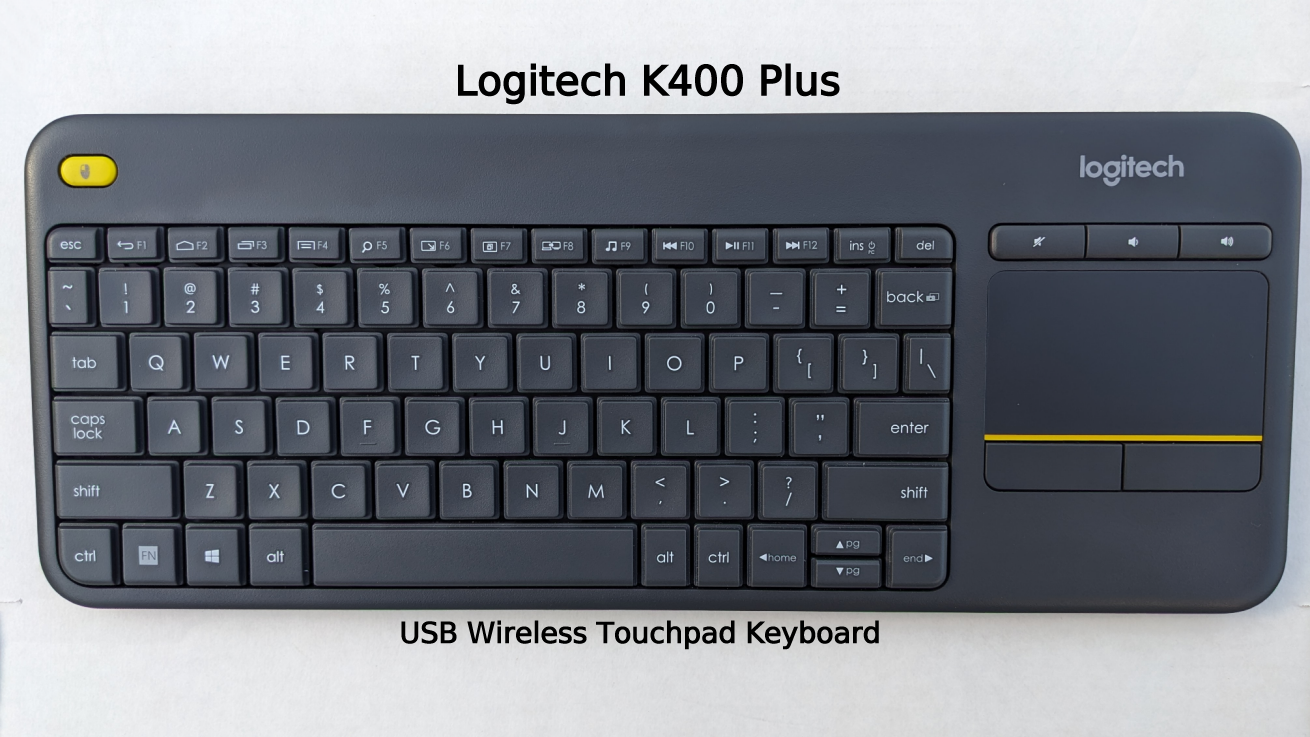
If you look closely at the keyboard, you will notice a yellow button with a picture of a mouse on it in the upper left-hand corner. Pressing this button is the equivalent to pressing the left mouse button. This makes it easy to move the pointer around with a right-hand finger on the touchpad while holding down the left mouse button with the left hand. The mouse button key and the touchpad being at opposite ends of the keyboard makes this a very comfortable and easy way to perform these actions.
GUI Settings Workarounds:
Ok, that solves half the problem. Now what about using the right mouse button and touchpad for menu selections. Of course, many menu items have keyboard equivalents, but I rarely remember most of them and what about menu items that don't have keyboard equivalents. If only there was a way to not have to hold down the right mouse button to keep the menus displayed, while making a selection. Well...it turns out there is.
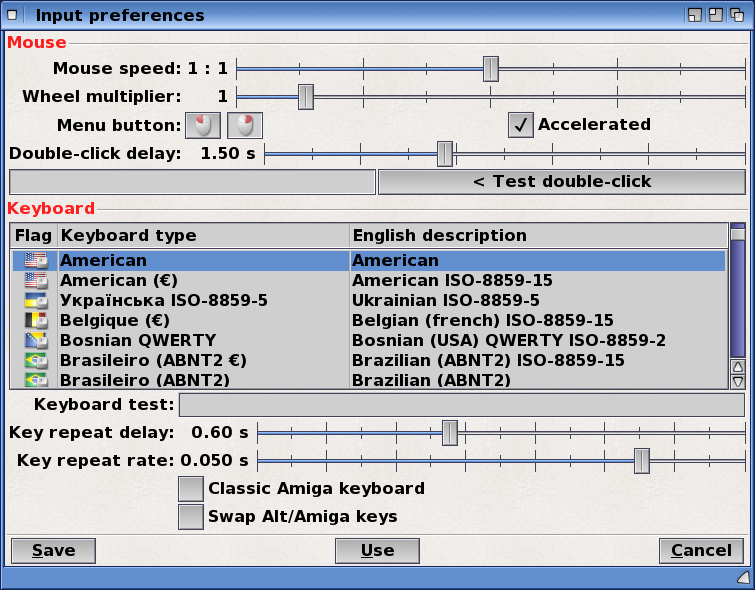
Open the GUI preferences program and click on "Menus" in the "Subsystem" list. Under the "Pull-Down Menus" and "Pop-up Menus" sections, enable the "Sticky panels" selections.
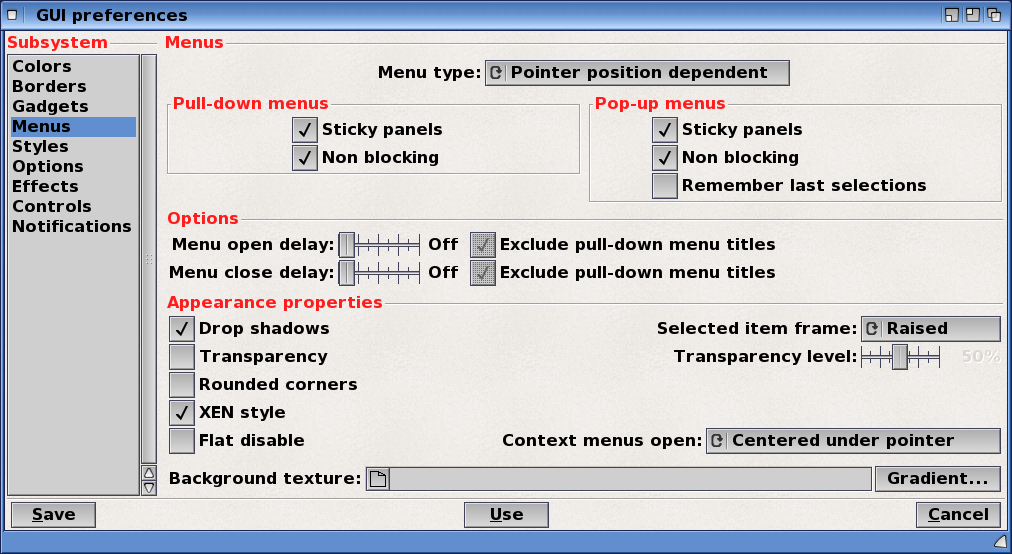
While in the menu setting, I set the following setting as well. "Menu Type" to "Pointer position dependent", to enable context menus, and "Context menus open" to "Centered under pointer", to have the menu pop up with the mouse in the center of the menu.

What About the "Amiga" keys?
Looking at the bottom row of keys on the Logitech K400 keyboard you will see, Ctrl, FN, Windows, alt, space, alt, ctrl, home, pg up/down, and end keys. Oh no, there is no menu key! Usually, the Windows key will function as the Left Amiga key and the Menu key can be mapped as the Right Amiga key. What to do? Fear not, there is a workaround. By default the Left and Right Alt keys will function as the Left and Right Amiga keys respectively. That's all well and good, but now we don't have Left and Right Alt keys, and unfortunately, as all Amiga users know, from time to time we have to use the CTRL+LALT+RALT keys to perform a hard reset.

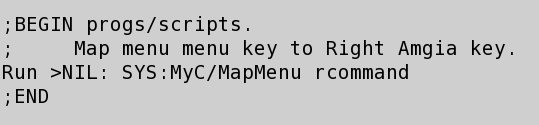
On OS4Depot, you will find Daniel Westerberg's program called "allkeys.lha". This program allows you to map keys, including multimedia keys, to act like other keys, execute Arexx scripts, or to start programs. More on this later, but for now we are interested in another program that is also contained in this archive. After unpacking the archive, you will find a directory called "Tools" in the AllKeys directory. In this directory is a program called, "MapMenu". This program will change the "Menu" key to act as the Right Amiga key. But, "we don't have a menu key", I hear you say. Well, not so fast. It turns out that the "F4" key also functions as a "Menu" key. In fact, all the function keys on the K400 keyboard perform the multimedia functions by default. You have to hold down the "FN" key then the desired function key for function key use. Ok, back to making the "Menu" key act as the "Right Amiga" key. Place the "MapMenu" program where ever you like. I moved it to a directory called "MyC" on my system, where I put cli commands that didn't come with the OS by default. Then add the line shown below to the "S:User-Startup" file.
How To Use Multimedia Keys
After unarchiving AllKeys, I suggest moving it to the "Sys:Utilities/Commodities" directory, since it is a commodity. I personally create a "MyCommodities" directory in the Commodities directory, so I can keep track of ones I've added vs. ones that come standard with AmigaOS4. Anyway, once that is done, start the program. The following Window will appear. (Note the list will empty. The picture contains my assignments.)
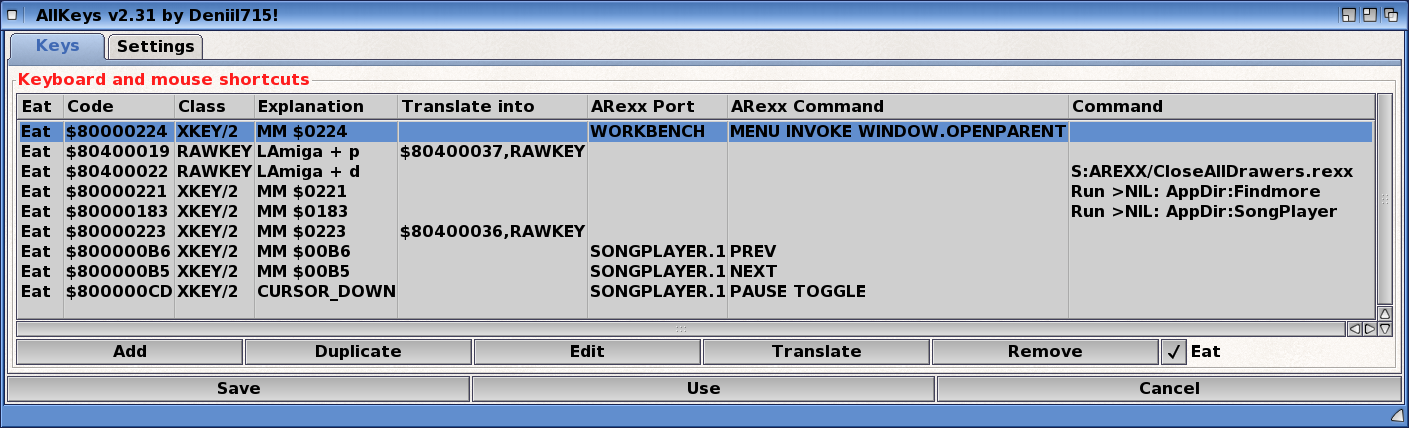
This program is much easier to use than it used to be, but it can still be a little tricky, so I'll provide an example of how to setup a key to execute the "Open Parent Window" Workbench AREXX command. The first thing to do is decide which key on the keyboard I want to use to start the calculator. I'll assign the "Back Arrow / F1" key to send the command. Since we already have AllKeys running, click on the Add button which will open a second window as shown below. This window will record key presses and display the keycode for the given keys. Unless disabled by the buttons, it will show both the down stroke and upstroke codes. After pressing the "Back Arrow / F1" key the window will contain the following entries.

The recording window will close and an entry containing the keycode will be made in the main window. Then I filled in the action I want the key to perform by double clicking in the "ARexx Port" field and typing in "WORKBENCH" as the port name. Next I select the "ARexx Command" field and entered the Arexx command to execute. In this case, "MENU INVOKE WINDOW.OPENPARENT". Then I clicked "Save". Now the active windows parent drawer window will be opened when the "Back Arrow / F1" key is pressed. I selected the "Eat" button, so the keycode will not get passed on. If "Eat" is not selected, the keycode will get passed on and used as it normally would by other applications.
If you just wanted to Translate a key to act as another key, click the "Translate" button and the recorder window will open again. Once again, press the key you would like the original key to be translated too, highlight, and click "USE". The new keycode will then be placed in the Translated field in the main window. Once saved the first chosen key will send the translated code of the second key when pressed. The other option is to follow this process and add the full path to the command you want to execute in the "Command" field.
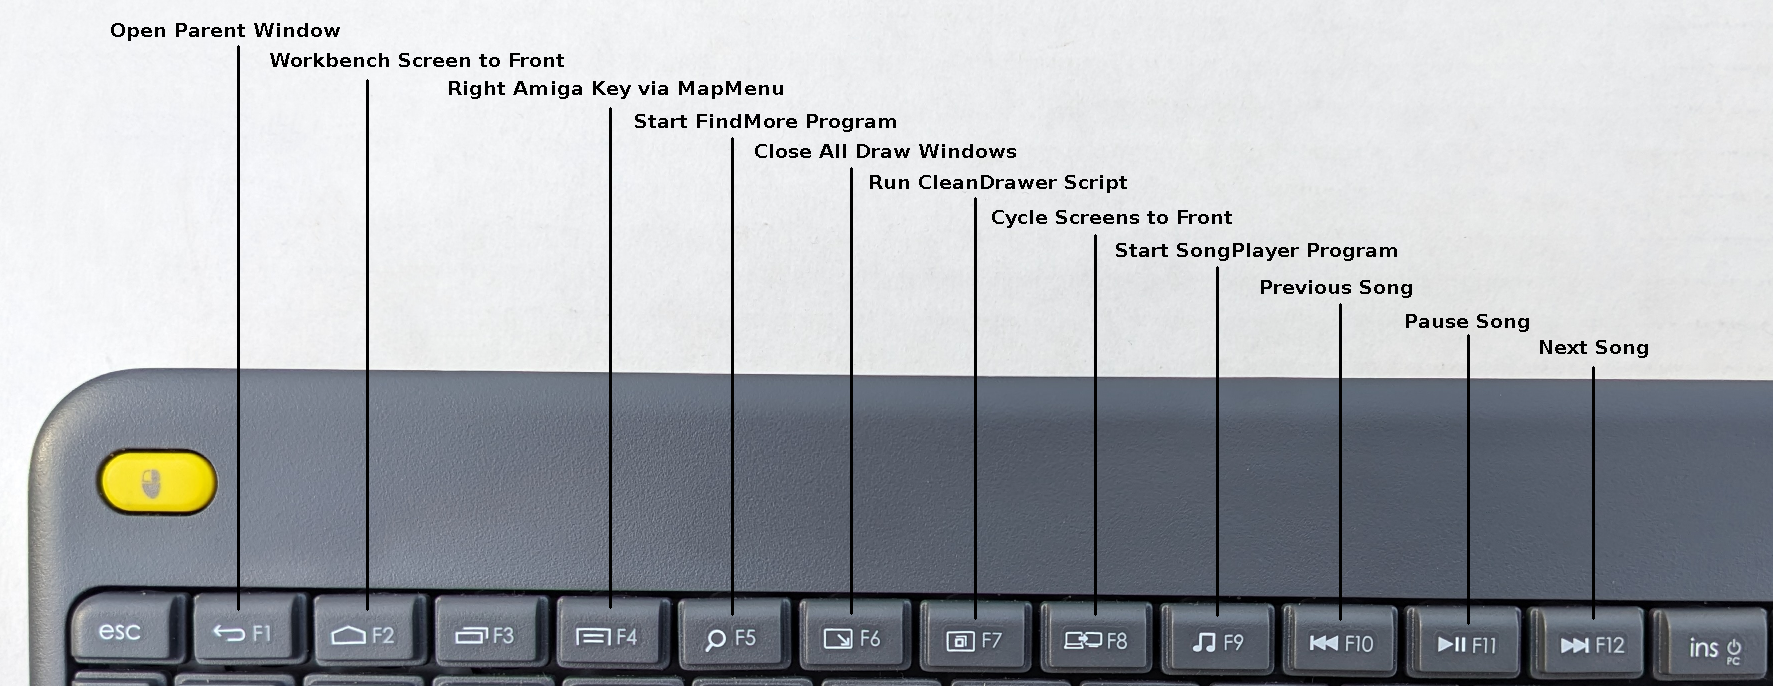
My Key Assignments
There you have it
Most of these tips can be used with many keyboards. I hope you find something useful here, even if you aren't using a Logitech K400 Plus keyboard. Let me know in the comments. If you have other ideas which make using multimedia or touchpad keyboards easier I'd love to hear about it.