Amiga 4000T Tape drive and ZIP drive installation

 For those who regularly read my blog, you would know that back in 2023 I did a huge Amiga 4000T rebuild, adding all the cool stuff I always wanted to have on it. Cyberstorm 060, ZZ9000 RTG, Ethernet, AmigaOS 3.2, AGABlaster, SCSI Scanner, MIDI, loads of software, and so much more.

You can read the two parts of the blog series here and here.

In the second part, I tried and failed to get not one, but two different DDS3 tape drives working with the Amiga 4000T. I got another different tape drive model (DDS1) to try again.
This weekend I decided to have another go at it - and this time I got it working! :-)

This situation came about because I attended an Adelaide Retro computing swap meet a few months ago. 
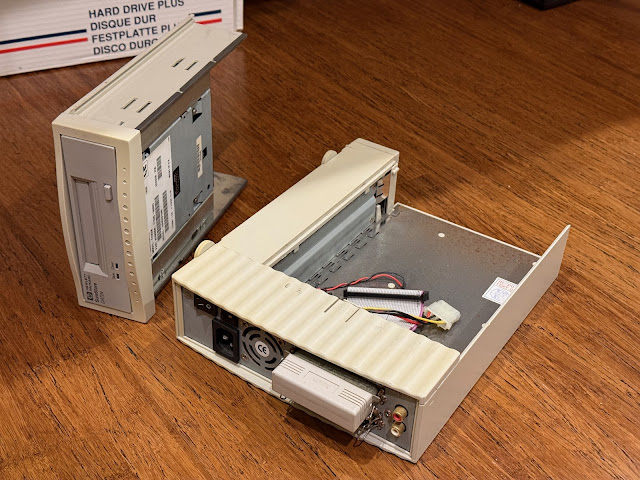
While there, I picked up a HP DDS1 tape drive in an CD enclosure it clearly wasn't meant to be in (see below), and some SCSI zip drives, all in unknown condition.. 
I also found an IDE ZIP drive going cheap on Ebay locally in the last week, also unknown condition.
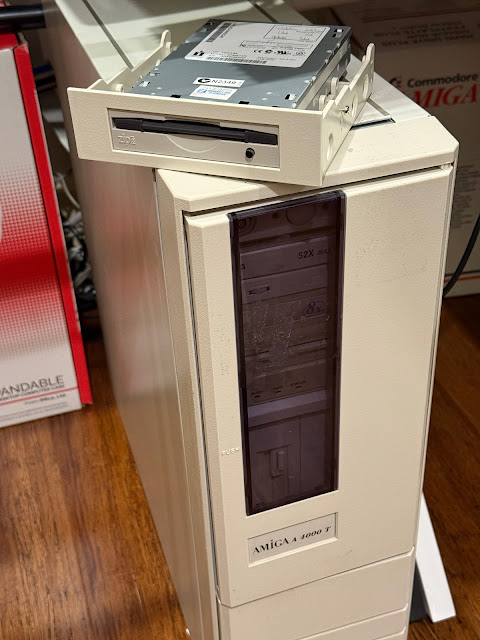
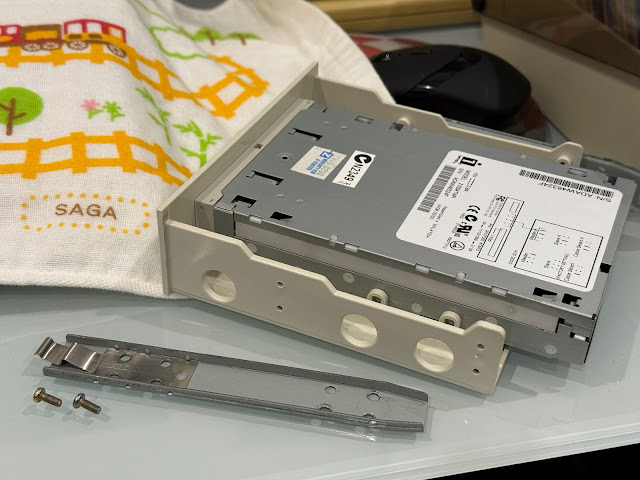
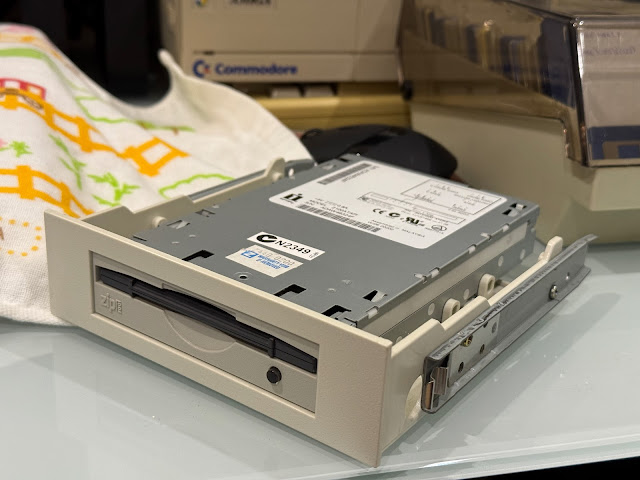
So, first up  I installed the IDE ZIP drive into my A4000T before doing the tape drive. 
I now have SCSI zip drives working on my Amiga 3000, 2000, A1200 and A600, but not the A4000T. It will make data transfer easier since not every Amiga has a USB card in it.

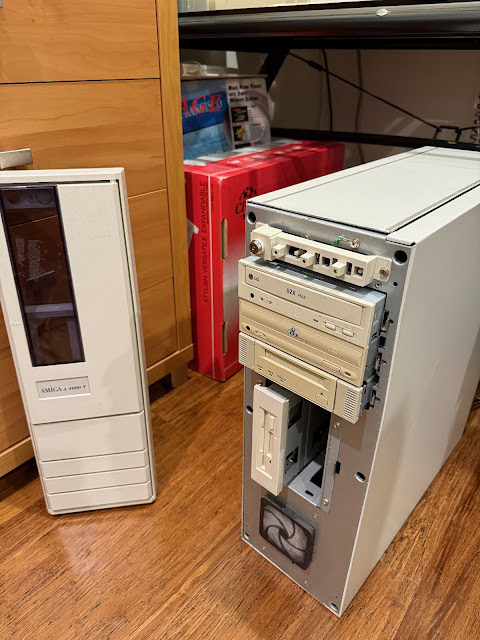
To be honest I sometimes think I could pull apart the A4000T case with my eyes shut - I have done it so many times now.

I remove the front part first, and then unscrew the case with it lying on the ground.

I then removed the Sony DDS3 tape drive that had caused me nothing but grief when I tried to get it working last time...

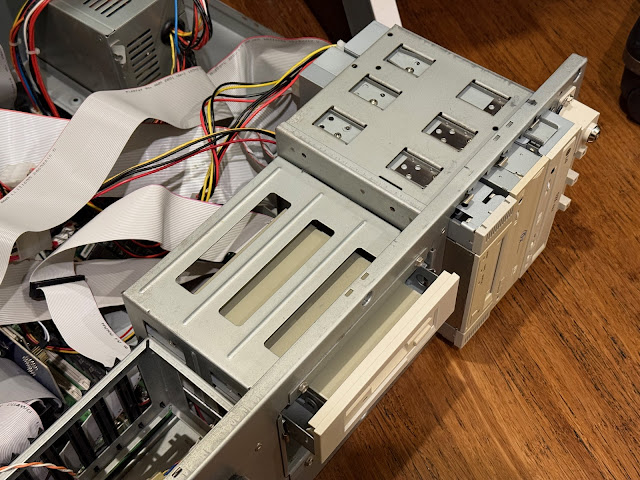
The A4000T uses slide rails connected to the 5.25 bay devices to make it easier to insert and remove without screws in the bay itself.

Mind you, you need to remove and re-attach the rails to the device being swapped in...

Being an IDE device, I need to care about whether the device is set to Master or Slave on the IDE bus. The jumper is on the back of the ZIP Drive, and helpfully the product label on top explains which jumpers need to be closed for each mode.

I plan on removing the IDE CD-ROM drive that shares the same IDE bus from the Buddha Zorro card, so technically it doesn't matter whether the Zip drive is master or slave. I slid in the ZIP Drive into the space vacated by the Tape drive, and disconnected the LG IDE CD-ROM drive. I still have the SCSI CD Burner, so I don't really need two cd drives in the A4000T.

I then booted up the Amiga 4000T and transferred the ZIP0 (Amiga), ZIPX (PC) and ZMAC0 (Mac) Dosdriver mountlists from the Amiga 3000, since I have a Zip drive on that.

I then updated the SCSI device name to buddha_atapi.device rather than SCSI.device, and then rebooted the Amiga 4000t - and the ZIP drive works! I inserted a previously FastFileSystem formatted Amiga 100MB Zip disk and it appeared a few seconds later on the Workbench, ready to use!
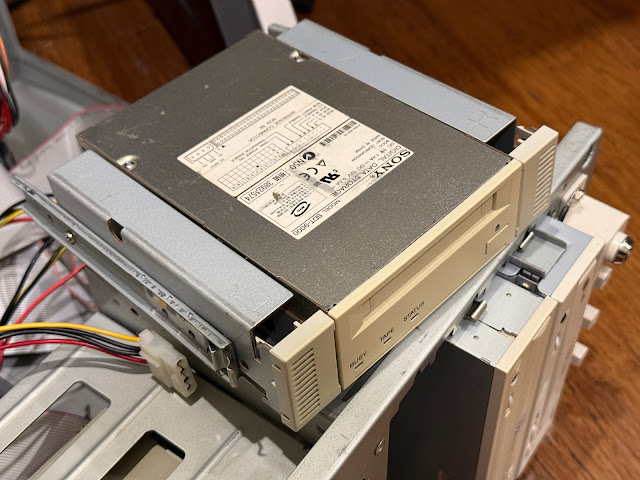
With that done, I turned my attention to the Tape Drive installation. I eventually removed the HP DDS1 SCSI tape drive from the enclosure it was sold to me in.

I wanted a DDS1 tape drive specifically, as I found that the DDS3 tape drive media I was trying before was not detected successfully by the Diavolo tape software. I confirmed in the settings that it only seemed to know about DDS2 and DDS1 tape drive types in the DDS tape drive model support.

I suppose I could have tracked down a DDS2 drive, but remember I already wasted  bunch of money getting two DDS3 tape drives and didn't want to waste more money. DDS2 tape drives are more in demand and cost a lot more. 
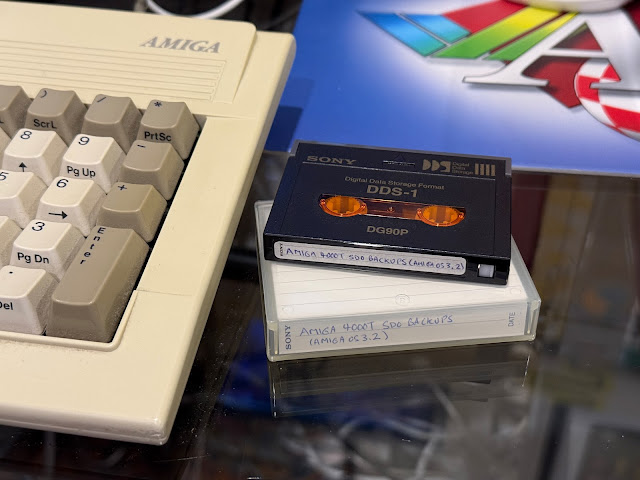
I settled for this HP SureStorte DAT24 SCSI drive which uses DDS1 tapes (1.3GB uncompressed, 2.6GB compressed). This drive was really cheap, less than $50, and came with a set of new Sony DDS1 blank tapes to use with it. I was happy, and hoped that third times a charm! :-)
I removed the rails from the LG CD-ROM drive and attached them to the HP DDS1 tape drive.

I then slide the HP Tape drive in the remaining horizontal 5.25 bay.

I then connected up the SCSI cable into the back and molex power. I needed to change the SCSI cabling a bit since the old tape drive was originally below the cd burner. On reflection I maybe should have put in place of the old tape drive to avoid the extra work, but well, you know. I didn't. Retrospection is always 20/20....

As mentioned I got a number of new, never opened Sony DDS1 tapes to use with it.

In my first professional IT job, I had to use DDS1/2 tapes a lot to back up Windows NT4 and Red Hat Linux servers, so this is very familiar for me.

The guy who sold me the drive had no idea if it worked or not. So buying it was a gamble. I hoped it would work.

I inserted the tape into the drive, and it quickly updated to show the tape was accepted and ready with a green light on the Tape LED going solid. Promising.
The software I use on the Amiga 4000T to control the tape drive is Diavolo Backup. 
I bought the original release version below, but upgraded it later to run the Diavolo Backup 2000 release.

I ran the Diavolo backup software on the Amiga 4000T and got it to detect the Tape drive, and it quickly picked up.

I started out with a simple test run, backing up one drawer on the system SD0: partition, the Devs drawer. 
To my amazement - it worked straight away, and the tape streamer ran very well - the system kept up with the drive, and the tape didn't need to pause at all while running the backup - excellent!

The tape backup completed quickly and all went well:

I am genuinely so happy I now have a working Tape drive on my Amiga 4000T!

I wanted to use the Tape drive to backup the main System AmigaOS 3.2 partition, so I set to work setting up the backup job in Diavolo Backup:

I select the HP tape drive as the destination device (above), and by clicking the Settings button next to the Device I can detect the drive again or adjust the setting for the tape drive functions:

I click on OK and go back to the Backup job screen - I double click on the AmigaOS32 (SD0) partition, and it then reads in the directory and file information, to allow me to select whatever files and drawers I want to backup. 

To backup everything I just double-click on the root drive on the top left pane, and it highlights everything on the drive. You can also select specific drawers and files if you prefer. With everything highlighted, the window updates to show how many drawers and files I have selected, the space needed for the backup to complete. 172 floppy disks to backup to floppy! Heh...

After clicking on return, the Backup job window updates to show the selected files/drawers, backup size, and predicted time to do the backup:

I tell it to start the backup, and I then name the job with description title and date:

The next window queries the tape catalog, and checks to confirm where on the tape I want to have the backup stored, given I already did one backup earlier to the tape. It shows the earlier Devs drawer backup I did (the space it used also), and the remaining space:

I selected the remaining free area and I chose not to overwrite the other backup stored on the tape. There is plenty of space on this 2.6GB tape (with compression enabled) to fit a number of system backups.

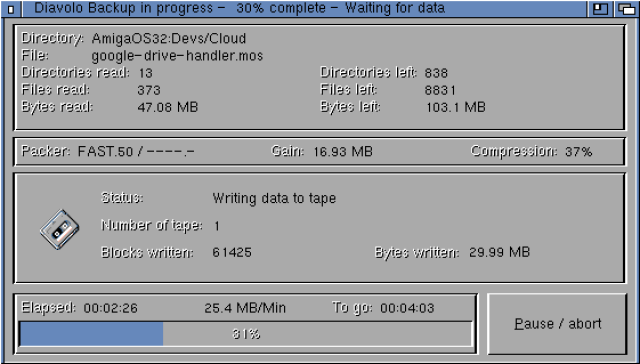
I then click OK and the tape streamer backup starts.

I can't begin to tell you the excitement I felt at finally being able to use a tape drive on my Amiga system! 

I used to use a tape drive on my old 386PC in the mid 1990's to back it up, and I like the security that comes from having the backup available anytime.

I realise that these days I can just take an image of the SD card to my Mac Studio or Windows 11 PC - job done. But tape drives are part of the retro computing experience - we didn't have that option back then. 

Tape backup was the way. 
And now, in 2025, I can finally backup my Amiga 4000T AmigaOS3.2 system using a tape drive!
The backup completed in just over 8 minutes as below. 
8 minutes to backup 150MB, with 37% compression applied. 
It would have run the backup faster without the compression enabled, but this maximises how many backups I can store on each tape before having to change tapes. Given I only have a limited number of new tapes, I want to extend the tape life as long as possible.

I powered off the A4000T and put the case back together.

I am VERY happy with the setup on the A4000T now. I can now do regular backups of the system drive to Tape whenever I want to make changes to the system configuration.

It is possible I might add another floppy drive to the remaining empty vertical 5.25 bay (normally used for a hard drive but I have two CF converters in the rear slots instead), but I don't actually need another floppy drive. I have never had the requirement in the 20 years I have owned this A4000T. 
That said, I do plan to add an external Iomega 1GB Jaz drive to the A4000T. 
When I was using Zip drives in the late 1990's on my Amiga 1200 system, I saw the Jaz drive come out, and it apparently works with the Amiga just fine. I wanted one back then as one Jaz disk capacity was ten times a standard zip disk, but the cost was too high. 
In 2025 I can now afford one. I bought one recently on Ebay and when it arrives, I will probably hook it up to the back of the SCSI Scanner since it uses the same SCSI connector type. 
So, I will finally have a Jaz drive to use with my Amiga, as I wanted to do back then.

You may be wondering what will I do with the empty external SCSI enclosure the DDS1 tape drive was in? Funny you should ask. I have a plan. :-)

What is the plan? Well, perhaps this next picture provides a clue. 
A while back, I managed to secure the Amiga Unix AMIX install tape, boot floppy install disks, manuals and a compatible Wangtek tape drive for the install tape, which I have now installed into the SCSI external housing.
Not sure when I will get time to do it, but I do plan to try AMIX out on my Amiga 3000 system. It is compatible with it, since it was one of two Amiga models that were released with a "UX" version that was installed with AMIX rather than AmigaOS. (Amiga 2000UX and Amiga 3000UX)
I will prep a blueSCSI partition setup to use with AMIX on a seperate new MicroSD, so I keep my current A3000 super kickstart 1.3/3.1.4 dual boot hard disk setup I spent a lot of time building. AMIX is just to play with, not something I will use everyday!
I can then use AmigaOS 3.1.4/1.3 setup as usual, and just swap out the MicroSD whenever I want to play with AMIX. Well, that's the theory anyway. From what I have read, it is a serious pain to get working.
When I get to it, you can be sure I will cover the build in this blog.
For now though, I kicked back and relaxed to enjoy some CDXL music videos I previously prepared to use with AGABlaster on my Amiga 4000T.

I love my Amiga 4000T setup now. It's awesome and I am very satisfied with what it can now do - tape drive backups and zip disk transfers now added to its considerable functionality in 2025!
I hope you are all enjoying your Amiga hobby also (if you own one still). Beyond applications, demos and utilities, there is also more new game software still to come in 2025 like the commercial release of Settlers 2 AGA and others as well. I can't wait to try them out on my A4000T!