AmigaOS4.1 Classic on WinUAE Part 2
In Part 2 of setting up AmigaOS4.1 Classic on WinUAE I will look at how to prep and install AmigaOS4.1 Classic on a hard disk file in WinUAE.
There is a guide I followed for the AmigaOS4.0 installation here. However there are no pictures so I have done screengrabs to show the process to hopefully make it clearer what needs to be done.
I created a WinUAE configuration with a standard A1200 Kickstart 3.1 system, 2MB Chip RAM, 4MB Fast RAM (not needed really), with the Workbench 3.1 Install floppy mounted in DF0, and the AmigaOS4.1 HDF I created in Part 1 mounted (with RDB enabled) as DH0: using the default UAE driver.
Make sure that the AmigaOS4.1 Classic configuration created in Part 1 also has RDB enabled on the hard disk created.
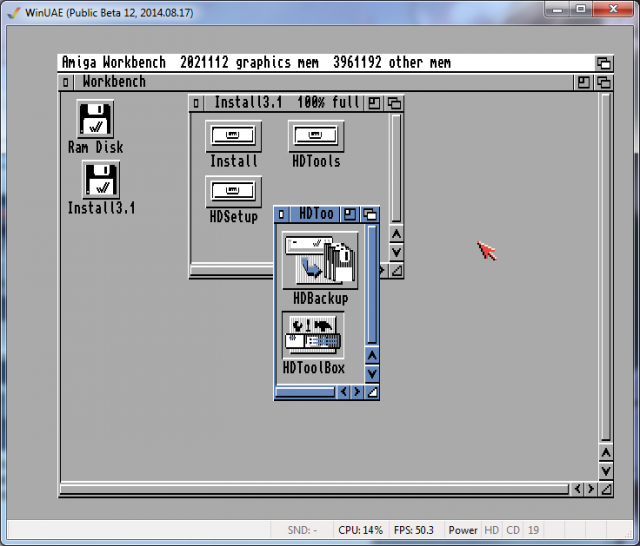
When the emulation is started and the Install disk has booted to Workbench 3.1 desktop, open the Install3.1 disk, browse to HDTools folder and run HDToolbox:
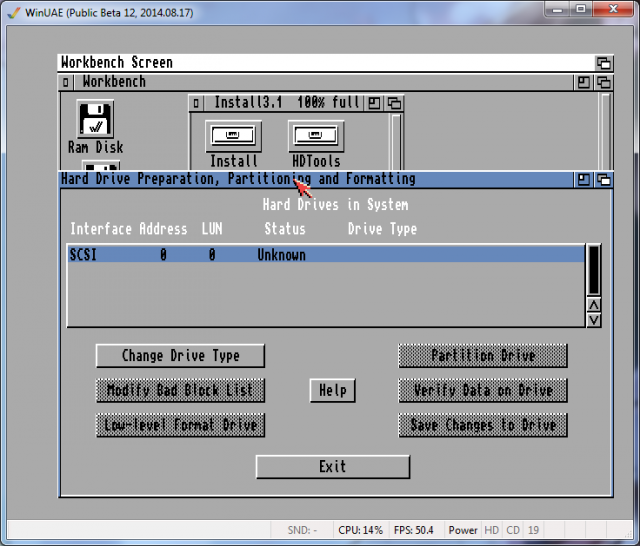
In HDToolbox you should see the unknown SCSI disk as below:
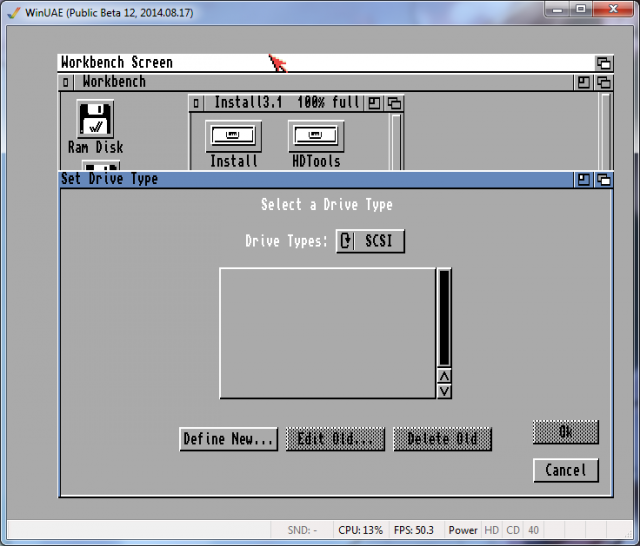
Click on Change Drive Type, which should show the following screen:
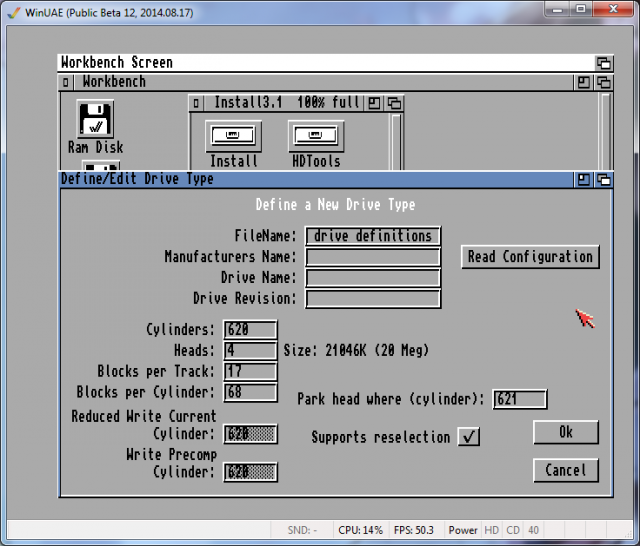
Click on Define New... to define a new hard disk drive type:
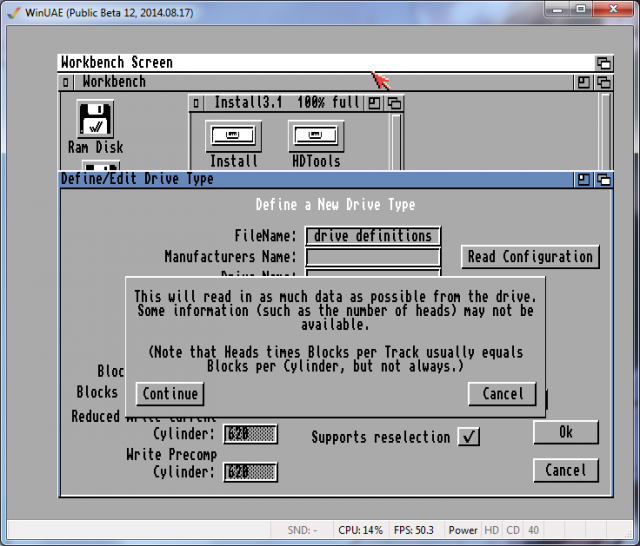
Click on Read Configuration, then click on the Continue option in the window that appears:
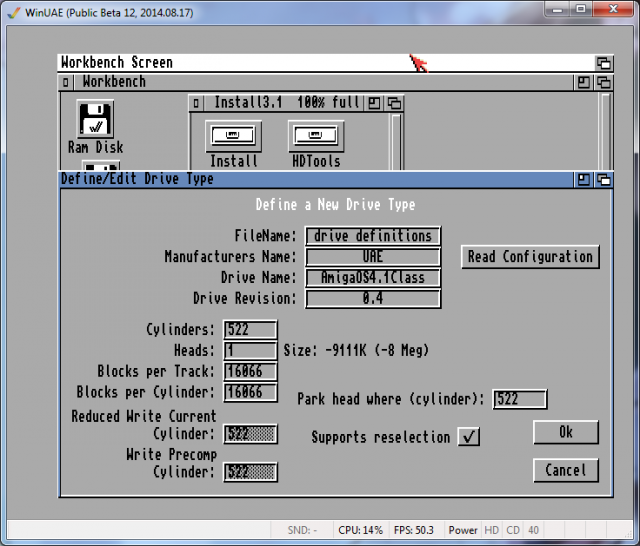
You will then get a screen like below. Ignore the incorrect sizing shown. Click on OK:
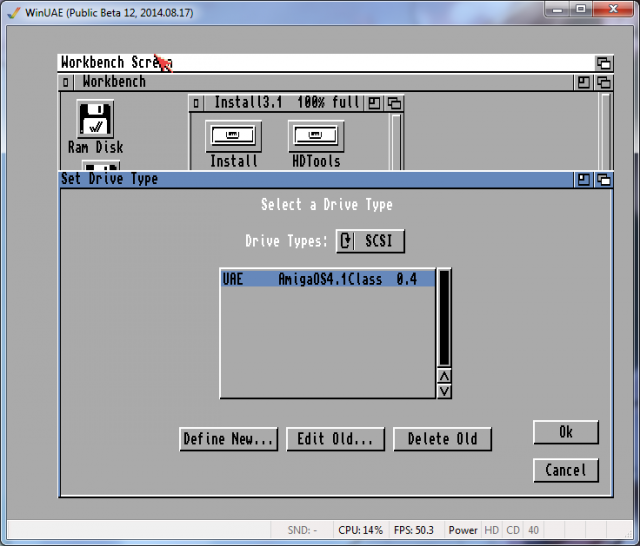
You then get a screen similar to the one below. Click on OK:
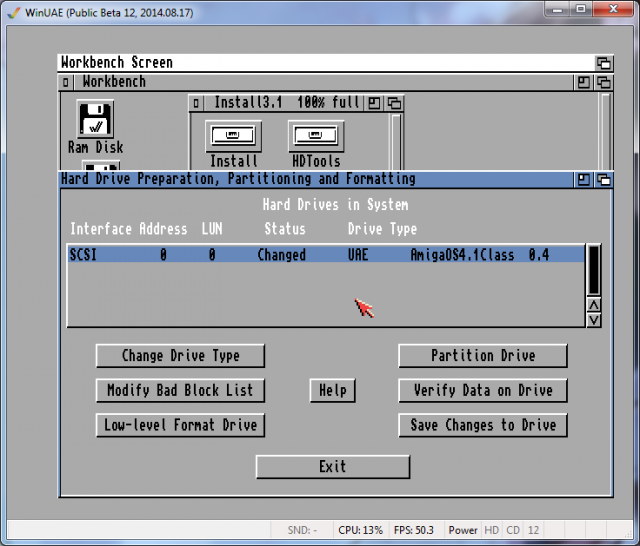
Now the drive status has changed and is shown as below:
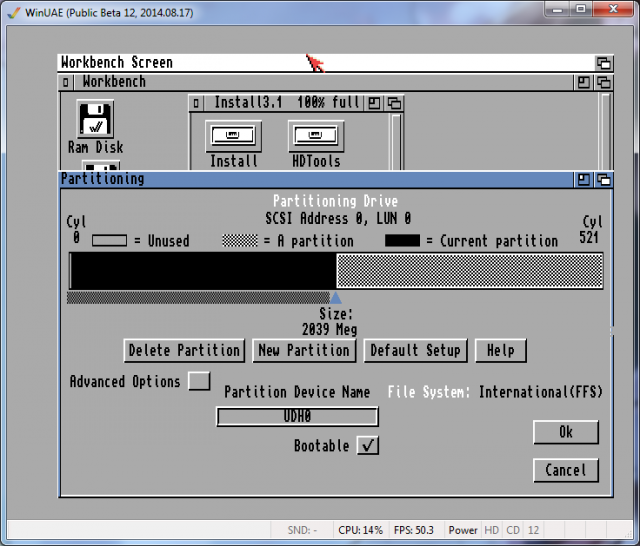
Next, click on Partition Drive:
I removed the second partition (click on the partition on the right, then select Delete Partition).
Then drag the first partition to cover the rest of the drive. Click on Advanced Options checkbox to see the additional options as shown below:
I changed the Partition device name to DH0, the File System to Fast File System (click on Change... option to change this) and then click on OK:
Now click on Save Changes to Drive, and then click Exit.
Now close the WinUAE emulation, then relaunch WinUAE and load the AmigaOS4.1 configuration created in Part 1. Then launch the emulation. When it boots you should now see the new Drive DH0:Uninitialised icon as below:
I then select the drive, then right click on the Title bar, highlight the Icon Menu and select Format Disk to see the Format Disk screen below:
I change the Volume name to System, uncheck the Put Trashcan option, and select Quick Format - it will double check you really want to do this and then it will format - this takes a few minutes so please be patient:
When done you will see the formatted drive, ready to go:
Double click on the AmigaOS4.1 Installation icon to start the installation:
Click Next and accept the Terms and Conditions. Then ensure Amiga 4000 is the model automatically selected in the screen below and click on Next:
Click Next on this next screen:
Next it asks where to install - it should pick DH0 automatically - click on Next:
Change the Graphics Card to Picasso IV and click on Next:
Select the resolution. It gives the option for 1920x1080 (shown below) but the Picasso IV can't do this - I suggest 1024x768 @ 60hz:
Uncheck the Load the cybppc.device option and click Next:
On the next screen below just click Next:
On the next screen below just click Next:
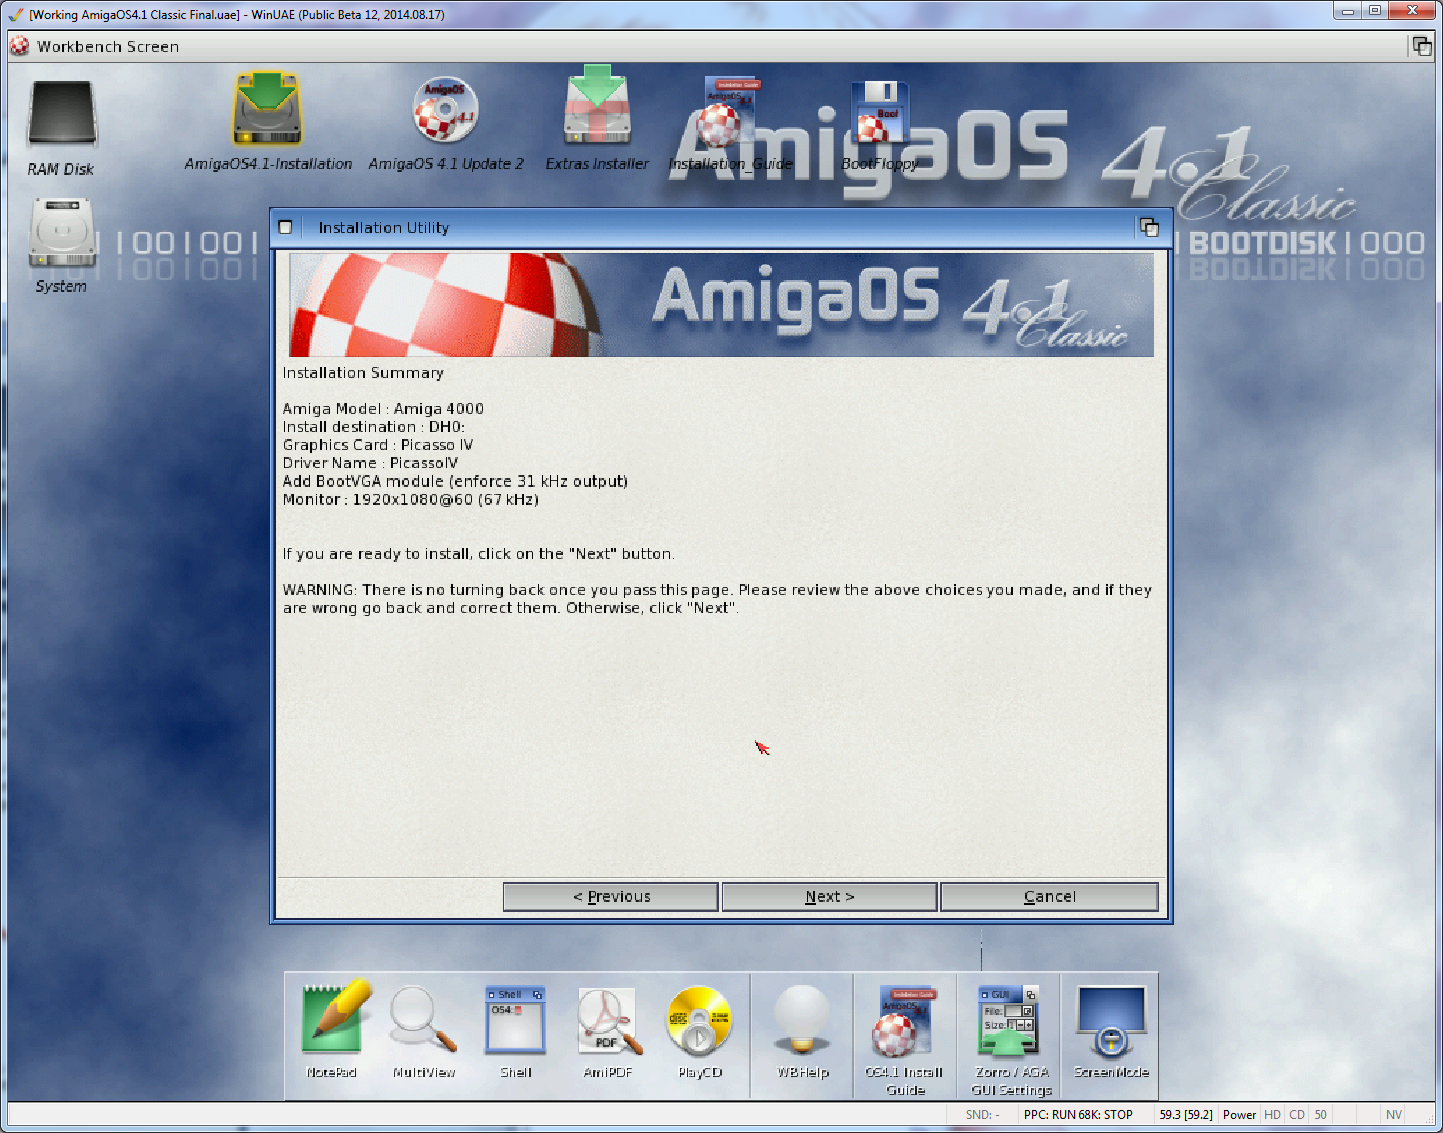
You are now presented a summary of your installation choices prior to the Installation of files onto the hard disk:
After clicking Next, the installation of files to the hard disk starts:
As a guide, it took 1 hour on my PC to do this installation section until I got the completed screen below - so make a coffee, watch some tv or whatever!
At this point, Click Next to finish the installation. Press F12 and hit Restart (don't use Reset - soft resets don't work properly when using ppc emulation in this WinUAE version).
When the WinUAE configuration GUI comes back up, eject the boot floppy adf from DF0 and eject the AmigaOS4.1 Classic cd image and then save the configuration. Then start the emulation to boot AmigaOS4.1 from hard disk.
As a guide, booting takes around 4 minutes. You then get the post install configuration options - fantastic! It worked!
I check the screen resolution since the Picasso IV is defaulting to 1024x768x16 bit instead of 24 bit. I changed this as below, clicked Test to make sure it worked, then Clicked on Save to make the change permanent:
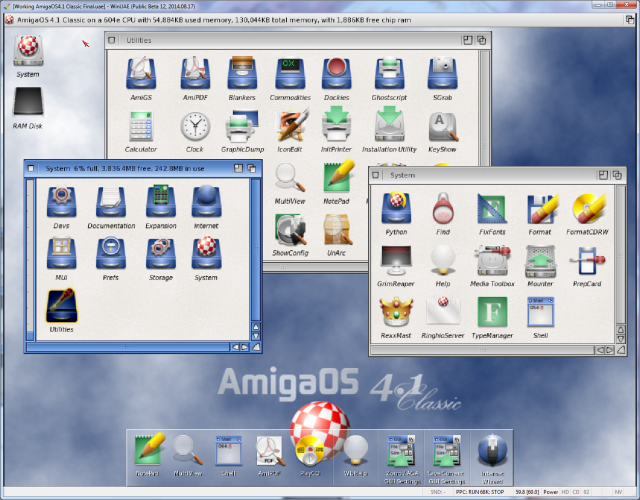
Here is the AmigaOS4.1 Classic desktop running under WinUAE:
At this point, you really should close WinUAE and make a backup copy of the HDF you just created so you don't have to do that installation again.
Next I downloaded the AmigaOS4.1 Updates 3,4,5 and 6 from Hyperion's website. I then used Imgburn to create an iso containing those files, and then mounted the cd image into this WinUAE session (using F12 within the emulation, then selecting the cd image file). The cd image I created then appears on the AmigaOS4.1 desktop. I do a directory in Shell to show the contents:
Next I ran UnArc from the System:Utilities folder (and added it to the AmiDock) to extract the Update3 archive to RAM: - this also takes a while, so please be patient:
Once extracted, here is the Update3 folder:
I then kicked off the Update 3 installation:
The install takes a little while, so please be patient:
Install then completes. Make sure you uncheck Restart my Computer now and then click Finish. Press F12 and select Restart in WinUAE and relaunch the emulation:
After it boots back up we now have Update 3 installed:
We can then move on to extract and install Updates 4,5 and 6. It is required to install each in order as the updates are not cumulative.
I won't bore you showing all those installs, but they follow the same pattern as the Update 3 install I have shown. Allow plenty of time for these!
In Part 3 I will cover the next part of the build configuration. Until then, have fun with AmigaOS4.1 Classic on WinUAE!
