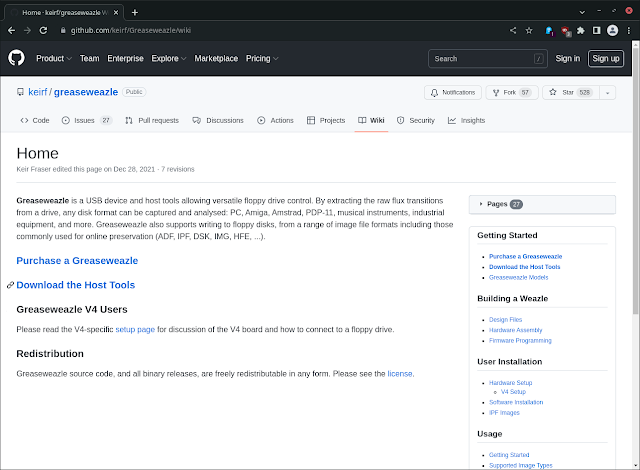
Checkmate 1500 Mini case build with Pi4B and Greaseweazle V4
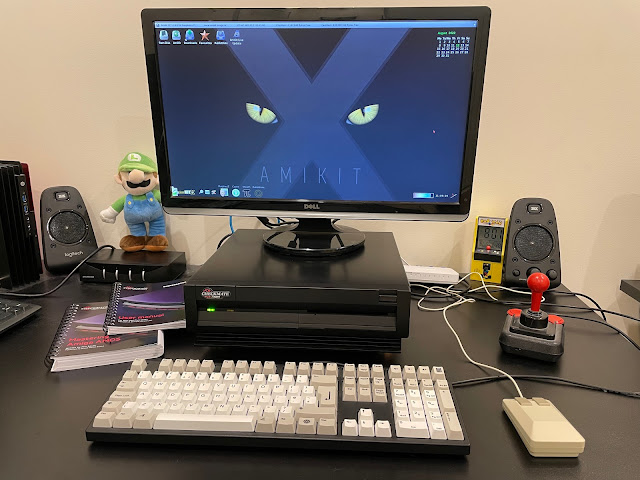
Recently I have been working on another new build project, this time using the recently released Checkmate A1500 Mini case, running a Raspberry Pi 4 with AmiKit XE.
I opted for the Black Van Helsing pack, which is intended for installation of the Raspberry Pi 4B and includes all the fittings needed (minus the Pi 4B itself).
You can also choose other packs, which are setup with the parts needed for installing FPGA based Amiga systems like UnAmiga, Mister, and if you are lucky enough like myself to have a AmigaOne A1222 to play with. You could also put in a Mini-ITX Windows/Linux PC and run Amiga emulation on that.
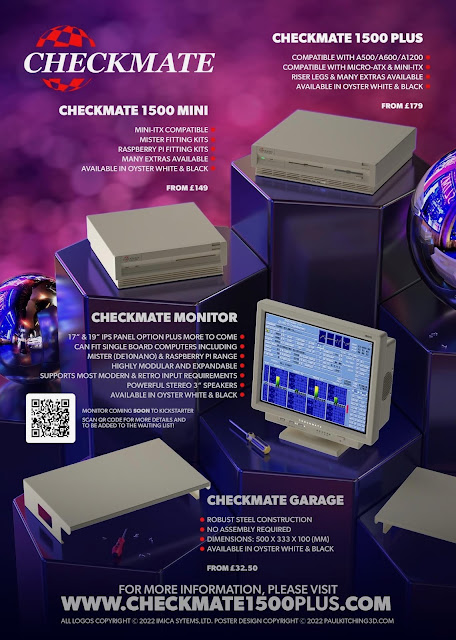
The larger Checkmate 1500 Plus case is still available for adding in Classic Amiga system boards (like Amiga 1200, 500, etc), and larger PC motherboard build projects.
If you want a small computer garage to tidily store your All-In-One Amiga 1200/500/C64/Atari ST/etc under a CRT or other monitor, iMica is also selling a solution for this too.
Steve and his team are working on some other interesting projects too, including the upcoming Checkmate Monitor 1087s and 1089s, with a Kickstarter on it's way soon (Image above and below used with permission):
For now though, I turn my attention back to the Checkmate 1500 Mini case build.
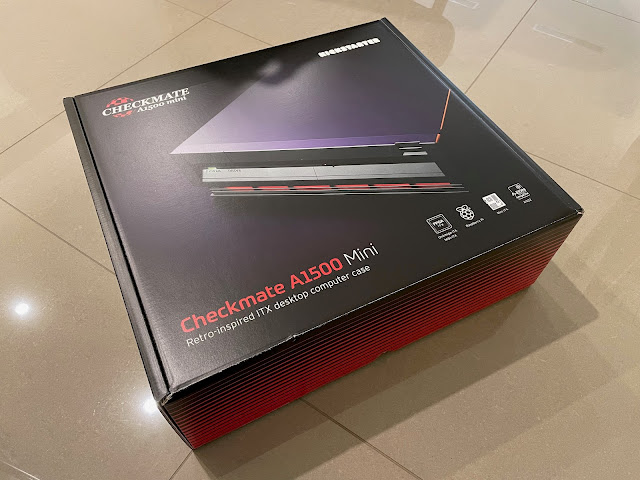
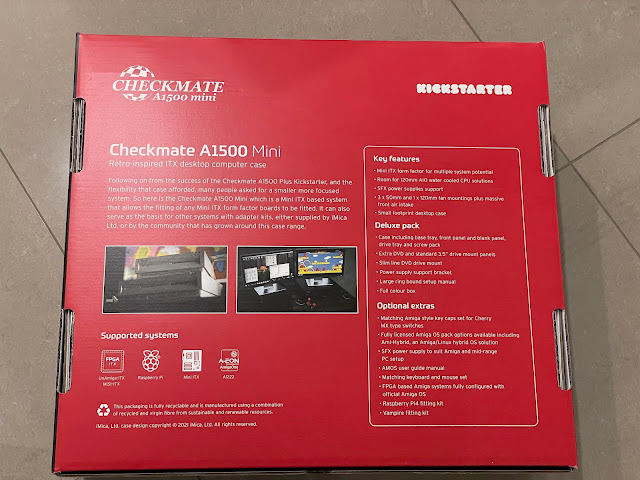
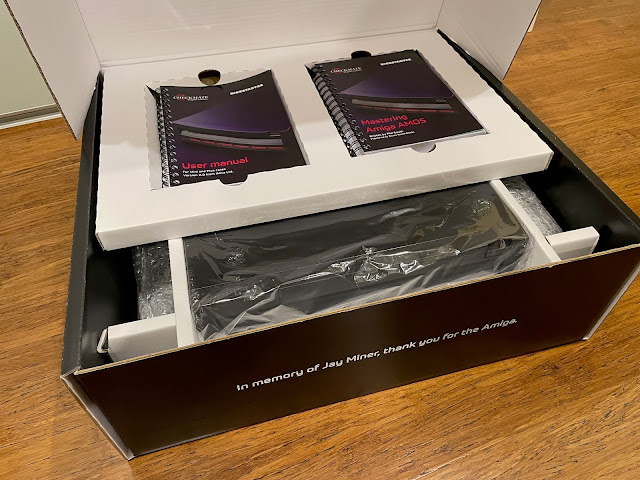
The package I selected was delivered to Australia very quickly in this impressive box:
Previously in 2019, I purchased and built out the full Checkmate 1500 Plus case, and I have done many projects with it since over the years, with Vampire, Pistorm upgrades and many more.
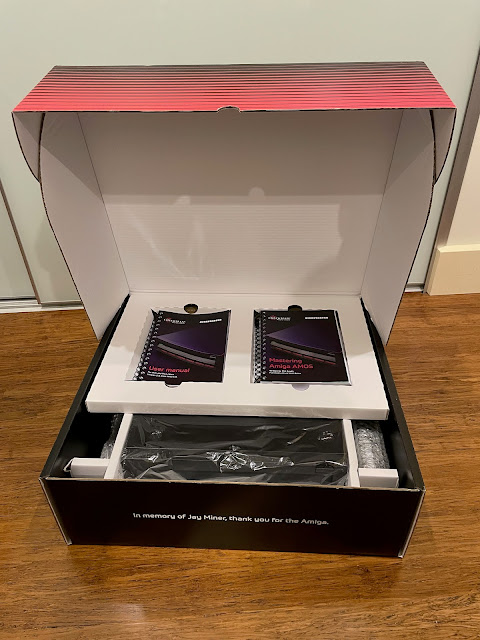
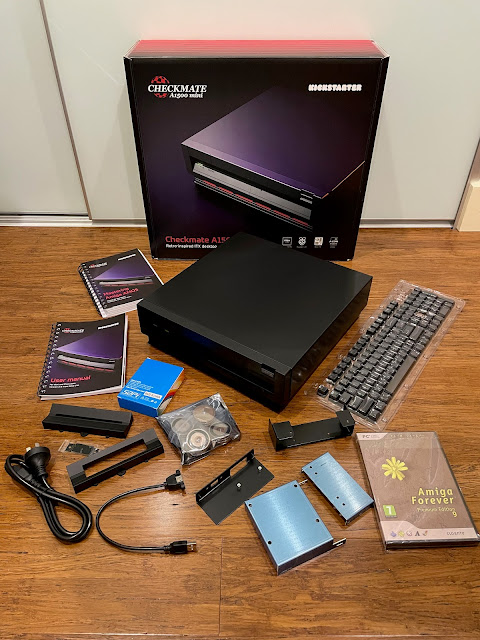
I like the nice tribute to Jay Miner when you open the box (as above), and the ring bound User manual and Mastering Amiga AMOS manual positioned in their own section immediately visible.
Underneath is the main case, carefully packaged, along with the accessories and custom black Amiga keycaps to use on your own favourite Cherry MX or clone mechanical keyboard if you like. (you can have biege keycaps also)
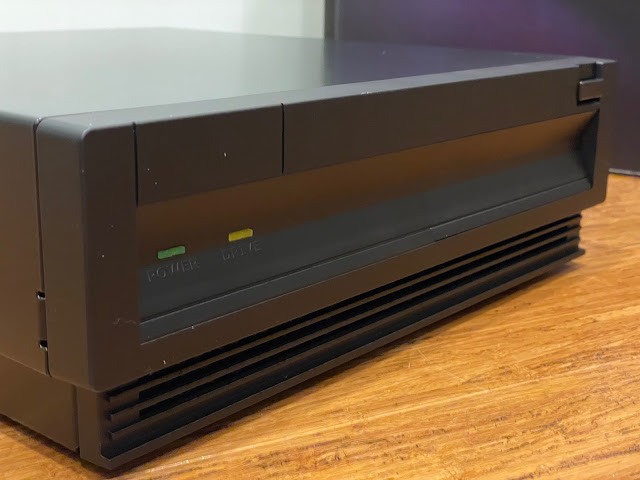
The style is clearly based on the original Amiga 3000 case. You can also have this case in a beige colour also if you want something closer to the original Amiga case colour. Personally though, I think the black looks really cool.
The view of the case from the rear, showing the ports in place as delivered, plus the slots and included small SFX PSU. Make sure the PSU Voltage switch is set correctly (on the back) for your country before turning it on!
Closer in, you can see the two HDMI ports USB-C, audio out port, and a slot open space for the Raspberry Pi 4 ports once installed inside the case.
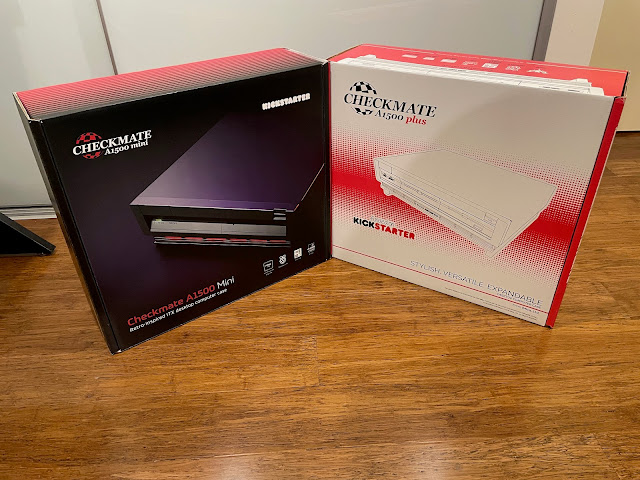
As a comparison, you can see below the difference in size between the Checkmate 1500 Plus and Checkmate 1500 Mini cases:
The Checkmate 1500 Plus case gives you an extra 5.25 bay to play with at the front, allowing more front mounted CD/DVD/floppy/USB/other configurations if you need it.
As with the Checkmate 1500 Plus case, it is important to read through the well prepared and detailed User manual, which explains what you need to do to build the Mini case for your planned host system - in my case, the Raspberry Pi 4B.
An obvious question one might ask is why would you take such a small system like the Pi 4B and put in a larger case like this?

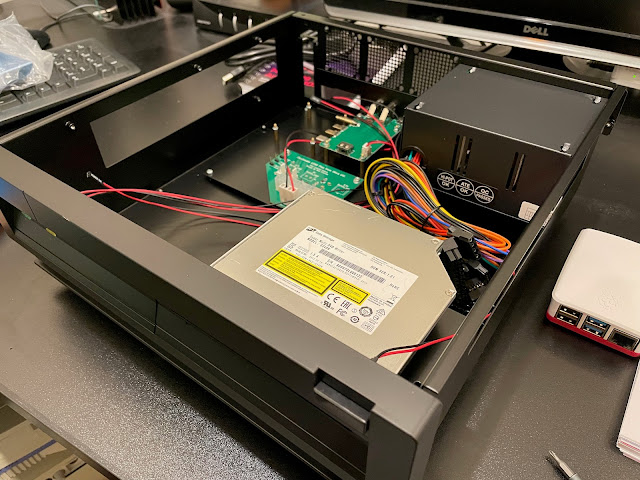
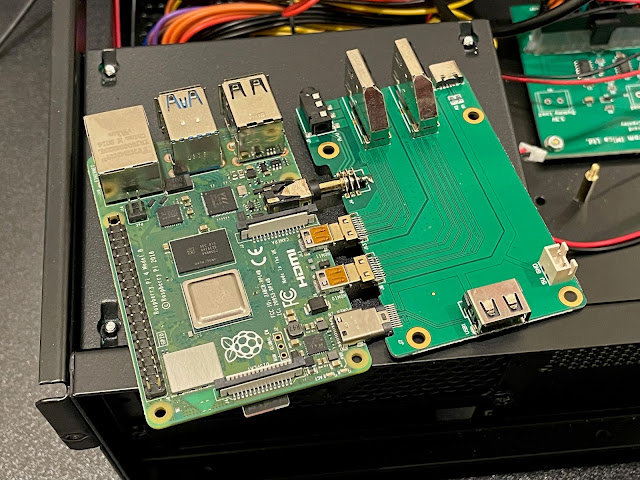
Inside you can see the two mounted boards, one for the connection to the Pi 4B (to supply power, redirect the HDMI, USB-C and audio out ports to the rear of the case. There is a internal USB port on this board also, but this is not currently usable from the Pi.
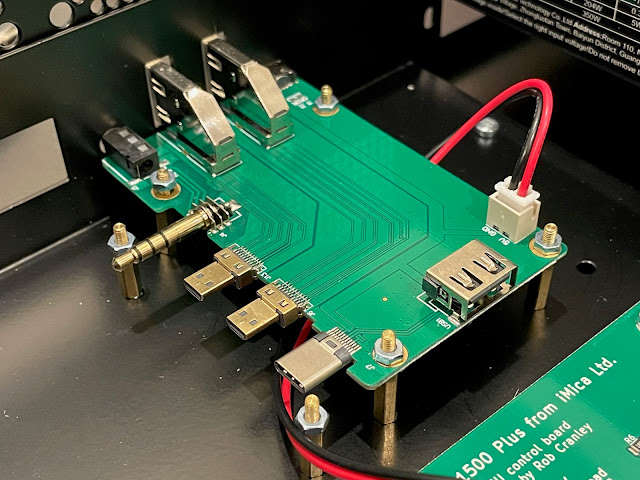
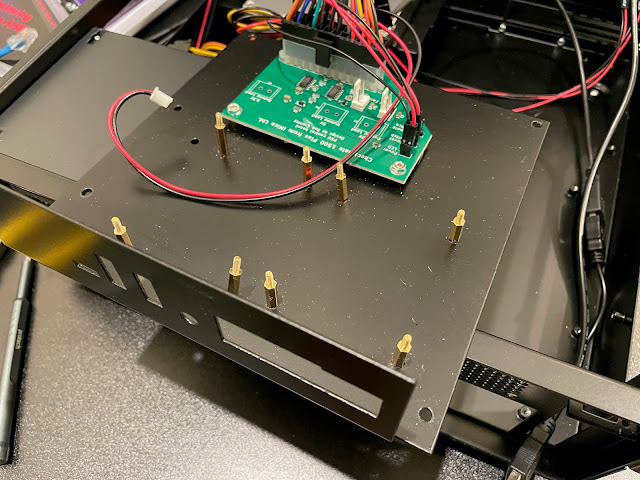
You can see both boards are mounted on a seperate plate that is then secured to the bottom of the case. This is important, as we will see later.
Looking at the 5.25 bay internals, you can see it is easy enough to swap out the blanking plate for a DVD/CD faceplate or 5.25 to 3.5" bay faceplate for a floppy drive, USB hub mounted in a 3.5" enclosure, etc. With the Van Helsing pack, you get all these faceplates included, and a shorter 5.25 riser if you need more cooling solution space in front of the 5.25 bay.

Turning the case over you can see the cooling fan vent area and also the four velcro feet at each end of the case.
This nicely gets us to the first task to work on, attaching the optional "gold" feet to the case. They are metal and very solid, but not quite gold in colour - very close though.
Checking the case I realised I would need to remove the PSU, 5.25 bay riser plate, and the plate holding the power board and pi port extender, as the hole for the feet is located under them. This is why I am doing this task first.
With the plate removed, I can now see the empty case, with all the screw holes for the feet visible, ready to be attached.

I should get some more of these feet for the Checkmate 1500 Plus case! That said, I do have the extenders to create a keyboard garage underneath the Checkmate 1500 plus.
The User manual provides plenty of information here on how to do this, so I found myself referring back to it quite a lot.
You need to position the DVD slim drive frame over the screw holes in the 5.25 riser so it is in the right place for the DVD drive to align with the hole in the DVD faceplate.
Here is the DVD faceplate now installed in the case - you can see (with difficulty) the DVD slot load drive is lined up behind it - small adjustment needed as a little bit high still:
This is where the case really comes into its own. Being able to use the DVD drive with the Pi 4B, all integrated in the one Amiga 3000 style case looks fantastic.
The next tip that will help (as you do assembly) is to remove the mounting plate for the extender and pi from the case (it was already for me since I installed the feet) as it is much easier to mount the boards on to the screws.
I deliberately loosened the mounting screws as shown, to make it easier to align the screws with the board holes, without putting any pressure on the connection between the boards to mount them both safely.
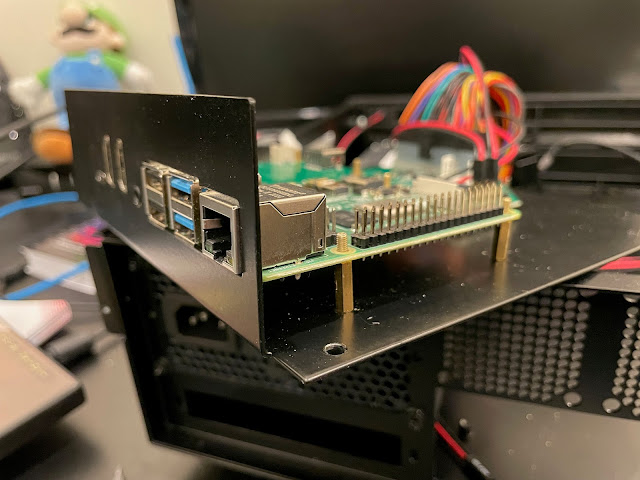
I then applied the nuts onto both boards to secure them to the plate underneath. It is easy to damage the boards putting the nuts on as there is no room between the holes and important traces on the motherboards, so I just did it finger tight, which is fine.
I applied some heat sinks to the Pi 4B chips to allow for overclocking it (you must have these applied if you plan to do that). By default the MicroSD AmiKit XE (as delivered) is not overclocked.
I also connected the SATA connector to USB cable and connected via the open slot to the USB ports on the back of the case.
One thing worth mentioning here is that the Pi4B has nowhere to connect a Hard disk LED to illuminate the HDD led on the front of the case.

I pleased to say it booted straight up in AmiKit XE.

I settled back and enjoyed my 1080p AmiKit XE workbench and played a few mods and games to celebrate.
If you get the black case, definitely get the gold feet option.
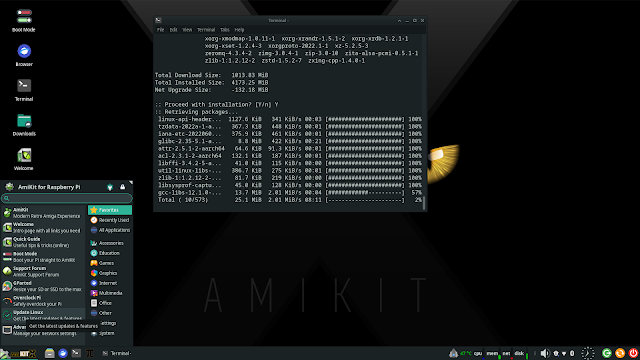
The Linux upgrade was also a major version upgrade, so this took a while to complete - a few hours actually. Time for a coffee or two.
There is a setting that needs to be changed in /boot/config.txt after the Linux version upgrade, to change the dtoverlay setting from fkms to kms to resolve a small bug causing the mouse pointer to delay its movements. I read up about this fix on the AmiKit Discord channel.
As mentioned earlier, the Ami-Hybrid setup of this system allows me to use Rabbit Hole functionality to access applications on the linux host from within AmigaOS, and to access the drives of the Pi from within the Amiga emulation. You can configure this functionality within Amiberry GUI.
I then ran LibreOffice to create a document while enjoying Eagleplayer banging out the modules while I worked.
I also could download the latest Aminet software directly to the emulation, via Rabbithole drive mappings to make the Pi Linux partitions and Amiga folders visible and available from the host Linux system and from the Amiga side.
Next I connected up my Roland SC-88 Pro MIDI device with a Edirol MIDI to USB device to playback MIDI songs under Linux. I hope to get this working on the Amiga side eventually (i gave it a good go but Amiberry MIDI support is limited compared to WinUAE). For now, MIDI playback via Linux will have to do.

There are some excellent instructions on the website on how to install it under Linux, which I followed closely:
Some adjustments need to be made to those instructions given it is Manjaro and not Ubuntu/Debian Linux, so we need to go to Add & Remove programs in Manjaro to install the python-pip package:

Next I removed the DVD slot load drive from the Checkmate 1500 Mini case, and the DVD fascia too, as we can only have one of them installed at a time. I could then mount the floppy drive frame on the riser.
Anyway, moving on, I then mounted the black floppy drive onto the floppy drive frame, loosely initially, so I could line it up correctly to the floppy drive fascia on the case.
It also noted that the Greaseweazle needed a firmware update to 1.2, so I ran ./gw update to do this. It worked without any issues.
I then ran the export PATH="$HOME/./local/bin:$PATH" command to add this folder to the system path so I can run gw from anywhere.
With that done, and the Greaseweazle detected, I ran Amiberry (v5.1 as of this blog entry) to reconfigure it to use the Greaseweazle V4. The first setting to change is under Floppy drives:
I then saved the configuration and resumed the emulation. I then put in a real Amiga Workbench 1.3 floppy disk into the floppy drive and it comes up!
I then booted the Amiga emulation into Workbench 1.3 from a real Amiga floppy disk!
I then cleaned up the case a bit and attached the Greaseweazle to the top of the floppy drive so I could put the case lid back on.
I reckon this looks sensational with the greaseweazle floppy drive solution installed. I like it more than the DVD to be honest, as it provides me an Amiga emulation that boots and uses real Amiga floppy disks. I love it.
Feels right that I can have a disk box next to the system now, as I can now test all sorts of Amiga games and applications on disk!
I tried a number of games in Amiberry on the Pi 4B that all worked booting from floppy drive, starting with Simcity...
Games that I thought might trip it up like commercial copy protected non-dos game disks such as New Zealand Story, SWIV, Agony and Xenon 2 - didn't. All booted and run perfectly.
Dimitris (author of Amiberry) has done a great job with the Amiga emulation on the Raspberry Pi. It works very well indeed and is regularly updated with more features, bringing it close and closer to the functionality of WinUAE on Windows PCs.
There are the occasional Amiga disks (some trackmo demoscene disks) that I found can trip up the Greaseweazle, like below.
I feel like the Greaseweazle solution compliments the Checkmate 1500 Mini system beautifully, providing us all an Amiga experience using modern hardware and Amiga emulation, while keeping all the modern applications and toys we expect to use today via Ami-Hybrid environment and directly via Linux.
I looked up a table to find out what Pin 21 was. This table for Pin 21 was produced from the website here.
Extending the partition just requires you to select it, and then use the Partition > Resize option:
It was about this point with the Amiga demos running, the empty floppy drive clicking away, with the custom Amiga keycap Cherry MX mechanical keyboard, A500 Mini mouse, together with the Amiga 3000 inspired Checkmate 1500 Mini case, that I really felt like I was using an Amiga!
Next I ran the yay amigaos-xfwm4-themes command in a Linux terminal session:
I typed in 1-3 again and it showed me what I presume is a preview of the make file. User friendly this part isn't.
I then went into Settings in the start Menu and selected Window Manager - I can then see the available Window Manager themes, the new Amiga ones are Amiga1.3, Amiga3.x in normal and high DPI options:
I selected Amiga3.1_hidpi theme. Personally I think the 1.3 themed one looks awful - I remember it being used in Icaros at one point and it looked terrible to be honest.
I then rebooted the Pi so that Window Manager would restart with the new theme settings I selected. I have to admit I like the look already:
It definitely makes everything on the Linux side feel more integrated. Here is Amiberry with the new theme applied.
Next, I needed to change AmiKit XE's theme to more closely match what I selected in Linux. I opened AmiKit and then ran Morpheuz, which allows you to change the theme in use - here is the preview of the Blue theme, which is the closest to the Linux Amiga 3.1 theme I chose earlier:
On relaunch, AmiKit XE looks very different, with a blue background along with the updated Amiga 3.1 style window theme applied.
I will change the background for sure. But before I do that, let's try out RabbitHole launched linux apps and see how it looks...
The colour is slightly different, but I am impressed - it looks great. Here is VLC and a Terminal window opened via RabbitHole under AmiKit XE:
I test from AmiKit XE first by running the command host-run rosegarden in Amigashell. It runs straight away:
Having established it works, I now need an icon and Amiga launch script for it to execute without the need for the Amigashell.
I then took a screen grab of the region surrounding the Rosegarden icon from the launcher properties window in Linux I showed earlier, and saved in PNG format. Yeah, I know I should just locate the Linux icon file, but I was lazy ok?
Another cool thing is the AmiKit setup has direct access to the Raspberry Pi system drive via the RPi: assign, so I can view the folder where I just saved the screen grabbed png file.
I then drag the Rosegarden image icon over the top of the ? icon in the Information window. It replaces it with the new image, but looks a bit corrupted. Have faith, it has worked. I click Save to commit the change.
I then refresh the RabbitHole drawer in AmiKit XE and I can now see the new RoseGarden Launcher icon! :-)
We then need to create the script launch file for RoseGarden to activate the Ami-Hybrid functionality via host-run. In AmigaShell, I go to the RabbitHole: assign again, and create a new file by typing:
I then saved the file and closed the editor. Next I modified the properties of the Rosegarden file so it can be run as a script executable file:
I then closed the Amigashell and double clicked on the new RoseGarden icon in the RabbitHole drawer and the linux Rosegarden application launches via Ami-Hybrid and runs on top of the AmiKit XE environment. Success!
With the background changed (but still with the AmigaOS 3.1 theme on AmiKit XE and in Linux, I am pretty happy with the setup now on my Checkmate 1500 Mini system build.
The integration via Ami-Hybrid functionality in RabbitHole is genuinely great, and helps to make this modern computer feel like an Amiga, without losing the modern applications we all use today!
